
Nasza czwartkowa gra u Hugha, była kontynuacją gry, którą rozegraliśmy dwa tygodnie temu. Tym razem jednak rozegraliśmy epizod walk o St.Lambert-sur-Dives. Do gry użyliśmy zmodyfikowanych przez nas zasad Bolt Action (żetony końca tury).
SCENARIO/SCENARIUSZ: David Hyttenrauc
adapted to our game/dostosowane do naszej gry: Colin Jack
adapted to our game/dostosowane do naszej gry: Colin Jack
FIGURES&MODELS/FIGURKI I MODELE: Colin Jack
SCENERY/SCENERIA: Hugh Wilson
1. Orders/Rozkazy.
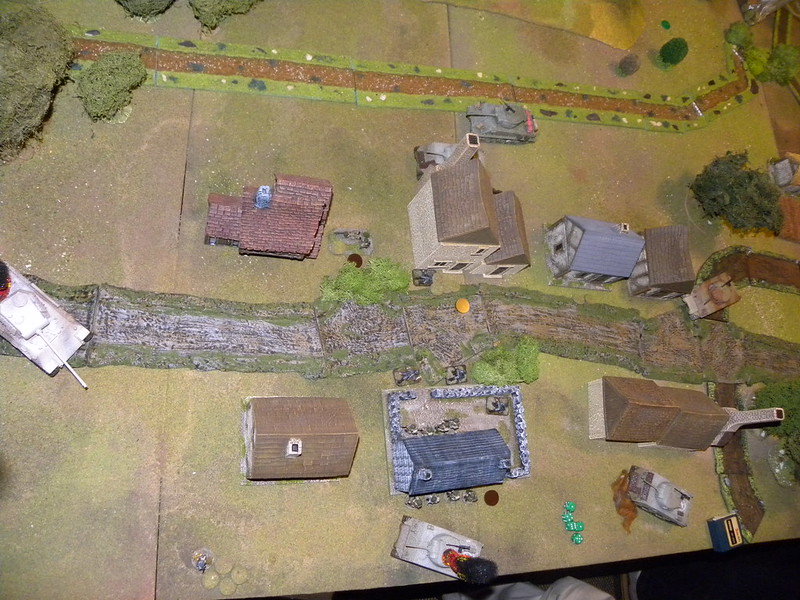
 |
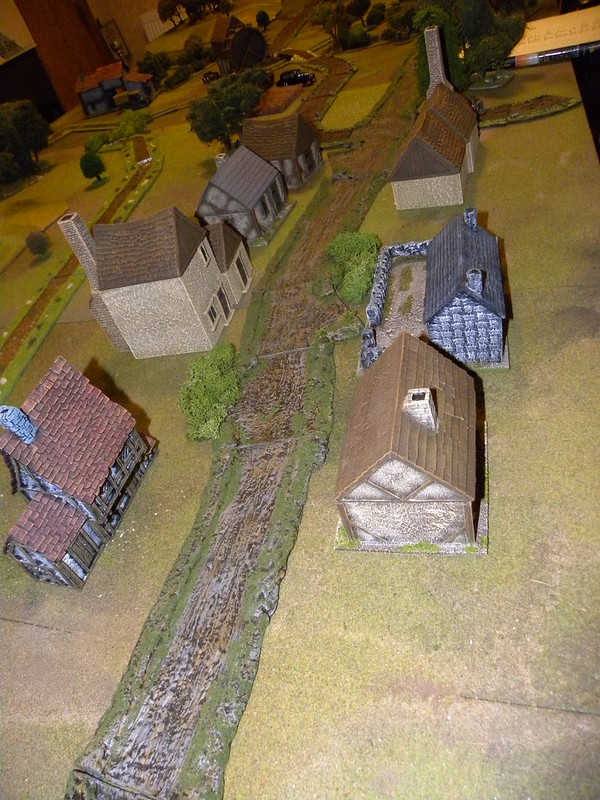
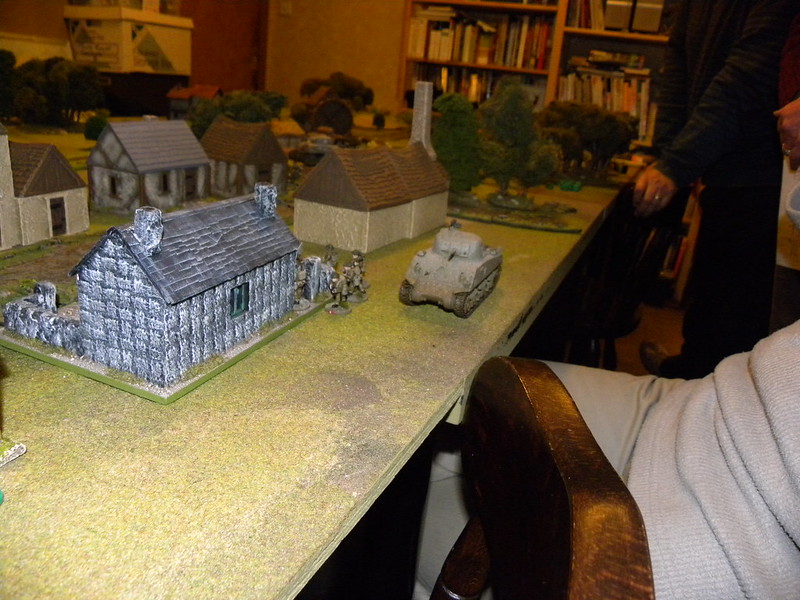
| The battlefield. Pole Bitwy. |
Canadians from the 4th Armoured Division have to take the village of St.Lambert-sur-Dives and prevent the Germans break out the Falaise Pocket. The Germans had to kept the bridge over the river Dives to allow their troops break out from the Falaise Pocket.
Kanadyjczycy z 4 dywizji pancernej mieli za zadanie zająć wieś St.Lambert-sur-Dives i uniemożliwić w ten sposób wyrwanie się Niemcom z Kotła pod Falaise. Niemcy mieli utrzymać most na rzece Dives aby umożliwić swoim oddziałom wyrwanie się z tego kotła.
2. Ordre de bataille

CANADIANS (all regular):
(Colin Jack, Bill Gilchrist, Dave O'Brian)
South Albetra Light Horse Armoured Reconaissance Regiment
HQ: 1 Lieutenant, 1 Sergeant, 4 Rifles (one of them is medic), FOO team
1st Infantry Section: 10 men (6 rifles, 2 SMG, Bren MG)
2nd Infantry Section: 10 men (6 rifles, 2 SMG, Bren MG)
3rd Infantry Section: 10 men (6 rifles, 2 SMG, Bren MG)
MMG team: 4 crew
Mortar team: medium, 4 crew
PIAT team: 4 men (2xPIAT)
Argyll & Southerland Highlanders
HQ: Sherman M4A4
3 x Sherman M4A4
1 x Sherman Firefly
Possible Reinforcements (not used during the game)
17pdr AT gun - 5 crew
Cromwell Tank
2 x M10 Wolverine
GERMANS (all veterans)
(Tim Watson, Hugh Wilson, Bartek Żynda)
Infantry:
HQ: Leutnant + 5 men (one is medic)
1st Falschirmjager Squad: NCO, 10 men (1 x MG34)
2nd Falschirmjager Squad: NCO, 10 men (1 x MG34)
MMG team: 3 crew
AT team: 2 crew (1x Panzerschreck)
PaK 38 gun: 5 crew
Medium mortar team: 4 crew
Attached Armour:
2 x PzKpfw VI Tiger I
1 x PzKpfw V Panther
1 x Marder II
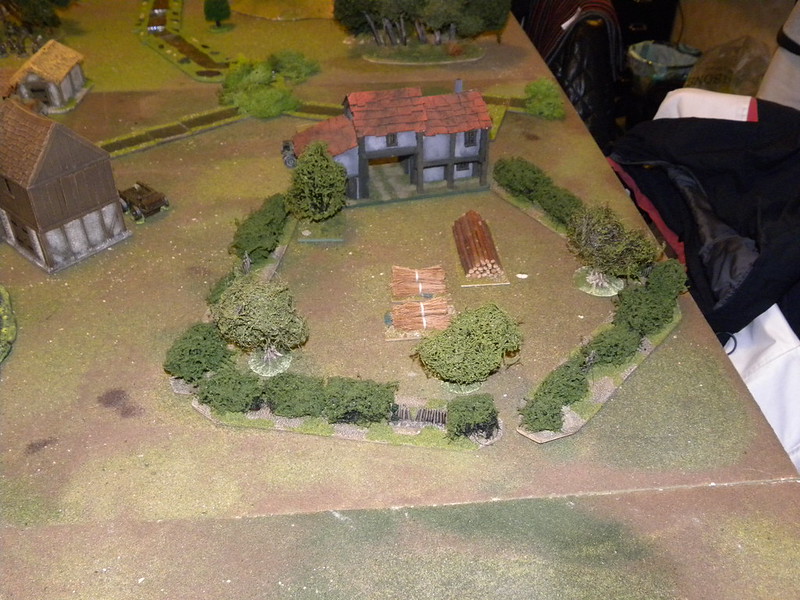
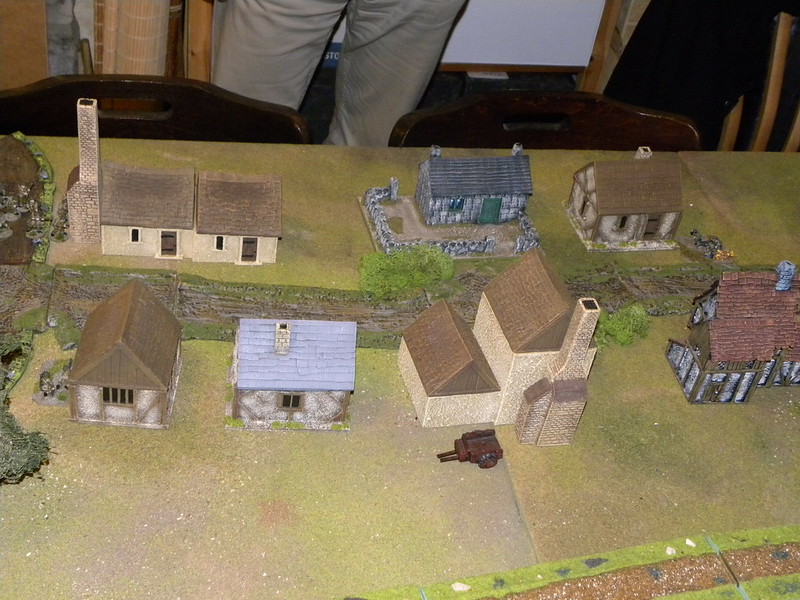
3. Scenery/Sceneria
Here are some images of the battlefield and contemporary look of the St.Lambert's bridge.
Oto kilka obrazów przedstawiających pole bitwy oraz współczesny wygląd mostu w St.Lambert.


4. The game/ Gra
The game started with both sides presented on the table. Germans occupied the western end of the village, and Canadians the estern. Slowly the main forces of both sides aproaching to the battlefield.
Gra rozpoczęła się z rozstawionymi już jednostkami obu stron. Niemcy zajęli zachodni kraniec wioski, a Kanadyjczycy wschodni. Powoli na pole bitwy zaczęły zbliżać się główne siły obu stron.

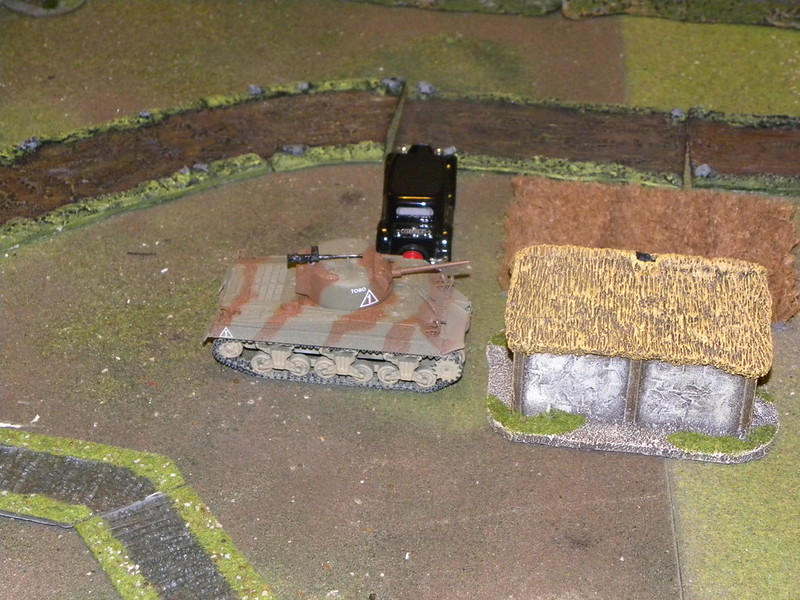
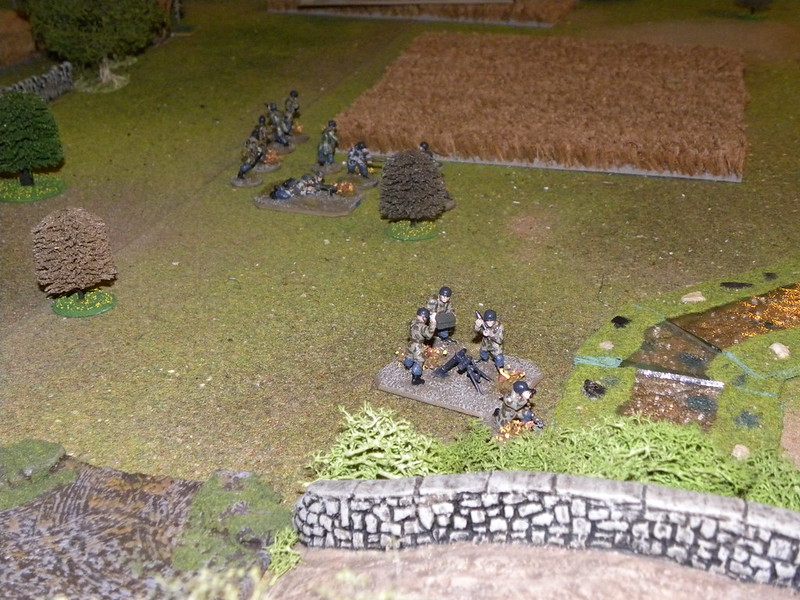
Wpierw Kanadyjczycy spróbowali wjechać do wioski główną drogą, jednak tutaj spotkała ich niemiła niespodzianka. Do pierwszego Shermana ogień otworzyła niemiecka PaK 38. Pocisk trafił czołg i wywołał pożar, który kanadyjska załoga zdołała ugasić. Czołg jednak nie był zdolny do dalszego użytku i musiał wycofać się na tyły. Reszta kanadyjskich czołgów postanowiła objechać wioskę do okoła.


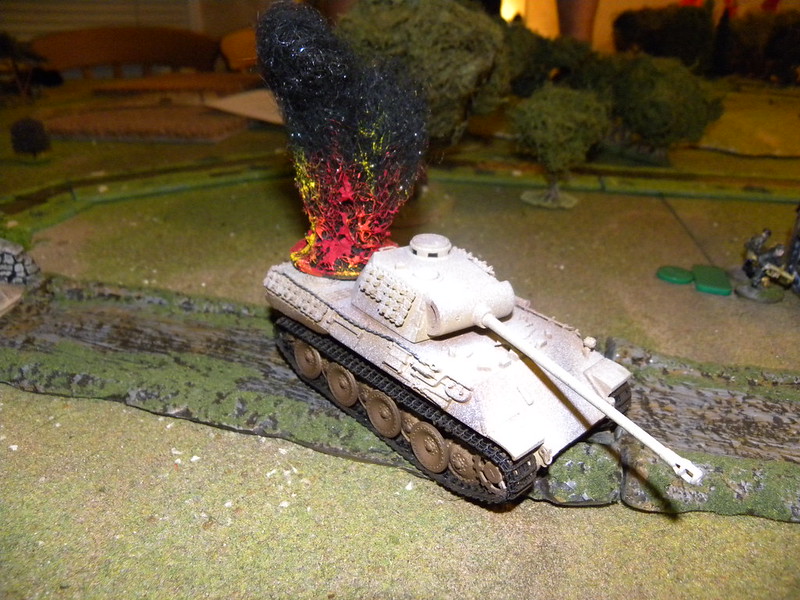
The ambushed Tiger opened fire to the encircling village Shermans, but he failed. In response the Firefly opened its fire and with the first salvo eliminated the German giant.
Do okrążających wioskę kanadyjskich Shermanów otworzył ogień zamaskowany Tygrys, jednak zrobił to bardzo niecelnie. W odpowiedzi ogień otworzył Firefly i już pierwszą salwą wyeliminował niemieckiego kolosa.


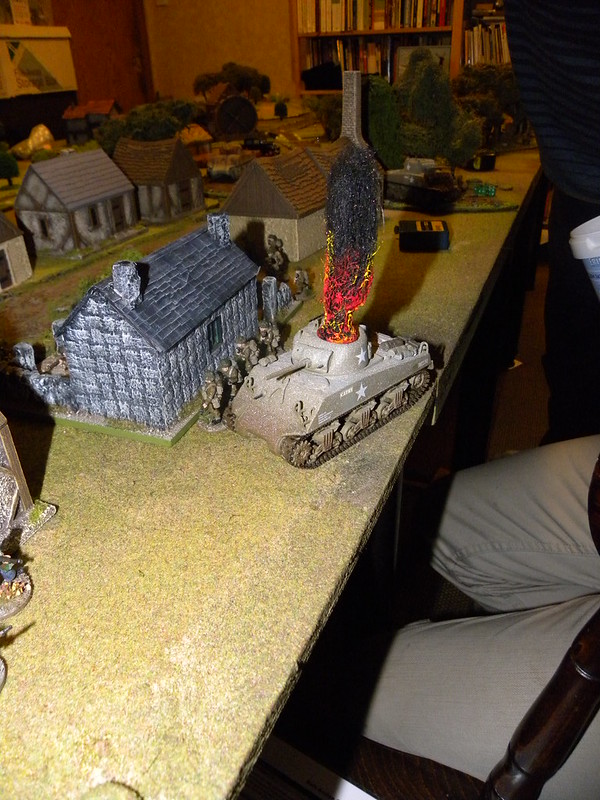
After the elimination of the Tiger, the next Canadians issue was a German anti-tank gun. The mortar crew tryed to eliminate it, but not very effectively, however, Germans, fearing the lost the gun, decided to change its position. At some point they have to be in the open field, but the chanse of its elimination was very small, the German player (me...) forgot about the huge firepower of the HE Sherman's shells and the crew along with the gun was eliminated. The situation of Germans at St. Lambert has become a critical becouse the German tanks were still far away...


After the elimination of the Tiger, the next Canadians issue was a German anti-tank gun. The mortar crew tryed to eliminate it, but not very effectively, however, Germans, fearing the lost the gun, decided to change its position. At some point they have to be in the open field, but the chanse of its elimination was very small, the German player (me...) forgot about the huge firepower of the HE Sherman's shells and the crew along with the gun was eliminated. The situation of Germans at St. Lambert has become a critical becouse the German tanks were still far away...
Po wyeliminowaniu Tygrysa, kolejnym problemem Kanadyjczyków pozostało niemieckie działo ppanc. Próbe jego wyeliminowania podjęła załoga moździerza, niezbyt skutecznie, jednak Niemcy bojąc się utraty tej armaty postanowili zmienić jej pozycję. W pewnym momencie musieli by oni znaleźć się w otwartym polu, jednak groźba jego wyeliminowania była bardzo mała, jednak niemiecki gracz (ja...) zapomniał o olbrzymiej sile rażenia pocisków HE z dział Shermanów i w ten właśnie sposób załoga wraz z działem została wyeliminowana. Sytuacja Niemców w St. Lambert stała się krytyczna, a niemieckie czołgi cały czas były daleko...

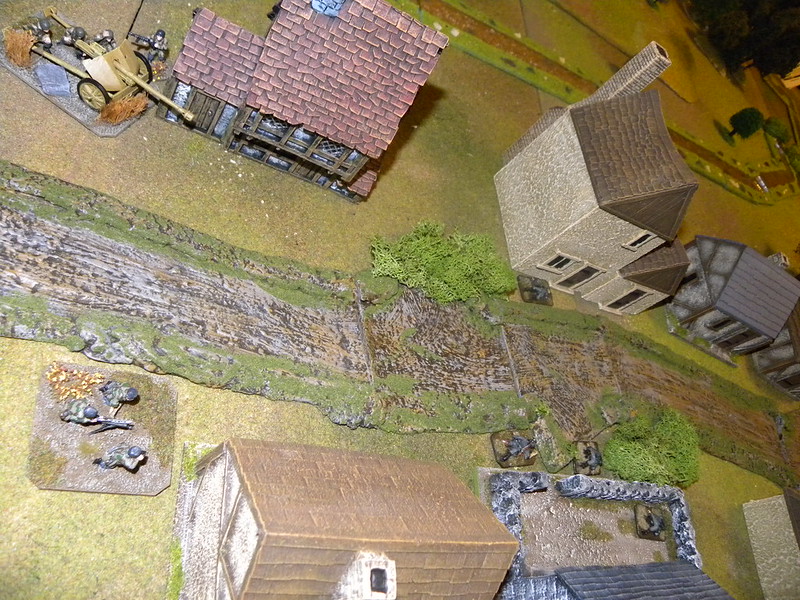
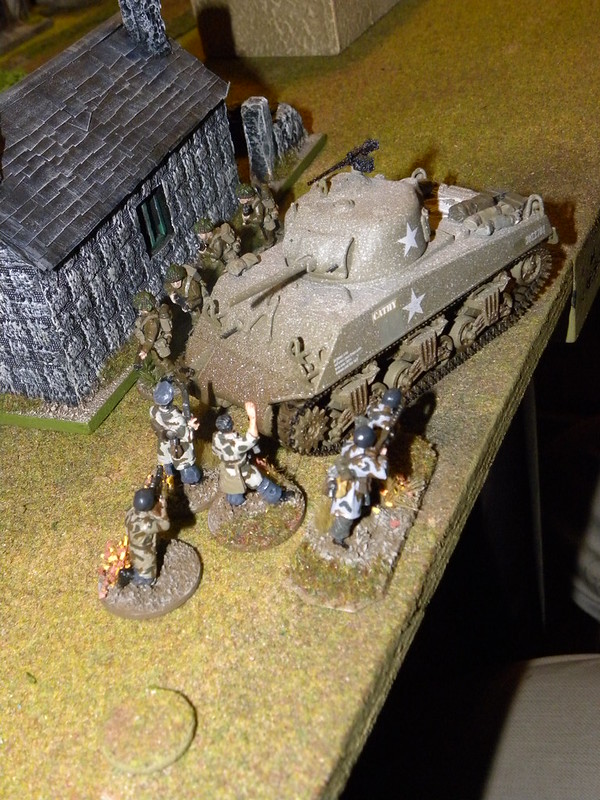
Using their temporary advantage Canadians started taking the village's buildings. German troops tryed to resist, but the Canadians were moving forward. Shermans lined up and were excellent support for the infantry.
Wykorzystując swoją chwilową przewagę Kanadyjczycy rozpoczęli zajmowanie budynków wioski. Oddziały niemieckie stawiały zacięty opór, jednak Kanadyjczycy posuwali się cały czas naprzód. Shermany zaś ustawiły się w lini i stanowiły dla piechoty znakomite wzmocnienie.


W końcu ruszyły się i Shermany i zaczęły bezpośrednio wspierać piechotę. Niemcom, pomimo wrogiego ostrzału moździerzowego udało się do wioski sprowadzić drugi oddział piechoty, który wzmocnił obronę. Niestety dla nich, kanadyjskie czołgi stanowiły zbyt dużą siłę ognia i trzeba było je wyeliminować. Ze względu na brak czołgów i dział trzeba to było zrobić wykorzystując piechotę. Pierwszy atak nie powiódł się, jednak drugi zakończył się zniszczeniem jednego czołgu. Wydawało się, że Niemcy wrócili do gry...

 |
| Canadian infantry is in the building and does not directly support the Sherman... Kanadyjska piechota znajduje się w budynku i nie wspiera bezpośrednio Shermana... |
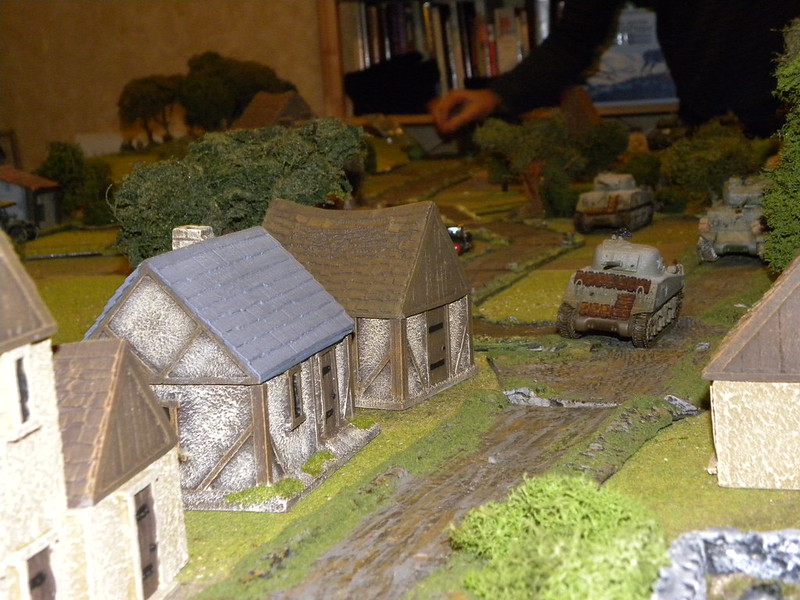
Canadians went to attack on bayonets, but in melee Germans showed their superior). Nothing was lost. The remaindered Germans were almost all shot by Canadian machine guns. Almost all were killed, because one of the NCOs survived... Then German tanks arrived on the battlefield. Marder began a duel with one of the Shermans, which has been heavily damaged. The other Sherman began the duel with the Panther, and the Panther has been surprisingly destroyed. The last Tiger left behind and had to defend the bridge, very important for the Germans at this moment.
Kanadyjczycy ruszyli do ataku na bagnety, jednak w walce wręcz lepsi okazali się Niemcy. Nic straconego. Pozostali Niemcy zostali prawie wszyscy rozstrzelani przez kanadyjskie karabiny maszynowe. Zostali zabici prawie wszyscy, ponieważ jeden z podoficerów przeżył... Wtedy przybyły na pole walki niemieckie czołgi. Marder rozpoczął pojedynek z jednym z Shermanów, którego ciężko uszkodził. Drugi z Shermanów rozpoczął pojedynek z przybyłą Pantherą i o dziwo Panthera została zniszczona. Ostani Tygrys pozostał w tyle i miał bronić mostu, tak ważnego dla Niemców w tej chwili.

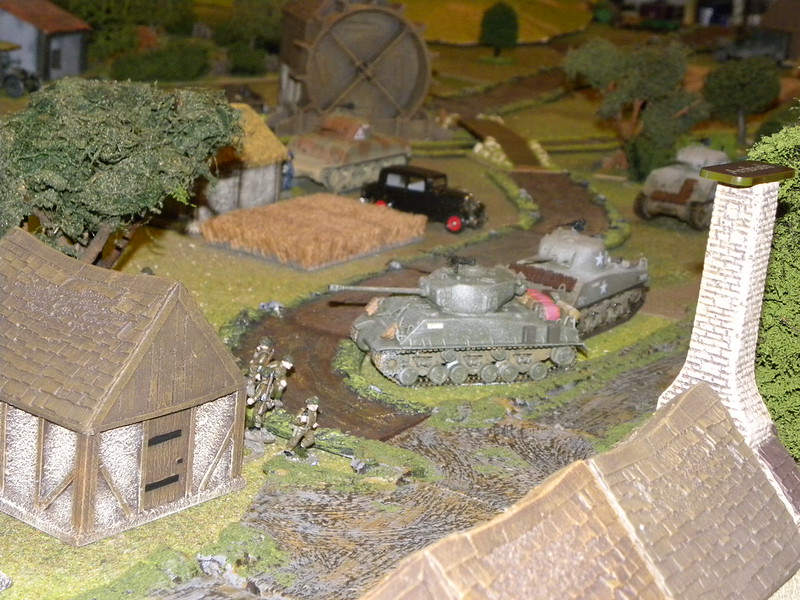
I kiedy już się wydawało, że Kanadyjczycy wygrali, coś się wydarzyło. Kilka tur wcześniej, gdy Niemcy stawiali jeszcze silny opór we wiosce, wezwano wsparcie artyleryjskie. Przez dłuższy czas nie nadchodziło ono jednak, ponieważ była potrzeba wsparcia innych jednostek. W końcu gdy nadeszło, zamiast na Niemców, pociski spadły na Kanadyjczyków. Własne armaty zatrzymały natarcie i nie udało się Aliantom zająć wioski przed zmrokiem. Most w dalszym ciągu pozostawał pod kontrolą Niemców. Pozostały przy życiu podoficer zapewnił Niemcom remis w tym starciu.
 |
| A red marker means a centre of fire, now the radius is defined (12 inches). Czerwony żeton oznacza środek ostrzału, teraz określamy tylko promień (12 cali). |
 |
| Last view at the St.Lambert. Ostatni widok na St.Lambert. |
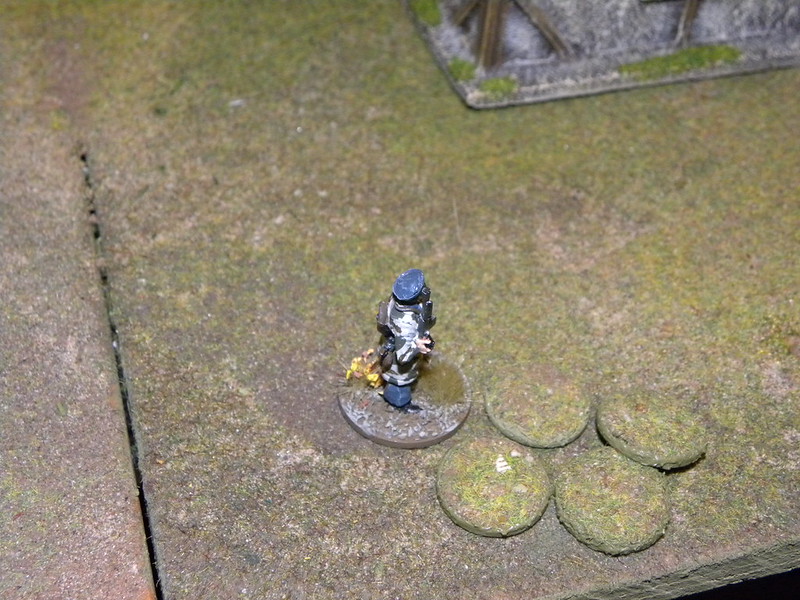 |
| The hero of the day: German NCO. Bohater dnia: niemiecki podoficer. |
5. Summary/Podsumowanie.
The game, as usual, provided a big excitement. In our games at Hugh made its presence the bad luck of the support weapons. However, this time, instead of a friendly aircraft, Canadian artillery fired at our own troops, which prevented the Germans from losing.
Gra jak zwykle dostarczyła duzych emocji. W naszych grach u Hugha dał znać o sobie pech broni wsparcia. Tym razem jednak zamiast przyjacielskiego samolotu, własne oddziały ostrzelała kanadyjska artyleria, co uchroniło Niemców przed przegraną.
And some links at the end:
I kilka linków na koniec:
1. To my flickr, where you can find pictures from the game in much better resolution:
1. Do mojej galerii na flickr, gdzie możecie znaleźć zdjęcia z gry w dużo lepszej rozdzielczości:
http://www.flickr.com/photos/asienieboje/sets/72157632890458550/with/8518137103/
2. To the movie on the YouTube, showing the fighting of the South Alberta Regiment at St.Lambert
2. Filmik na YouTube, pokazujący walki Pułku Południowej Albery pod St.Lambert:
http://www.youtube.com/watch?v=WdgsVDS99go
Next game: Rapid Fire! Poland 1944.
Następna gra: Rapid Fire! Polska 1944.
Glad to see another great table, a wonderful Tiger explosion, and to see that Canadians did not fall in the cliff, table edges are sometimes so dangerous!
OdpowiedzUsuńGreat game Bart!
Phil.
Thank you Phil! I like that that you enjoy our tables. This time the table edges ware less dangerous than the friendly off table fire ;)
UsuńAll the best!
Bart
Fajny raport, ciekawa victoria, dobrze się czyta i ciekawe zdjęcia. Wy coś tam macie nie tak z tym wsparciem, jak nie samoloty ostrzeliwujące swoich, to artyleria :)... ale na wojnie bywało różnie.
OdpowiedzUsuńSławek.
Dziękuję! W naszych grach wezwanie wsparcia to naprawdę duże ryzyko ;) A szczególnie jak się rzuca 1 na efekt :D
UsuńPozdrawiam
Bartek
Ciekawy raport, miło się czytało :)
OdpowiedzUsuńBardzo dziękuję, cieszę się że się podobało!
UsuńPozdrawiam
Bartek