Pokazywanie postów oznaczonych etykietą Prussians. Pokaż wszystkie posty

30 listopada 2025

Two games: Command and Conquer: Waterloo and Junta.

November and December are the two months of the year when my workload increases, leaving me with less time for blogging. I often find myself having to choose between painting and writing blog posts on my days off, and painting usually takes precedence. As a result, I'm now resorting to writing collective game reviews. 

Today, I want to discuss two board games. The first game, which we played two weeks ago, was the Napoleonic version of Command and Conquer, along with the most well-known battle in the UK, Waterloo. The second game we played was Junta, coinciding with our club's AGM at the end of November.


1. Command and Conquer: Waterloo.

Two weeks ago, we played a game that Mike organised called Command and Conquer. Although we had played a similar game set in Roman times before, this one featured a hexagonal board. The French occupied one side, the British the opposite, while the Prussians remained off the board for the time being. The game was based on the Battle of Waterloo, which has become somewhat emblematic in the UK.


Mike arranged for each player to command a wing, with commanders-in-chief above them who distributed activation cards. One player was designated to lead the Prussians. The roles were as follows: Fred played Wellington, Michael was on the British right flank, Tim took the centre position, and Ben commanded the left flank. On the French side, Peter played Napoleon, Andy took the left, I was in the centre, and David was on the right. Gordon led the entire Prussian army.


On the board, there were three historically significant farms that the French were required to capture and hold until the game's end. They earned victory points for each farm held as well as for destroying enemy units. The British, however, only received points for enemy units destroyed. 


It appeared that there was a flaw in the scoring system, as the French focused their efforts on capturing one farm and thus accumulated a large number of victory points, even while losing a greater number of their own units. More on that later.


Unfortunately, the scenario did not allow for a change in the timing of the French forces' attacks. It also compelled Napoleon's troops to assault farms that should have been left untouched, diverting their focus away from the British forces. We decided that I would attack La Haye Sainte, David would assault Papelotte, and Andy would not attack Hougoumont; instead, he would provide cover for my attacks.


Our plan worked partially. I managed to capture La Haye Sainte and held it for a time with varying degrees of success. David's attack on Papelotte was halted, and Andy engaged in a futile firefight with the British right wing, which forced his forces to shift to my side of the map, inadvertently fulfilling their original mission. Meanwhile, the Prussians finally arrived on the battlefield, but they were significantly delayed and did not demoralise the French forces. David was able to hold his flank.

Ultimately, the game ended in a French victory. However, I believe that points for holding villages should be awarded at the end of the game rather than for each turn the villages were under French control.


2. Junta.

Last Thursday, we held our club's AGM. This occasion also provided us with the opportunity to play our annual game of Junta. For those unfamiliar with the game, it revolves around a fictional banana republic where families compete for influence and international aid dollars.


This year, our club meeting extended significantly due to a multitude of issues we needed to address, including the election of new committee members. Although this meant we had less time to play, it also brought plenty of excitement and fun.

The meeting kicked off with our first presidential election, which Alasdair won. Shortly after we adopted our first government and budget, I grew dissatisfied with my position and sent men to assassinate the president. The assassination attempt was successful, leading to Tim becoming the new president, who then appointed me as Minister of the Interior. This scenario has become a recurring theme in our games.

After several budgets passed almost unanimously, there were multiple assassination attempts, but all failed. Michael came the closest; he pinpointed my location, but his man ultimately abandoned the mission. 

As the game progressed, Alasdair staged a coup. Initially, I was the only one loyal to Tim while everyone else joined the rebellion. Eventually, we managed to persuade David to support our cause, and Andy lost all his troops. Unfortunately, we ran out of time before we could fully resolve the coup.

In the end, I won the game by accumulating the most funds in my Swiss account.


At the end, I wanted to share some exciting news—I was elected to our club committee!


05 października 2025

Black Powder: Pilica 1764.

This time, I returned to my fictional Second War of the Polish Succession. My freshly painted Saxon miniatures made their debut in the game, and it turned out as expected. We used the Black Powder rules along with the Last Argument of  Kings supplement.


SCENARIO: Bartek Żynda
UMPIRING
Bartek Żynda
SCENERYMichael Schneider, Bartek Żynda, SESWC
FIGURES & MODELSMichael Schneider, Bartek Żynda


1. Forces.


POLISH-LITHUANIAN COMMONWEALTH, SAXONY

(Alasdair, Bartek)

CinC (8)

Grenadier Brigade

General (8)
4 x Grenadier Battalion
1 x Regimental Gun

1st Muskeeter Brigade

General (7)
4 x Muskeeter Battalion
1 x Regimental Gun

Polish- Saxon Infantry Brigade

General (8)
2 x Saxon Small Muskeeter Battalion
1 x Radziwiłł Militia
1 x Regimental Gun

1st Cavalry Brigade

General (8)
1 x Cuirasiers
1 x Dragoons

2nd Cavalry Brigade

General (8)
2 x Uhlans

Gun Battery

General (8)
3 x Medium Gun

REINFORCEMENTS:

2nd Muskeeter Brigade

General (8)
4 x Muskeeter Brigade
1 x Regimental Gun


PRUSSIA
(Andy, Michael)


2. Scenario.

After the Battle of Warsaw, the armies divided. The Austrians began their retreat towards Częstochowa, while the Saxons moved towards Kraków. Meanwhile, the Russians decided to surround the gathering deputies of the Election Sejm to influence the selection of a "suitable" candidate for the King of the Polish-Lithuanian Commonwealth. The Prussians opted to pursue the Saxons, who still possessed the royal regalia. What the Prussians did not realise was that the Saxons were expecting reinforcements, with the second part of their forces marching in from Kraków. The two forces eventually met at the Pilica River, where they decided to make a stand and confront the Prussians.

The terrain appeared to be advantageous for defence. The Saxon positions were situated beyond the river, and both banks were bordered by marshy floodplains, making it difficult for infantry and cavalry to march or charge effectively. Although the river was relatively low, it did not present a major barrier to crossing. However, the current of the Pilica was treacherous, posing a significant challenge for anyone attempting to cross it. There is a bridge over the river located north of the village. On the northern side of the river, there is a prominent hill known as Swedish Hill. On the eastern and western sides of the river, two small woods can be easily traversed by both infantry and cavalry.


DEPLOYMENT:

The Saxon player begins by deploying his brigades. He positions two infantry brigades and all cavalry brigades, along with a battery of medium guns and what is known as the Polish-Saxon brigade. The Polish-Saxon brigade is stationed in the village (In one of the buildings, the player secretly positions the royal regalia), the medium artillery is set up on Grodzisko Hill, the infantry is positioned along the flood line, and the cavalry is placed on the flanks. If the brigade has regimental guns, those are also deployed.

The Prussian player begins by deploying his three infantry brigades, all cavalry brigades, and one medium/heavy artillery battery. If the infantry brigades are equipped with regimental guns, those guns will be deployed alongside their respective brigades. The Prussians can deploy their brigades 24 inches from their edge, with cavalry on the flanks and artillery positioned on the Swedish Hill. After this initial deployment, the player rolls to determine the status of the remaining infantry brigades and artillery batteries. If the player rolls a 6, that brigade is also deployed, but it must be arranged in marching columns or positioned limbered if it is artillery. Additionally, these brigades must touch either point A or point B.

The remaining brigades will enter the table starting from the second turn. The Prussian brigades will be positioned at points A and B, while the Saxon brigades will be located at point C on the map.

TERRAIN SPECIAL RULES:

The bridge can only be crossed in a marching column.

Rivers and floodplains are considered "tricky ground." Infantry and light cavalry become disorganised on a roll of 6, while other cavalry disorganise on a roll of 5 or 6. For cannons, a roll of 4 or higher results in their loss. Test every move the unit makes on this terrain.

All woods are passable for both infantry and light cavalry. For heavy cavalry and artillery, these areas are considered difficult terrain, and their movement speed is halved when travelling through them. Woods provide a +1 bonus to cover when targets are shot at (except artillery), and they can be seen from up to 2 inches away from their edge.

Buildings provide +2 cover from muskets and +1 from light artillery, but offer no cover from medium or heavy artillery.

VICTORY CONDITION:

PRUSSIANS: Break through the Saxon-Polish defence line and capture the village, or force three Saxon infantry brigades to retreat. If the royal regalia are captured and transported beyond the Prussian lines, the game will end in a decisive victory for Prussia.

SAXONS: Hold the village and hill for at least eight turns or destroy three Prussian infantry brigades. Do not lose the royal regalia.

BROKEN BRIGADE SPECIAL RULE:

If more than half the units in a brigade are destroyed or shaken, a test must be conducted for the brigade. Roll a D6 and subtract 1 for each destroyed unit and 0.5 for each shaken unit. Regimental artillery and skirmishers should not be included in this calculation. If the result is 0 or less, the brigade panics and flees.

Prussian CinC is 9, all other Brigade Commanders are 8

Saxon CinC has a level of 8, and all other Brigade Commanders also have a level of 8. However, for each commander, roll D6. If the result of their test is 1, their level drops to 7.


3. The Game.

The deployment of forces went quite smoothly. On the Polish-Saxon side, Alasdair commanded the artillery, grenadiers, and the first musketeer brigade, while I led the remaining troops. The royal regalia were concealed in the right-hand building, protected by one of the small Saxon battalions. Opposite us, the Prussians held their left flank under the command of Michael and their right flank under Andy. Our strategy was to maintain our position and avoid being broken.  


The Prussians advanced aggressively, but they encountered significant difficulties due to the Pilica River and its floodplains. To make matters worse, they faced consistent fire from the Saxons, which constantly disrupted their lines. Only two Prussian brigades were able to cross the river and engage the Saxon positions. This led to intense hand-to-hand combat, where the Prussian soldiers showcased their superiority. Gradually, the Saxons began to retreat.


Before this could happen, a cavalry fight erupted on our left flank. Initially, the Saxon cuirassiers defeated a unit of Prussian jagers that had gotten too close to the river. The dragoons then responded, and the Prussian cuirassiers charged, successfully routing them. As a result, the Saxon cuirassiers were forced to retreat. Seizing the opportunity, the Prussian cuirassiers crossed the river and threatened our flank. Meanwhile, the Saxon cuirassiers returned to the battlefield, but they were routed again, this time by the Prussian dragoons.


Light cavalry brigades joined the fighting, with Hussars fighting for the Prussians and Uhlans for the Saxons. The Uhlans charged against the Cuirassiers, but their attack ended in defeat. However, this charge provided the reserve Saxon infantry brigade with the opportunity to secure its flank, ultimately preventing the destruction of the Saxon-Polish army.


At this point, we were on our fifth turn. The Saxon commander, realising that the Prussians had successfully established a second battery of cannons across from the village, along with the serious situation in the Saxon infantry lines, ordered a retreat towards Kraków. Most of the forces were still on the opposite side of the river. The Uhlans managed to cover the retreat, giving the Saxons a chance to withdraw. Most importantly, the royal regalia remained in the possession of the Saxon elector, which was a significant argument in the ongoing discussions at the electoral sejm, under the watchful eyes of Russian bayonets.


The Saxons experienced significant casualties, losing two grenadier battalions along with a regiment of cuirassiers and dragoons. Three of these units were freshly painted. The Prussians, on the other hand, lost a battalion of jägers and another of musketeers, and several more of their units were shaken.


4. Links.

SESWC:

FLICKR:

https://www.flickr.com/photos/asienieboje/albums/72177720329483103


25 kwietnia 2025

Black Powder: Estrellitz 1813.

It is another game using the Black Powder rules and the Clash of the Eagles supplement. The setting is Czechia in 1813, near the fictional village of Estrellitz. A Polish army division has encountered an Austrian force occupying two fairly large hills. The game's objective is to capture these hills and potentially seize the town before reinforcements, alerted by the battle, arrive. I have prepared a game scenario loosely based on one of Charles Grant's scenarios. 


SCENARIO: Bartek Żynda, Charles Grant
UMPIRING
Bartek Żynda
SCENERYMichael Schneider, Bartek Żynda, SESWC
FIGURES & MODELSMichael Schneider, Bartek Żynda


1. Forces.


DUCHY OF WARSAW
(Bartek)

CinC (9)

1 x Heavy Gun (Veteran)
1 x Field Gun (Veteran)
1 x Horse Gun (Veteran)

1st Infantry Brigade

General de Brigade (9)

6 x Infantry Battalion
2 x Regimental Gun Battery

2nd Infantry Brigade

General de Brigade (9)

6 x Infantry Battalion
2 x Regimental Gun Battery


AUSTRIA & PRUSSIA
(Alasdair, Michael)

CinC (8)

1st Austrian Infantry Brigade (Hungarian)

Brigade General (8)

1 x Infantry Battalion (Large, Veteran)
1 x Infantry Battalion (Large)
1 x Jägers Battalion
1 x Field Gun

2nd Austrian Infantry Brigade (German)

Brigade General (8)

1 x Infantry Battalion (Large, Veteran)
1 x Grenadier Battalion (Large)
1 x Infantry Battalion (Large)
1 x Jäger Battalion
1 x Field Gun

REINFORCEMENTS:

Prussian Infantry Brigade

Brigade General (8)
Adjutant

2 x Infantry Battalion
1 x Fusilier Battalion
1 x Field gun

Austrian Cavalry Brigade

Brigade General (8)

1 x Cuirasier Regiment (Large)
1 x Dragoon Regiment (Large)


2. The Game.

Before the game, Michael and I agreed to an 800-point game. In designing my army, I decided to focus on artillery and infantry, completely ignoring cavalry. So far, my cavalry had been a mere shadow of the Austrian cavalry. I used Charles's scenario as a basis for the game, making some slight modifications. Before starting, we rolled a die, and the winner could choose to be the attacker or defender. I won and chose to attack. The defender then had to place half of their army on the hills, while the other half would enter the table from the second turn through the town. Scoring was as follows: a player would earn 10 points for controlling a hill, along with the usual points for destroyed units. However, if the Poles managed to capture the town, they would win the game regardless of the scoring. I didn't really count on capturing the town, so I primarily focused on securing the hills.


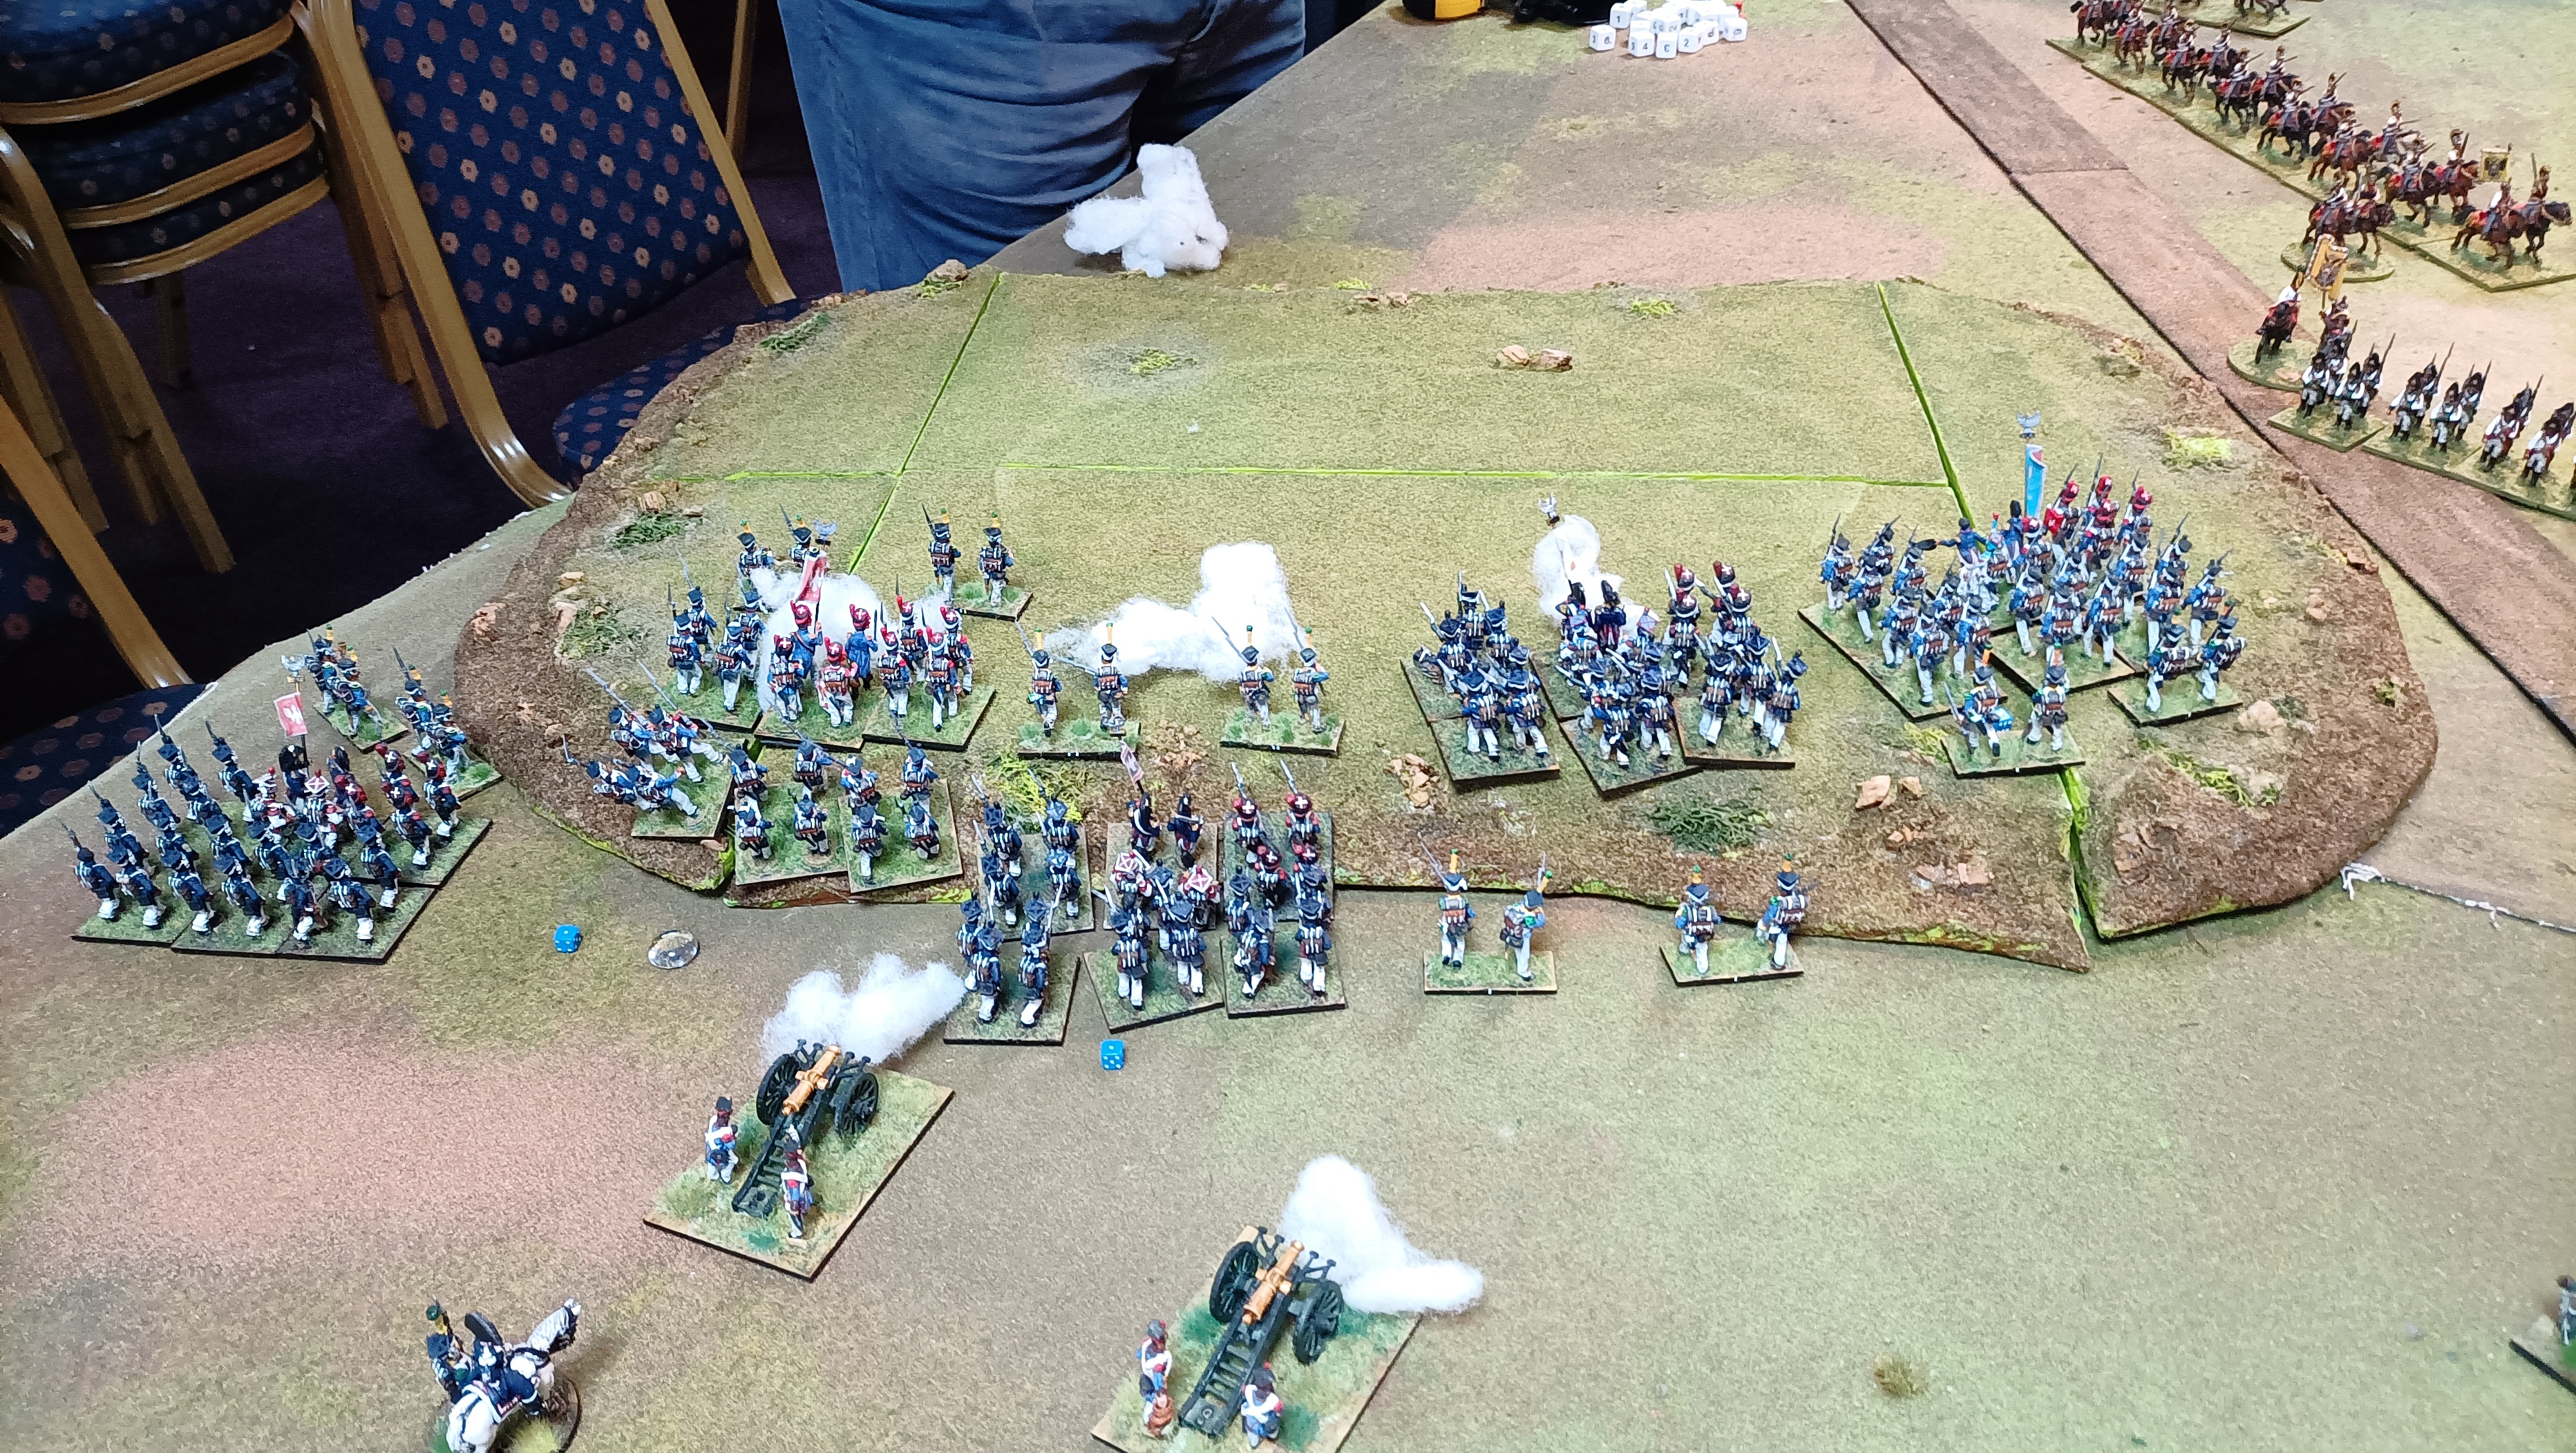
I pushed forward with momentum. Movement in the attack columns is rapid, but it exposes us to deadly fire, particularly from large Austrian units. Their cartridges have an additional die at point-blank range for the first shot, which means they can roll up to 5 dice instead of the usual 3. Fortunately, I was supported by the Mixed Formation, and my Voltigeurs effectively covered my columns.


In my first attack, I targeted the hill occupied by the Hungarians (commanded by Alasdair). Their Jägers managed to retreat, but this left the rest of their units exposed. My infantry launched a decisive attack on them. After a rather bloody melee, I successfully eliminated their veteran unit first, followed by their cannon, and ultimately destroyed their last unit. As a result, the entire Hungarian brigade was defeated. I did, however, pay a price for this victory, losing one battalion and several shaken units in the process. Nevertheless, the hill was now mine. The Austrian cavalry attempted to mount an attack, but I was able to strategically arrange my units into squares, successfully averting the threat.


The hill occupied by the Germans turned out to be much more difficult to conquer, as they had one additional unit compared to the Hungarians. Michael was in command at this location. Initially, he positioned his Jägers on the flank to defend their positions. This left my attacking units vulnerable to flanking fire during the assault on the hill, which I could not allow. Therefore, I directed my first attack against them. The Austrian light infantry was not equipped for hand-to-hand combat and quickly fell to the Polish infantry. Following this, the melee on the hill began. My artillery provided support, and gradually, we pushed the Austrians off the hill bit by bit, but I was unable to dislodge them completely. Throughout the remainder of the engagement, the Austrians resisted my soldiers valiantly, and I could not push them off their positions entirely. Nevertheless, both sides suffered the consequences of the fierce fighting, with several units left in a shaken state.


After capturing the "Hungarian" hill, another challenge emerged as a fresh Prussian infantry brigade approached. My units, already battered from the previous fight, engaged the Prussians and successfully forced them to retreat. However, this manoeuvre created a gap that allowed Austrian dragoons to seize the hill, which meant I would not earn points for capturing it. The game had to be decided based on points for destroyed units.


The Polish forces suffered the loss of one infantry battalion, while four others were left in a shaken state. This resulted in the Austrians receiving 2 points for the destroyed unit and 1 point for each shaken unit, totalling 6 points. Meanwhile, the Poles also accumulated points. They scored 8 points for two destroyed large units, 4 points for two destroyed Jäger units, and 2 points for two destroyed cannons. Additionally, they destroyed an entire brigade, earning another 5 points. The Poles also caused two large Austrian units to become shaken, which awarded them 4 points, and one Prussian unit to become shaken, which added another point. In total, the Poles amassed an impressive 24 points, while the final score of the battle was 24:8!


3. Links.

MICHAEL:

To be updated soon...

SESWC (Campbell):

FLICKR:

https://www.flickr.com/photos/asienieboje/albums/72177720325485612