10 listopada 2016

Spectre Operations - first game; pierwsza gra.

Last week we had something modern. Our that period guru bring new set of rules to our club, called Spectre Operations. It is quite different from the previous Sangin Skirmish, but also, quite interesting too. That system have much closer mechanism to most of the wargaming rules as we know. It have the special orders phase, than moving and finally shooting. Simple and very effective. That's what we like!
W poprzednim tygodniu mieliśmy coś współczesnego.  Nasz guru od tego okresu przyniósł nowy zestaw zasad, zwany Spectre Operations. Różni się on znaczne od poprzednich zasad: Sangin Skirmish, jednak jest równie interesujący. Posiada on bliższy mechanizm do znanych przez nasz zasad. Posiada fazę rozkazów specjalnych, poruszanie się i w końcu strzelanie. Prosto i bardzo efektywnie. Takie coś nam się podoba!

SCENARIO/SCENARIUSZ: Michael Charge
UMPIRING/PROWADZENIE GRY: Michael Charge
SCENERY/SCENERIA: SESWC, Campbell Hardie
MODELS/MODELE: Michael Charge.

1. Introduction to the game. Wprowadzenie do gry.


From the briefing:
"Two days ago, a pair of aid workers were kidnaped by a group of rebels in Bazistan. The rebels have been  in communication with their captive's employer, the Argo Corporation, who has deployed a team of Private Military Contractors to recover their employees.
However, these two employees are more than meets the eye. For month they have been using their cover as aid workers to perform covert actions for their bosses. One of these actions directly influenced a GRU operation and led to its failure. Due to this, a Spetsnaz team has deployed to capture the two 'aid workers' and take them to a nearby blacksite. The plan is to strike during the handover..."
Z odprawy:
"Dwa dni temu dwóch pracowników pomocy humanitarnej zostało porwanych przez grupę rebeliantów w Bazistanie. Rebelianci skomunikowali się z pracodawcą porwanych, Argo Corporation, która wysłała oddział najemników by odzyskać swoich ludzi.
Jednakże, ci dwaj pracownicy byli czymś więcej, niż to mogło się wydawać.Od miesięcy pomocy humanitarnej używali jako przykrywki do ukrytych akcji swoich szefów. Jedna z nich bezpośrednio dotyczyła GRU, która zakończyła się całkowitą porażką. W związku z tym wysłano oddział Specnazu, który ma odbić 'pracowników pomocy humanitarnej' i dostarczyć ich do najbliższego tajnego aresztu. Plan zakłada uderzenie w momencie przejęcia porwanych..."

2. Forces. Siły.


PMC
(Campbell Hardie)

1 x Professional Squad Leader w/carbine (w/scope and Red Dot)
3 x Professionals w/carbine (w/scope and Red Dot)
1 x Professional w/carbine (w/scope and Red Dot) and Battlefield Trauma Kit
2 x Professionals w/compact LMG
1 x Professional w/carbine (w/scope and Red Dot) and automatic shotgun
4 x Professionals w/carbine (w/scope and Red Dot) and UGL

all had body armour, pistols, radio, smoke and frag grenades and personal med kits

SPETSNAZ/SPECNAZ
(Bartek Żynda)

1 x Elite Squad Leader w/carbine (w/Red Dot and laser)
1 x Elite w/Heavy body armour, MMG (w/Red Dot) and Combat Shotgun
1 x Elite w/LMG (w/Red Dot)
4 x Elite w/assault rifle (w/Red Dot and laser)
1 x Elite w carbine (w/Red Dot and laser), battlefield trauma kit and stimulants
1 x Elite w/assault rifle (w/Red Dot and laser) and MGL

all had body armour, pistols, radio, thermobaric and smoke grenades and personal medical kits

OPFOR
(Michael Charge)

Rebels:
1 x Trained Commander w/assault rifle and UGL
4 x Trained Soldiers w/assault rifle
1 x Trained Soldier w/RPG (Heat and AP)
1 x Trained Soldier w/LMG
1 x Trained Soldier w/Battle Rifle and Battlefield Trauma Kit

Militians:
1 x Trained Squad Leader w/carbine and radio
1 x Trained w/MMG
1 x Trained w/Combat Shotgun
6 x Trained w/assault rifle
5 x Trained w/carbine

3. The game. Gra.

PMC started the game in the abandoned village, whereas the Spetsnaz started the game on the other side of the table. For few turns both sides tried to take the best positions before the fun begins. I split my specnaz forces into three teams, two strike teams and one support and it worked very well during whole game. I managed to sneak to the walls and using the human tower (I've seen it somewhere, but I don't remember where) I prepared to strike. My human tower consisted of three soldiers, two of them were standing on the ground and supporting the soldier standing on their shoulders. That gave me two soldiers been able to shoot over the wall.
PMC zaczęło grę w opuszczonej wiosce, natomiast Specnaz zaczął ja po drugiej stronie stołu. Przez pierwsze tury, obie strony starały się zająć jak najlepsze pozycje przed rozpoczęciem właściwej zabawy. Swoje siły rozdzieliłem na trzy zespoły: dwa uderzeniowe i jeden wsparcia i doskonale się to sprawdziło podczas całej gry. Udało mi się prześlizgnąć do murów i używając ludzkiej wieży (gdzieś coś takiego kiedyś widziałem, jednak nie pamiętam dokładnie gdzie) przygotowałem się do uderzenia. Moja ludzka wieża składała się z dwóch żołnierzy stojących na ziemi, którzy na swoich barkach mieli trzeciego żołnierza. To dało mi dwóch żołnierzy gotowych do strzału poprzez mur.


My soldiers started the shooting. First they killed two Rebels inside the walls, then my support team killed few Militants, who were outside the walls. However the PMC tried to stop me. They fired at me, but only managed to push my top towers soldier to jump off their colleagues soldiers. Despite of that I continued the mayhem. My biggest concern was the Rebel with RPG. I tried to kill him several times with my grenades launcher and finally I managed to. That opened me the way through the wall. First team jump over, but then they get suppressed by fire from the back. That not finished well, as one of my soldiers get killed.
Moi żołnierze rozpoczęli ostrzał. Wpierw zabili dwóch rebeliantów wewnątrz murów, a po tym oddział wsparcia zabił kilku bojowników znajdujących się poza murami. Jednakże PMC próbował mnie powstrzymać, jednak udało im się jedynie zmusić moich "wieżowych" do zeskoczenia z barków swoich kolegów. Pomimo jednak tego kontynuowałem siać zniszczenie. Najbardzej obawiałem się rebelianta z RPG. Kilkukrotnie próbowałem go zabić, używając mojej wyrzutni i w końcu mi się to udało. To otworzyło mi drogę poprzez mur i pierwszy zespół pokonał go. Niestety zostali przygwożdżeni ogniem z boku. To nie skończył się dla mnie dobrze, ponieważ jeden z moich żołnierzy został zabity. 


The Rebels saw that my soldier are unable to respond charged them, but then my second team jumped over the wall just on their heads. The melee was short and very deadly for the Rebels... During that time, Campbell and his PMC managed to destroy the gate and made their way inside the walls. With two precise shots he eliminated the two Rebels, who tried to use the hostages as the human shields. Then he threw the smoke grenades to separate target from me. That had to met the only respond with one action. No one can take the prize from Spetsnaz hands. Soon three of the PMC soldiers were dead... At that moment we had to finish our game. We all agree that the Spetsnaz was much closer to winning the game. Definitely we will have to return to this set of rules!
Rebelianci widząc, że moi żołnierze nie są w stanie na reakcję, zaszarżowali na nich, ale wtedy mój drugi oddział przeskoczył mur, wprost na ch głowy. Walka wręcz była krótka i zabójcza dla rebeliantów... W tym samym czasie Campbell i jego PMC udało się wysadzić w powietrze bramę i wejść wewnątrz murów. Dwoma precyzyjnymi strzałami wyeliminował dwóch rebeliantów, którzy próbowali użyć zakładników jako żywych tarcz, następnie rzucił granaty dymne by odseparować ich ode mnie. To mogło się spotkać tylko z jedną odpowiedzią. Nikt nie ma prawa odbierać łupu z rąk Specnazu! Wkrótce trzech żołnierzy PMC leżało więc martwych... W tym tez momencie musieliśmy skończyć nasza grę. Wszyscy się zgodziliśmy, że Specnaz był znacznie bliżej wykonania zadania i to on odniósłby zwycięstwo. Zdecydowanie do tych zasad jeszcze powrócimy!

4. Links. Linki.


Michael:

Campbell:

Flickr:

03 listopada 2016

Chioggia 1905.

Last Thursday we had another naval game. Few weeks ago Angus bring to the club his collection of 1/1000 Pre-Dreadnoughts for the game with Bill. Bill was unable to come to club that night, so the game was postponed (I also had different game that night). In the same evening I asked Angus, to bring that ships again and that happened last week. For the game we used Perfidious Albion rules some time ago invented in our club by Colin Jack and Bill Gilchrist.
W ostatni czwartek mieliśmy kolejną morską grę. Kilka tygodni temu Angus przyniósł swoją kolekcję przeddrednotów w skali 1/1000 by rozegrać grę z Billem. Bill jednak w tamten wieczór nie mógł przyjść do klubu i gra została przesunięta w czasie (tamtego wieczoru ja również miałem inną grę). Tego samego wieczora poprosiłem Angusa, by przyniósł te okręty jeszcze raz i to stało się w zeszłym tygodniu. Do gry użyliśmy zasad Perfidious Albion, wymyślone w naszym klubie jakiś czas temu, przez Colina Jack'a i Billa Gilchrista.

SCENARIO/SCENARIUSZ: Angus Konstam
UMPIRING/PROWADZENIE GRY:Angus Konstam
SCENERY/SCENERIA: SESWC
MODELS/MODELE: Angus Konstam

1. Forces. Siły.


TRIPLE ALLIANCE/TRÓJPRZYMIERZE

Austro-Hungarian and Italian Squadron/Eskadra austro-węgiersko i włoska.
(Campbell Hardie)

REGINA MARGHERITA
SMS ERZHERZOG KARL
SMS HAPSBURG

German Squadron/ Eskadra niemiecka.
(Michael Schneider)

SMS KAISER FREDRICH III
SMS KAISER WILHELM DER GROSSE
SMS DEUTSCHLAND

TRIPLE ENTENTE/TRÓJPOROZUMIENIE

British Squadron/ Eskadra brytyjska.
(Angus Konstam)

HMS FORMIDABLE
HMS LORD NELSON

Russian Squadron/ Eskadra rosyjska.
(Bill Gilchrist)

PANTELIMON
TSESSAREVITCH

French Squadron/Eskadra francuska.
(Bartek Żynda)

REPUBLIQUE
CHARLES MARTEL

2. The game. Gra.


For background of that battle and ships check Angus's blog (link at the bottom of my relation). Our game since the beginning divided into two different clashes. First Austro-Hungarian-Italian against Russians and British and the second Germans against French. In our naval games when Campbell had ships under command, his main tactic is to ram enemy ships despite period. This time it wasn't very wise as that rules do not tolerate that way of fighting. Soon Russians and British put the letter T over Campbell's squadron. That leads to the first disaster. The leading ship Regina Margherita was hit several times and finally one of the hit penetrated the powder magazine. Campbell had option of flooding the magazine or take the damage test, he failed and soon Italian ship exploded. That not finished his problems. Soon after the same fate get the second in the line SMS Erzherzog Karl. Michael tried to save Campbell and send him SMS Deutschland, but Campbell's troubles continued and soon the last Austrian ship exploded. Finally Campbell decided to withdraw last German ship of the battlefield. As his last desperate action, he tried to torpedoed British ships, but this time his attack completely failed.
Po historię bitwy i powstania modeli użytych w grze zapraszam na blog Angusa (link na dole relacji). Nasza gra od początku podzieliła się na dwa osobne starcia. Pierwsze pomiędzy Austro-Węgrami i Włochami a Brytyjczykami i Rosjanami oraz na drugi francusko-niemiecki. W naszych morskich grach Campbell zazwyczaj, bez względu na okres stara się doprowadzić do taranowania. Tym razem było nie inaczej, jednak te zasady nie tolerują takiej taktyki. Wkrótce Rosjanom i Brytyjczykom udało się postawić kreskę nad literą T nad eskadrą Campbella. To doprowadziło do szeregu tragedii. Prowadzący okręt Regina Margherita została trafiona kilka razy i jeden z pocisków trafił w magazyny prochowe. Campbell miał możliwość zatopienia magazynów, lub zrobić test zniszczenia, którego nie zdał i wkrótce włoski okręt eksplodował. Wkrótce ten sam los spotkał drugi okręt w linii SMS Erzherzog Karl. Michael próbował pomóc Campbellowi i wysłał mu SMS Deutschland, jednak Campbell był cały czas w opałach i wkrótce ostatni okręt austriacki eksplodował. Ostatecznie Campbell zdecydował się wycofać ostatni niemiecki okręt z pola walki. W swojej ostatniej desperackiej akcji  spróbował ataku torpedowego na okręty brytyjskie, lecz ten był kompletnie nieudany.

In the second clash two lead German ships fought against French ships. Both sides hit enemy ships many times and both sides tried to put the letter T over the enemy. Finally French managed to do it and that finished with German disaster. Soon badly damaged SMS Kaiser Friedrich III took so many water, that finally sunk. That lead the second German ship to withdraw as soon as possible. Game finished with great Entente victory.
W drugim pojedynku dwa prowadzące okręty niemieckie walczyły przeciw okrętom francuskim. Obie strony zaliczyły wiele trafień i obie eskadry próbowały postawić literę T nad wrogiem. W końcu udało się to Francuzom a to skończyło się niemiecką katastrofą. Wkrótce ciężko uszkodzony SMS Kaiser Friedrich III nabrał tyle wody, że zatonął. To doprowadziło do tego, że drugi niemiecki okręt czym prędzej opuścił pole bitwy. W ten sposób cała gra zakończyła się wspaniałym zwycięstwem Ententy.

3. Summary. Podsumowanie.


Entente ships hit enemy ships 64 times and get 20 hits in return. Triple Alliance lost 4 ships.
Okręty Ententy trafiły wrogie okręty 64 razy, samę będąc trafione 20 razy. Trójprzymierze straciło 4 okręty.

TRIPLE ALLIANCE/TRÓJPRZYMIERZE:

REGINA MARGHERITA: hit 12 times; exploded/ trafiona 12 razy; eksplodowała
SMS ERZHERZOG KARL: hit 9 times; exploded/trafiony 9 razy; eksplodował
SMS HAPSBURG: hit 2 times; exploted/ trafiony 2 razy; eksplodował
SMS KAISER FREDRICH III: hit 13 times; sank of losing flotation/ trafiony 13 razy; zatonął na wskutek przecieków
SMS KAISER WILHELM DER GROSSE: hit 18 times/ trafiony 18 razy
SMS DEUTSCHLAND: hit 10 times/ trafiony 10 razy

ENTENTE/ENTENTA:

HMS FORMIDABLE: no hits/brak trafień
HMS LORD NELSON: hit 4 times/trafiony 4 razy
PANTELIMON: hit 3 times/trafiony 3 razy
TSESSAREVITCH: hit 6 times/trafiony 6 razy
REPUBLIQUE: hit 2 times/ trafiona 2 razy
CHARLES MARTEL: hit 5 times/trafiony 5 razy

4. Links. Linki.


Angus's:

Campbell's:

Flickr:

24 października 2016

Trafalgar Day 2016.

The situation, when I arrived. RN lines broke the Franco-Spanish lines. My Ships on the down left corner.

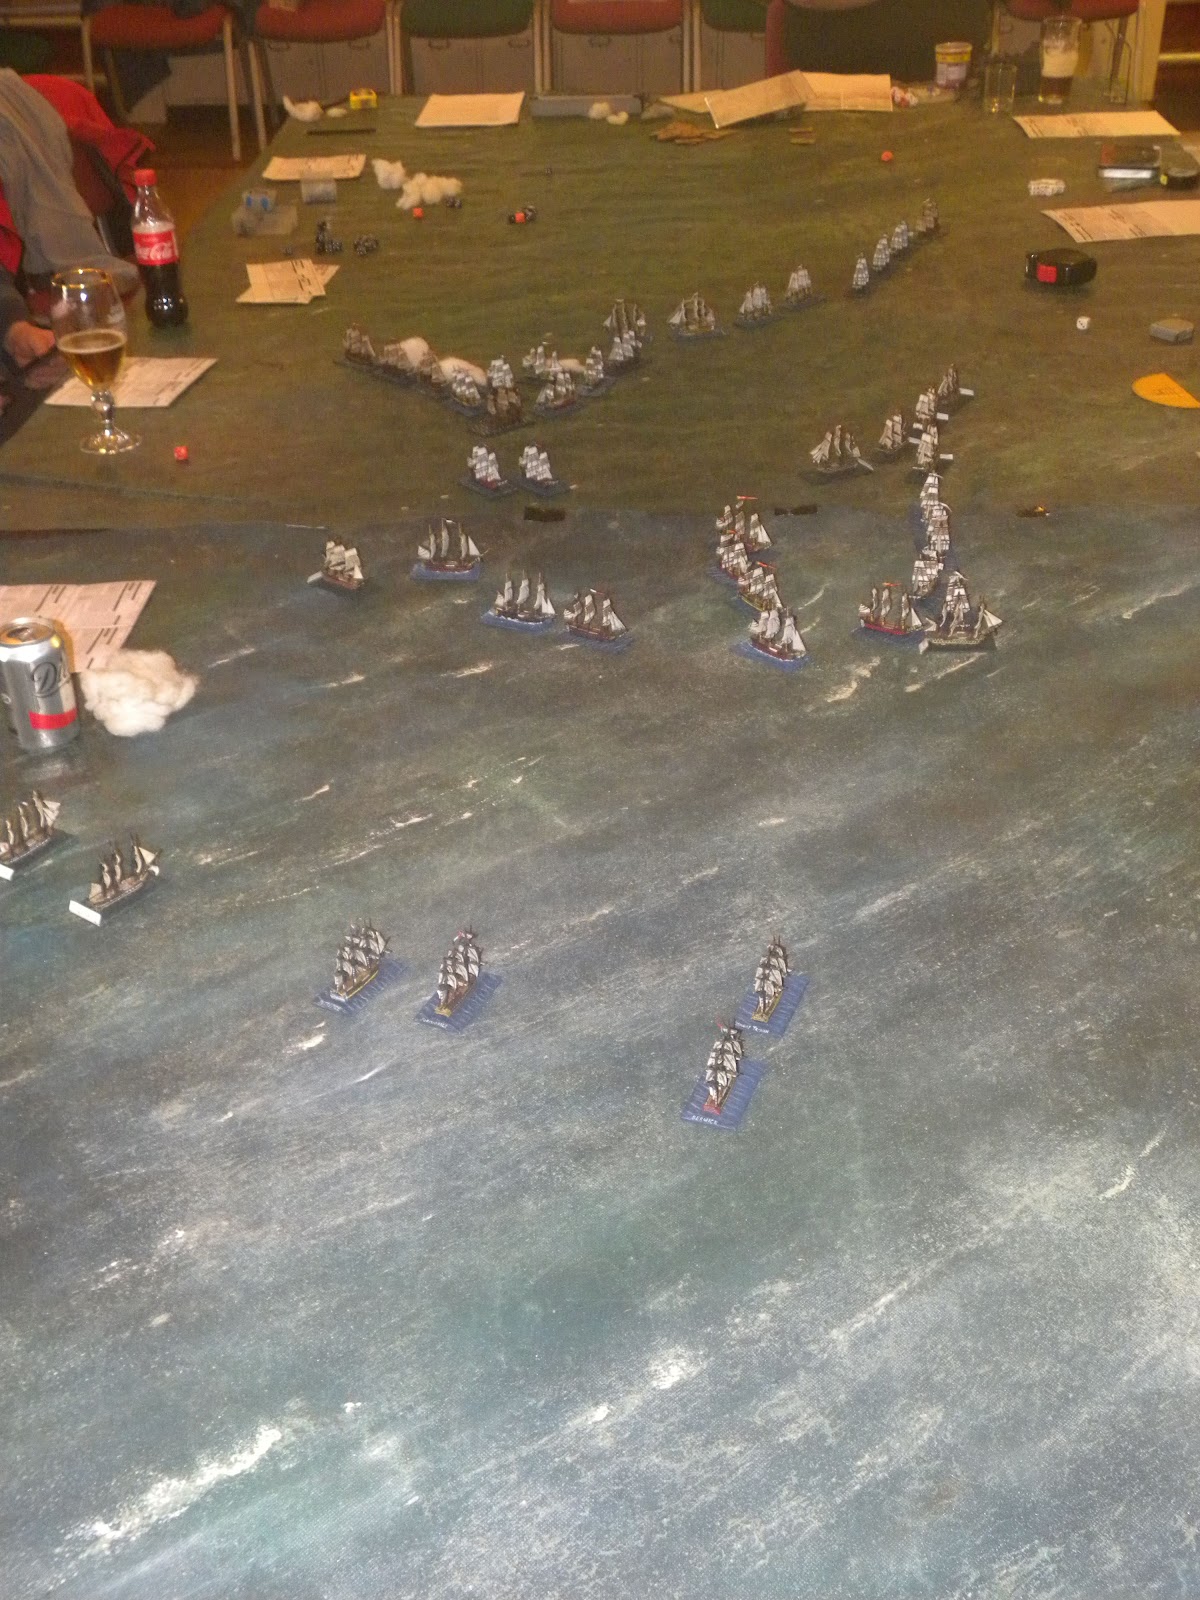
From some time few our club members, including myself, collecting 1/1200 Langton Miniatures ships for the battle of Trafalgar. We still about 15 ships short, but that is only temporary. Few days ago we had another anniversary of that one of the decisive battles in human history, so we decided to refight it again. For that purpose Angus hired the Dean Bowling Club for a Sunday and we were able to have a game with most of our ships (we used about 45 ships in total). Army lists and scenario were prepared by Jack Glanville and the whole game was umpired by John Ewing. For the game we used the Kiss Me,Hardy rules from the TFL.
Od jakiegoś juz czasu członkowie naszego klubu, włączając i mnie, kolekcjonują okręty w skali 1/1200 od Langton Miniatures do bitwy pod Trafalgarem. Cały czas brakuje nam około 15, jednak jest to tymczasowe. Kilka dni temu mieliśmy kolejną rocznicę, tej jednej z najważniejszych bitew w historii ludzkości, więc postanowiliśmy ja odtworzyć. Dla tego celu Angus wynajął Dean Bowling Club na niedzielę, gdzie mogliśmy rozegrać naszą grę z większością naszych okrętów (razem użylismy ich 45). Listy i scenariusz zostały opracowane przez Jack'a Glanville, natomiast cała gra była prowadzona przez Johna Ewinga. Do gry użyliśmy zasad Kiss Me, Hardy od TFL.

SCENARIO/SCENARIUSZ: Jack Glanville, Derek Hodge
UMPIRING/PROWADZENIE GRY: John Ewing
SCENERY/SCENERIA: SESWC
MODELS/MODELE: Jack Glanville, Angus Konstam, J.P., Donald Adamson, Dougie Trail, Bartek Żynda, Jim Louttit
British squadrons (Jack's and Angus's) moving into the action.
The battle gets more chaotic now.


The Royal Navy was played by J.P., Michael Schneider, Angus Konstam, Jack Glanville and Donald Adamson. Derek Hodge together with Chris Henry played the Spaniards and Sandy Gilespie, John Ewing, Campbell Hardie and myself played French.
Okretami Royal Navy dowodzili J.P., Michael Schneider, Angus Konstam, Jack Glanville i Donald Adamson. Derek Hodge razem z Chrisem Henry dowodzili Hiszpanami oraz Sandy Gilespie, John Ewing, Campbell Hardie i ja graliśmy Francuzami.
My British Ships of the line under the Michael's command.
Chaos of the batttle.

As I was quite late for the game, arrived on the second part of the game and I cannot give all story behind the game. I take two French ships separate from John's squadron and lead them to battle, however I had to maneuver first against the wind to come back on the battlefield. It took me some time to do it, but finally I managed to fired twice, but without any significant success. The game finished with a British victory, none of the ships were sunk and some of them changed the colors (6 Spanish, 2 French and 1 British). It was great fun and we will repeat it next year with a bigger number of the ships!
Jako, że do gry przystąpiłem mocno spóźniony, wziąłem jedynie udział w drugiej jej części i nie moge przekazać jej Wam w całości. Z eskadry Johna dostałem dwa okrety francuskie i poprowadziłem je do boju. to znaczy wpierw pod wiatr musiałem na pole bitwy wrócić, co zajęło mi trochę czasu. W końcu udało mi się dwa razy oddać salwy z moich dział, jednak bez większych sukcesów. Gra zakończyła się brytyjskim zwycięstwem, żaden z okrętów nie został zatopiony jednak kilku udało się zmienić kolory (6 hiszpańskich, 2 francuskie i 1 brytyjski). To była wspaniała zabawa i na pewno powtórzymy ją w przyszłym roku, jednak teraz z większa ilością okrętów!
J.P.'s ships in troubles.
Fate of the Spanish fleet...
HMS Victory n troubles. However she managed to win all combats and even took a prize. Also Adm. Nelson did not die this time!

For more detailed relations from the game check the links below:
Dla bardziej szczegółowych relacji sięgnijcie do linków poniżej:

Angus:

Jack:

Campbell:

Dereck:
(awaiting)

Michael:

My Flickr gallery:

21 października 2016

Dark Age Clash.

Last Thursday I invited Michael to the Dark Age game with Hail Caesar rules. The idea behind that game, was to use all figures from our entire collections. My Norman are much more numerous than Michael's, so he received support of my Vikings. That way all our figures were on the table.
W ostatni czwartek zaprosiłem Michaela do gry z wczesnego okresu średniowiecza przy użyciu zasad Hail Caesar. Główna ideą tej gry, było użycie naszych cąłych kolekcji z tego okresu. Moi Normanowie są dużo liczniejsi od Michaelowych, więc uzyskał on wsparcie moich Wikingów. W ten sposób wszystkie nasze figurki znalazły się na stole.

SCENARIO/SCENARIUSZ: Bartek Żynda, Michael Schneider
UMPIRING/PROWADZENIE GRY: some help from Bill Gilchrist
SCENERY/SCENERIA: SESWC
MODELS/MODELE: Bartek Żynda, Michael Schneider

1. Forces. Siły.


NORMANS&VIKINGS/NORMANOWIE I WIKINGOWIE
(Michael Schneider)

Norman CinC (9)
Viking CinC (8)

1 unit of heavy Norman cavalry

3 units of heavy Norman infantry
1 unit of heavy Viking infantry
1 unit of heavy Viking infantry with bows
1 unit of medium Viking infanatry
1 unit of Berserkers

1 unit of Archers
1 unit of crosbows

LOTHARYNGIANS/LOTARYNGOWIE
(Bartek Żynda)

1st CinC (9)
2nd CinC (8)

2 units of heavy cavalry
1 unit of medium cavalry

1 unit of heavy infantry
1 unit of medium infantry
2 units of light infantry

2 units of Archers
1 unit of Crossbows

2. The game. Gra.


We started game on both sides of a small river. This time my order dice was against me and soon some of my units crossed the river and some not. That put one of my units of Archers as an easy prey for the Norman cavalry. They charged on them, but my Archers survived and managed to withdraw on my bank of the river.
Zaczęliśmy grę po przeciwnych stronach małej rzeczki. Tym razem moje rzuty na rozkazy nie były zbyt dobre i raczej przeciw mnie w wyniku czego części moich oddziałów udało się przekroczyć rzeczkę, a części nie. To wystawiło moich łuczników, jako łatwy łup dla normańskich kawalerzystów. Zaszarżowali na nich, jednak moim łucznikom udało sie przeżyć i w konsekwencji wycofać na drugi brzeg rzeczki.

Now the past hunters become the prey for my cavalry. Outnumbered Normans get slaughtered by my knights. Then my cavalry charged on Vikings. Again the infantry survived the charge, but then came Bill and explained us, that some things we did very wrong. So far I played that rules few times before but I never read them, for Michael it was first time and he did not read them too. After some Bill's advices the game changed dramatically for me...
Teraz niedoszli myśliwi, sami stali się łupem mojej kawalerii. Normanowie zostali zmasakrowani, przez moich liczniejszych rycerzy. Potem moja konnica zaszarżowała na pozycje Wikingów. Znów piechocie udało się przeżyć szarżę, i wtedy do naszego stołu przyszedł Bill i wytłumaczył nam, że pewne rzeczy robimy źle. Do tej pory udało mi się rozegrać kilka gier z tymi zasadami, jednak nigdy ich nie przeczytałem, dla Michaela była to z nimi pierwsza gra i też ich nie przeczytał. Po wskazówkach Bill sytuacja mojej armii znieniła sie bardzo dramatycznie...

The main thing in hand to hand clashes is the number of support, which give you bigger number of attack dice. This time my cavalry was outnumbered by the Vikings and soon all my horses were destroyed. The game turn into huge disaster for my army.
Główną rzeczą w walce wręcz jest liczba jednostek wspierających, co przenosi się na liczbę kości ataku. Tym razem moja kawaleria była mniej liczniejsza od Wikingów i wkrótce przestała istnieć. Gra zamieniała się w klęskę mojej armii.

Michael encouraged by the Vikings success push his infantry against my infantry and soon he was victorious here too. I only managed to destroy his crossbowmen, but at this stage my army no longer existed as a whole. The battle was over and my army withdraw with a shame.
Michael zachęcony sukcesem Wikingów pchnął swoją piechotę przeciw mojej i wkrótce również i tu odniósł zwycięstwo. Mi udało się jedynie zniszczyć jego kuszników, ale na tym etapie moja armia przestała już istniec jako całość. Musiała, okryta wstydem, wycofać się z pola walki.

3. Summary. Podsumowanie.


It was great game with the Hail Caesar rules. We will continue to enlarge your armies and soon we will come back to the rules again. However before next game, we will have to read  the rules. From the other point of view I was able to use all my Dark Age figures, which I am happy with.  So my golden rule in wargaming is achieved. That rule is to use all my figures and models in game at least once. So I did it!
To była świetna gra z zasadami Hail Caesar. Będziemy kontynuowali rozbudowę naszych armii, jednak przed następnym razem postaramy się przeczytać zasady. Z innej strony udało mi się użyć wszystkich figurek z mojej kolekcji wczesnego średniowiecza, z czego jestem bardzo zadowolony. Moja złota zasada wargamingu została osiągnięta. Jest nią to by przynajmniej raz użyć każdej figurki i modelu w grze. Tym razem mi się to udało!

4. Links. Linki.


Michael:

SESWC:

Flickr: