21 października 2013

Clash of the Ironclads. Starcie Okrętów Pancernych.

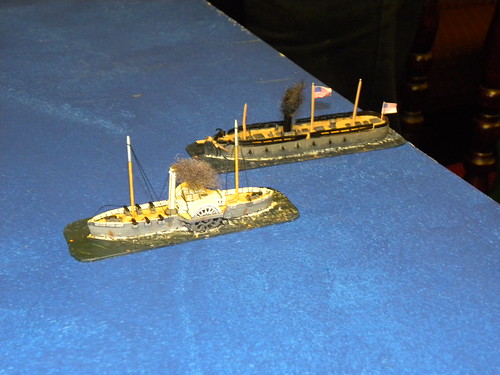
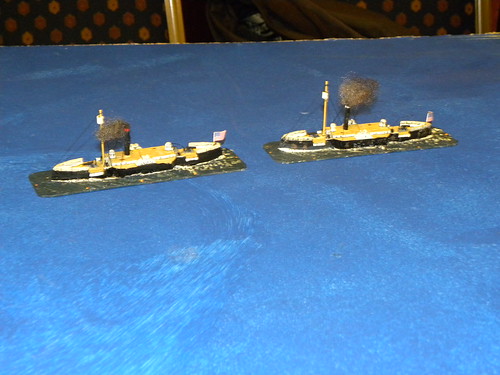
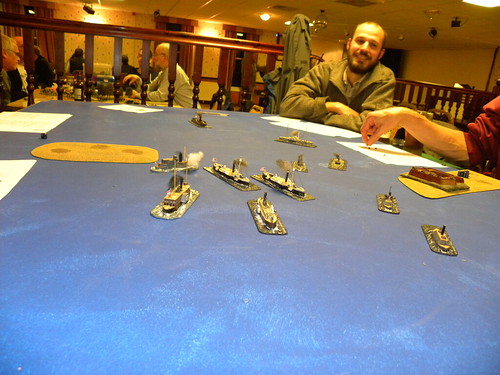
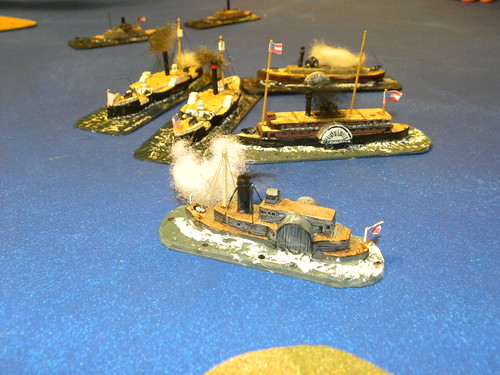
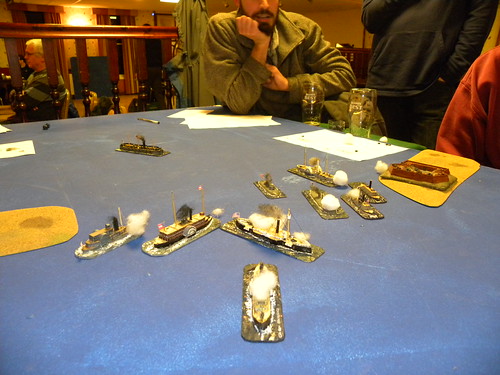
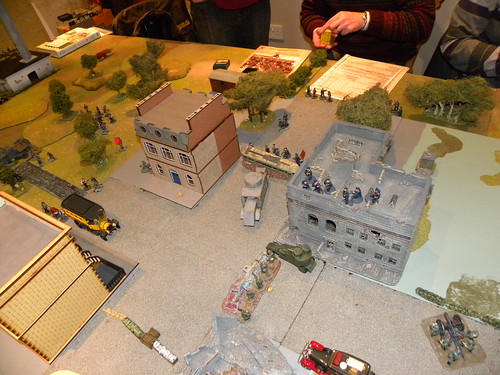
I have something special for the post number 200, our last game in SESWC. Bill created the  rules for the 1860-70 naval battles and we took its first try. This was also my first game ever with the American Civil War, as this period is not very popular in our club. Bill's system works quite well , however there were some issues, but they have been resolved during the game.
Na post numer 200 przygotowałem coś specjalnego, naszą ostatnią grę w SESWC. Bill stworzył zasady dla gier morskich z okresu 1870-70 i przeprowadziliśmy pierwszy test tych zasad. Była to także moja pierwsza gra z okresu Wojny Secesyjnej, a to dlatego, że okres ten nie jest zbyt popularny w moim klubie. System Billa pracował całkiem nieźle jednak nie bez pewnych problemów, aczkolwiek które udało nam się rozwiązać podczas gry.

SCENARIO/SCENARIUSZ: Bill Gilchrist
SCENERY/SCENERIA: Bill Gilchrist,SESWC
MODELS/MODELE: Angus Konstam
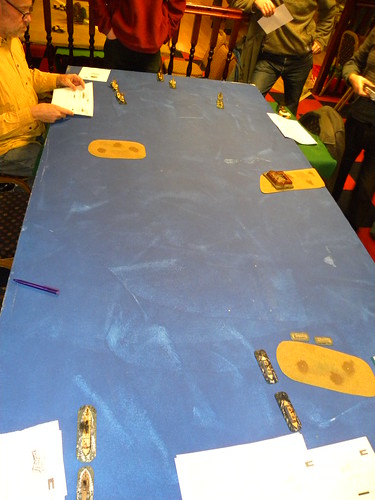

1. Introduction/Wprowadzenie.
Confederates brought the supply of cotton to the Cape Fear River, waiting for the arrival of fast blockade runners from Bermuda. Union Commodore Du Pond has decided to launch a raid on the port to cut out the barges. The task is clear: if Confederates lost their cotton, it  will strike its finances needed for foreign military equipment.
Konfederaci sprowadzili dostawy  bawełny do ujścia rzeki Cape Fear, oczekujące teraz na łamacze blokady z Bermudów. Komandor Unii Du Pond zdecydował się przeprowadzić rajd aby zdobyć te barki. Zadanie jest jasne: utrata przez Konfederatów bawełny, uderzy w ich finanse potrzebne na zakup zagranicznej broni.
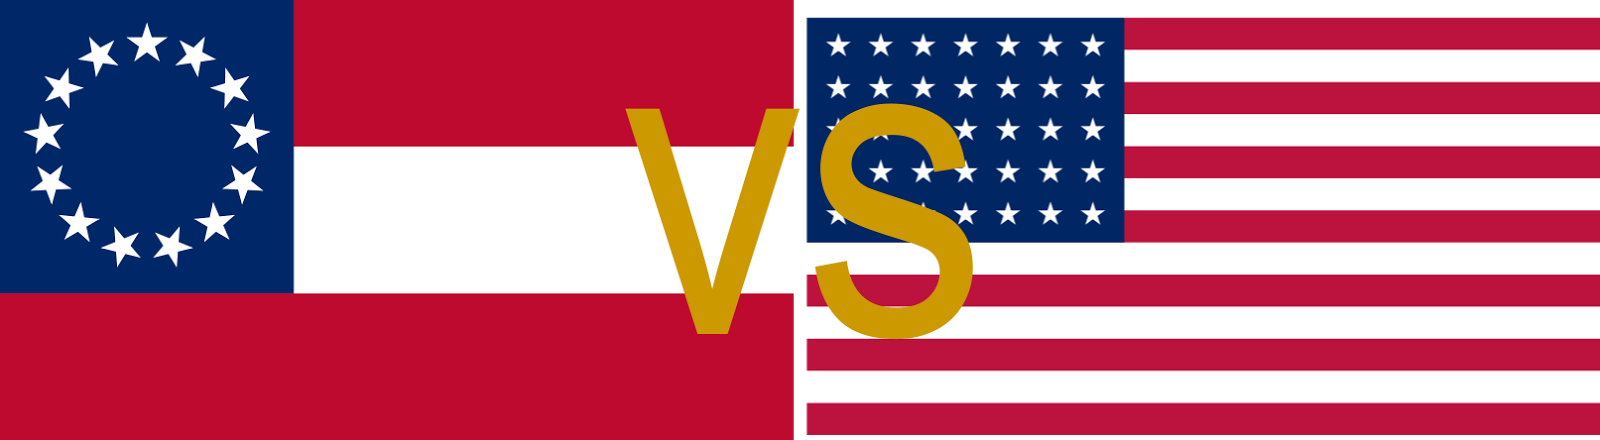
 
2. Ordre de bataille  
 
United States/Stany Zjednoczone
 
Ironclad Squad: USS Tecumseh, USS Keokuk (Colin Jack)
Gunboat Squad: USS Sassacus, USS Mattasesett (Ray Neal)
Command Squad: USS New Ironsides (Campbell Hardie), USS Miami (Matt)
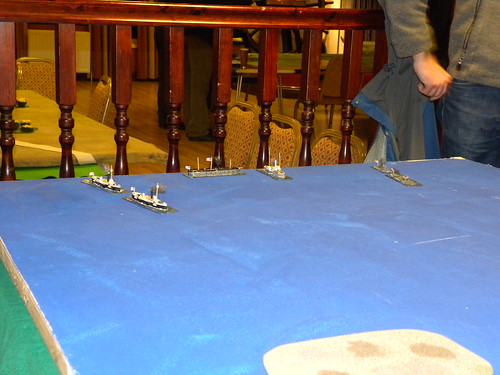
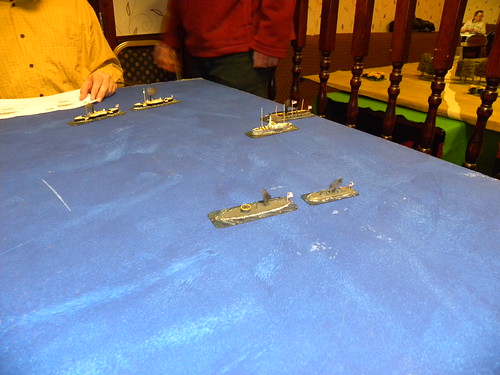
Confederate States/Stany Skonfederowane

Cape Fear Fort (Bartek Żynda)

Ironclad Ram Squad: CSS Savannah, CSS Palmetto State (Tim Watson)
Cottonclad Ram Squad: CSS General Beauregard, CSS General Bragg, CSS General Earl Van Dorn (Bartek Żynda)
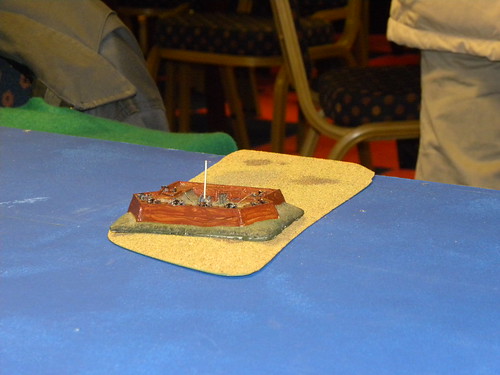
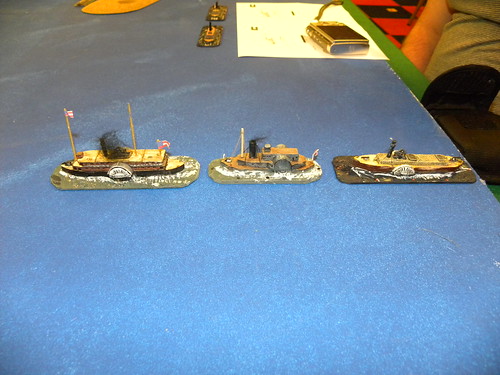
3. The game/Gra.
In our battle plan, decided to push our strongest ships against the strongest Union ships with our Cottonclads kept in reserve. All game was started with not very succesful firing from our fort. Our guns was to weak for the Union Ironclads. So we had to find the different tactic. 
Nasz plan bitwy polegał na zaatakowaniu naszymi najsilniejszymi okrętami najsilniejszych okrętów Unii a słabsze kotonklady trzymać w rezerwie. Cała gra rozpoczęła się od niezbyt udanego ostrzału dokonanego przez nasz fort. Okazało się, że nasze działa są zbyt słabe na pancerniki Unii. Musieliśmy więc zmienić naszą taktykę.
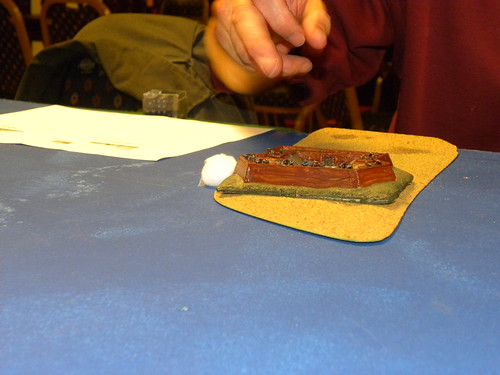
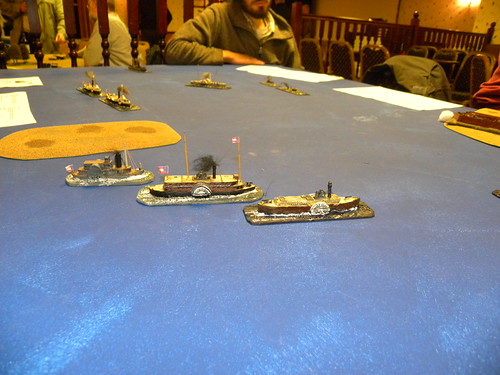
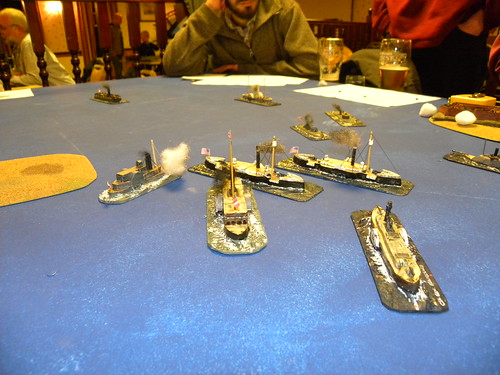
Those different tactic was raming. And soon our Cottonclads rammed Union gunboats. This attack was not fully successful. As far the USS Mattasesett sunk, Confederates paid for  this with CSS Gen Van Dorn, which damages removed this ship from any further actions.
Tą inną taktyką było taranowanie. Już wkrótce kotonklady staranowały kanonierki Unii. Ten atak nie był zbyt udany. Co prawda zatopiono USS Mattasesett, jednak Konfederaci zapłacili za to wyłączeniem ze względu na uszkodzenia z dalszej akcji USS Gen Van Dorn.
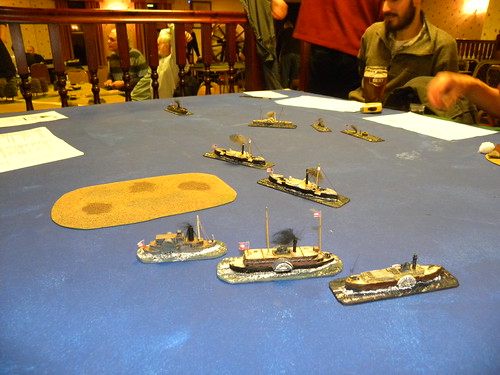
Next Union Gunboat was eliminated in the same way, by raming. But USS Sassacus was not sunk this time, only removed from any further action and again Confederates paid for this with another ship: CSS Gen Beauregard.
Następna kanonierka Unii została wyeliminowana w ten sam sposób, przez taranowanie. Tym razem jednak USS Sassacus nie został zatopiony, a tylko wyłączony z dalszych akcji. Konfederaci znów zapłacili za to kolejnym okrętem: USS Gen Beauregard.
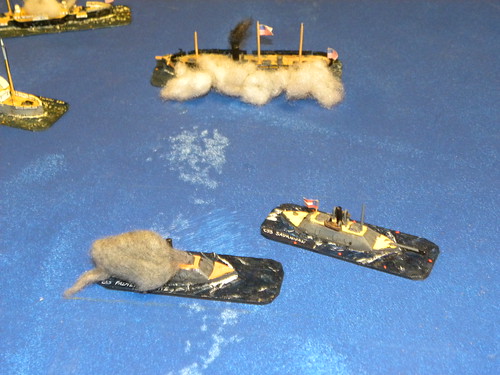
Now it comes the time for the clash of the main forces. The both sides Ironclades cannot harm each other, their armour was to strong and the guns to weak. The different situation was with the USS Miami. It faced the last Cottonclad and the Confederate fort. USS Miami had a lot of luck, as the fire from the fort's guns only caused the confusion on the ship and nothing more than this. Confederate Ironclades coused some damages on USS Miamia, but had to to stop firing at her, as the new threat arrived.
Teraz doszło do starcia głównych sił. Pancerniki obu stron nie były w stanie wyrządzić sobie większych strat, ponieważ ich pancerze były za silne, a ich działa za słabe. Inna sytuacja była z USS Miami. Stanęła ona do walki z ostanim kotonkladem i konfederackim fortem. USS Miami miała tutaj bardzo dużo szczęścia, ponieważ ostrzał z fortu nie powodował na okręcie nic poza zamieszaniem. Konfederackie pancerniki dokonały wprawdzie pewnych uszkodzeń okrętu, ale musiały przestać, ponieważ przybyło nowe zagrożenie.
This threat was the Union flag ship: USS New Ironsides. Her heavy guns was strong enought to bring the serious damages to the Confederate Ironclads. At this moment the battle was over, because not disturbed Union Ironclades broke the blockade and reach the barges with cotton. Confederates lost the battle.
Tym zagrożeniem był flagowy okręt Unii: USS New Ironsides. Jego ciężkie działa były wystarczająco silne by poważnie uszkodzić konfederackie pancerniki. W tym jednak momencie bitwa została zakończona. Pancerniki Unii, nie niepokojone przez nikogo przerwały blokadę i dotarły do barek z bawełną. Konfederaci przegrali walkę.
 
4. Summary/Podsumowanie.
 
Losses of both sides/Straty obu stron:
Union/Unia:
USS Mattasesett - sunk/zatopiony
USS Sassacus - destroyed/zniszczony
USS Miami - heavily damaged/ciężko uszkodzony
USS Keokuk - slightly damaged/lekko uszkodzony
USS New Ironsides - slightly damaged/lekko uszkodzony

Confederates/Konfederaci:
CSS General Van Dorn - destroyed/zniszczony
CSS General Beauregard - destroyed/zniszczony
CSS Savannah - heavily damaged/ciężko uszkodzony
CSS Palmetto State - heavily damaged/ciężko uszkodzony
CSS General Bragg - slightly damaged/lekko uszkodzony
 
Bill's system working quite well and I really enjoyed the game. There are still some issues, but I hope, that Bill resolve them very quickly. Bill still thinking about the name for the game, and there are some ideas about that matter, but nothing official yet. I cannot wait till next game with this rules.
System Billa działa dość dobrze i naprawdę byłem zadowolony z tej gry. Są jeszcze pewne problemy, ale Bill powinien bardzo szybko sobie z nimi poradzić. Bill ciągle też myśli nad nazwą dla tej gry i są już nawet pewne pomysły w tej materii ale nic oficjalnego jeszcze. Nie mogę się doczekać kolejnej gry z tymi zasadami.

Some links at the end:
Kilka linków na koniec:

Relation on Bill's blog:
Relacja na blogu Billa:
And my gallery on flickr:
Moja galeria na flickr:
 

16 października 2013

Polska 1944 (31) - Niemcy dla Rapid Fire. Poland 1944 (31) - Germans for Rapid Fire.

Dzisiaj prezentacja Niemców dla Rapid Fire. W załączonych poniżej plikach możecie w pełni prześledzić listę amii niemieckiej do tego systemu. Kolorem czarnym zaznaczyłem figurki i modele już przeze mnie posiadane, natomiast czerwonym przyszłe zakupy (jest tego znacznie więcej, niż u Sowietów...).
Today presentation of my Germans for Rapid Fire. With attached below files, you can watch my whole German Army list for this system. In black is  what I already have and in red my future purchases (there is much more to buy, than the Soviets...).

Numery na zdjęciu odpowiadają następującym jednostkom:
Numbers on the picture are reffered to the following units:
  1. Kampfgruppe HQ
  2. 1st Panzer Grenadier Regimental HQ
  3. 1st Armoured Panzer Grenadier Battalion
  4. 2nd Mechanised Panzer Grenadier Battalion
  5. 1st Regiment Support Companies
  6. 1st Regiment AA Batteries
  7. 2nd Infantry Regimental HQ
  8. 1st Infantry Battalion
  9. 2nd Infantry Battalion
  10. Regimental Self-propelled Guns Battalion
  11. Divisional Artillery Regiment
  12. StuG Battalion
  13. Panzer AT Battalion
  14. 1st Tank Battalion
  15. 2nd Tank Battalion
  16. 1st Heavy Tank Battalion
  17. 2nd Heavy Tank Battalion
  18. Air Support (Junkers Ju 87 Stuka)
Teraz czas na przygotowanie rozpiski dla Battlegroup...
Now is the time for the Battlegroup list...

Załączone pliki:
Attached files:

14 października 2013

Polska 1944 (30); Poland 1944 (30) - Domek i coś dla Niemców oraz brawo dla Armourfast. House and something for Germans and well done Armourfast.

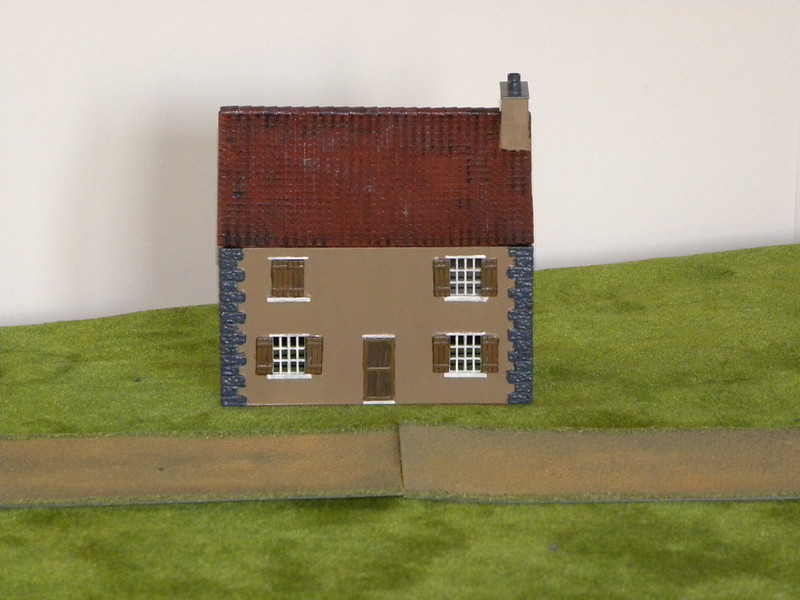
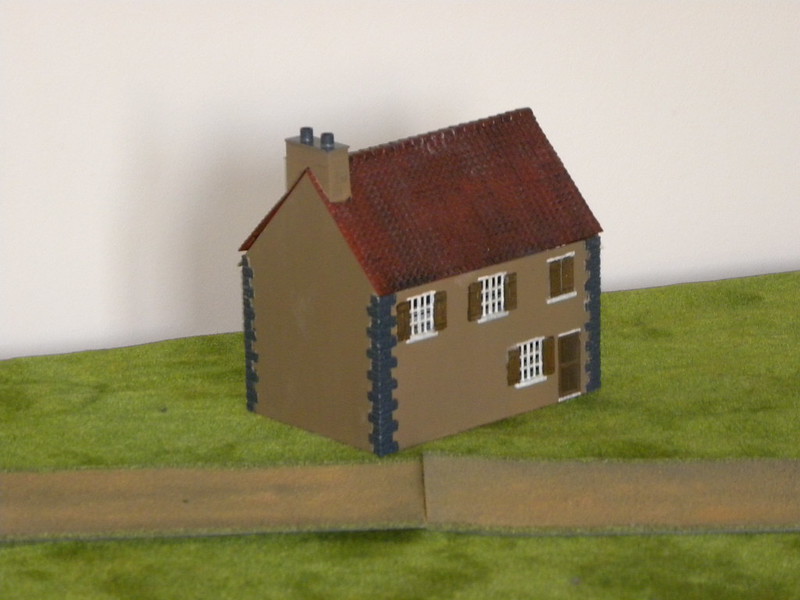
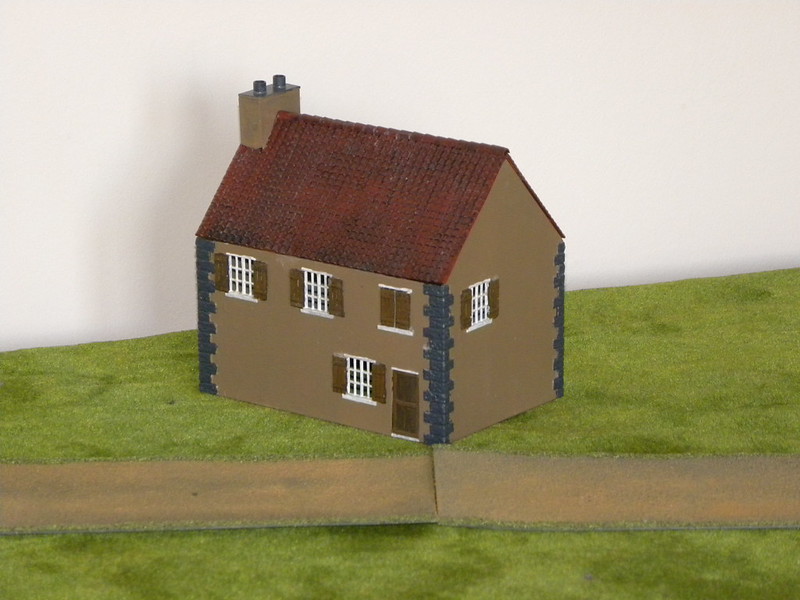
Dzisiaj trochę nowych rzeczy dla mojej kolekcji 20mm: Polska 1944. Pierwszą rzeczą jest domek. Co prawda bardziej on pasuje do Francji, ale do małego miasteczka gdzieś w Polsce też się nada. Domek to produkcja Armourfast. Z tym domkiem związana jest pewna historia. W dziale dystrybucji doszło do małej pomyłki i ten domek nie trafił do mnie za pierwszym razem tylko zamówienie kogoś innego. Gdy poinformowałem o tym fakcie producenta, Armourfast pozwolił mi zatrzymać artykuły przeze mnie nie zamówione i szybciutko dosłał produkty za które zapłaciłem (razem z domkiem dokupiłem już wcześniej prezentowane Shermany). W ten oto sposób stałem się posiadaczem dodatkowych niemieckich haubic 105mm (cały czas czekają na pomalowanie, nie mogę się jeszcze zdecydować czy pomalować je na 1944 rok, czy też na 1939) oraz bohatera dalszej części tego postu: Sturminfanteriegeschütz 33B. Bardzo dziękuję Armourfast, naprawdę dobra robota!!! Zanim przejdę do tego drugiego modelu, wpierw prezentacja domku. Oto i on:
Today some new stuff for my 20mm collection: Poland 1944. First item is the house. Although it much more fit for France, but for the small town somewhere in Poland is good as well. This house comes from Armourfast. With this item is connected some story. There was some mistake in the distribution department and instead of mine I received packaging belonging to someone else. When I have informed about it, Armourfast decided, that I can keep those items, and very quickly I received the correct items (besides of this house I ordered, previously shown on this blog, Sherman tanks). That's the way how I came into possession extra 105mm German Howitzers (still waiting for being painted as I can not decided should I do them for 1944 or 1939...) and the hero of the second part of this post: Sturminfanteriegeschütz 33B. Thank you Armourfast for this once again - very well done!!! Before I will write about the second model, first the house. Here it is:
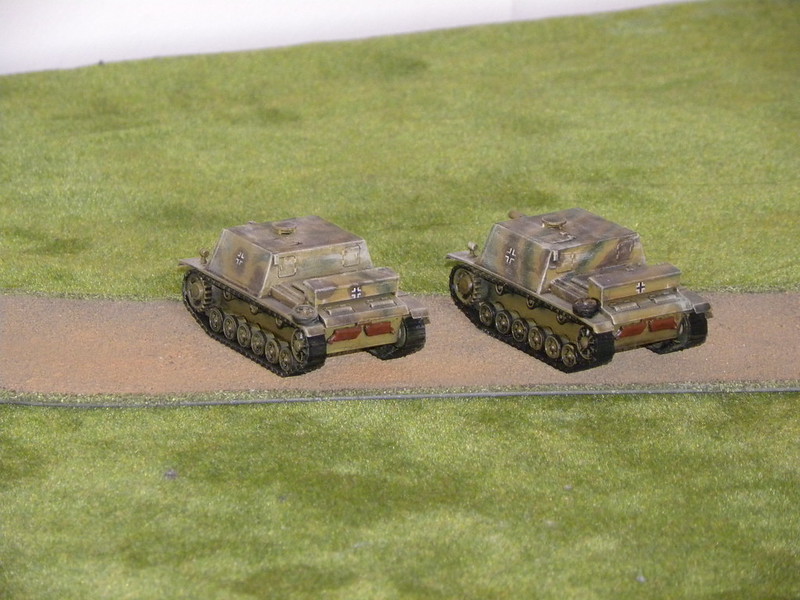
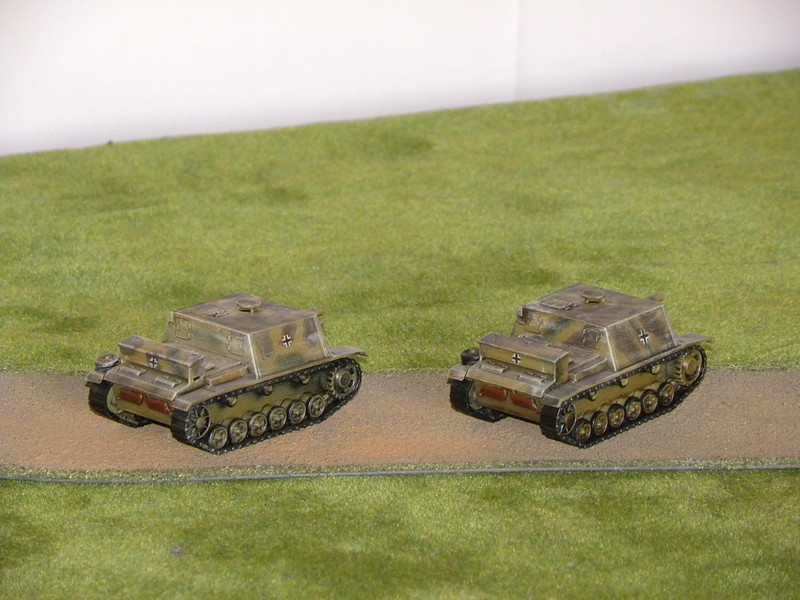
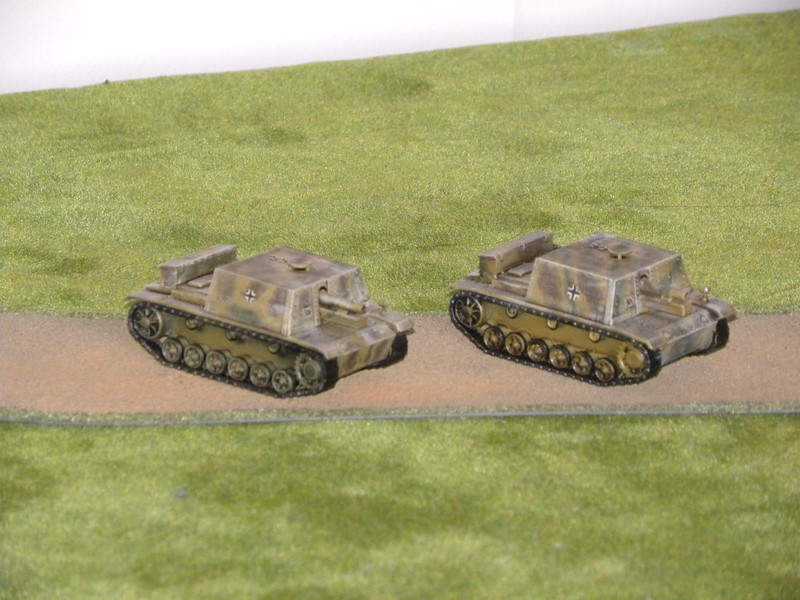
Teraz kolej na następny model, a raczej dwa. Są to działa samobieżne Sturminfanteriegeschütz 33B. Podczas ich malowania, pogrzebałem trochę w książkach, czy też nadadzą się do mojego projektu Polska 1944. Ogółem tych dział wyprodukowano tylko 24 sztuki, gdzie prawie połowa została zniszczona w Stalingradzie. Z pozostałej reszty utworzono baterię w składzie wpierw 22 Dywizji Pancernej, a następnie po jej rozbiciu w składzie 23 Dywizji Pancernej. Bateria na pewno wzięła udział w Bitwie pod Kurskiem, jednak po tym w moich źródłach dochodzi do pewnych rozbieżności. Według jednych bateria została rozbita w walkach na Ukrainie do grudnia 1943 roku, z kolei inne podają, że walczyła jeszcze do września 1944 w Polsce, na przyczółku sandomierskim. Mam nadzieję, kiedyś to ustalić. A na razie moi Niemcy dysponują baterią dwóch cięzkich dział 150mm! Już podczas pisania tego posta, zauważyłem że gąsienice pojazdów są trochę za czyste i trzeba to zmienieć...
Now is the time for the next model, but rather two. There are two self-propelled gun Sturminfanteriegeschütz 33B. During the painting I did some research, if they are correct for my Poland 1944 project, or not. There was only 24 guns produced in total and almost half of them was destroyed in Stalingrad. From the rest of them Germans created the battery first assignated to the 22nd  Panzer Division, and after its wiped out to the 23rd Panzer Division. Those battery for sure fought during the Battle of Kursk, but after this there some discrepancies in my sources. According to some of them, the battery was destroyed during the fighting in Ukraine till December 1943, but according to other, the battery took part in fighting till the end of September 1944 in Poland on the Sandomierz bridgehead. I hope someday to find it out. So far my Germans have the battery of two heavy 150mm guns! When I was writing this post I noticed that the tracks of those vehicles are little to clean, I'm just going to sort this problem right now...
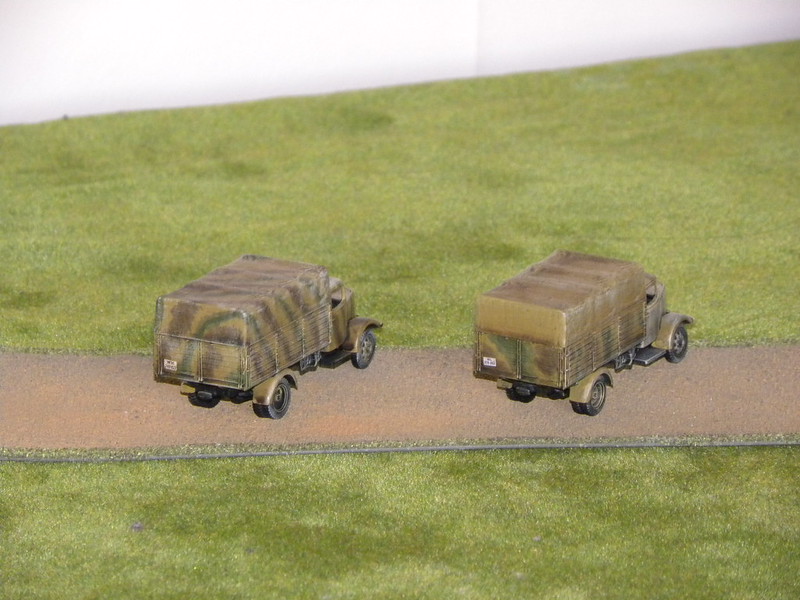
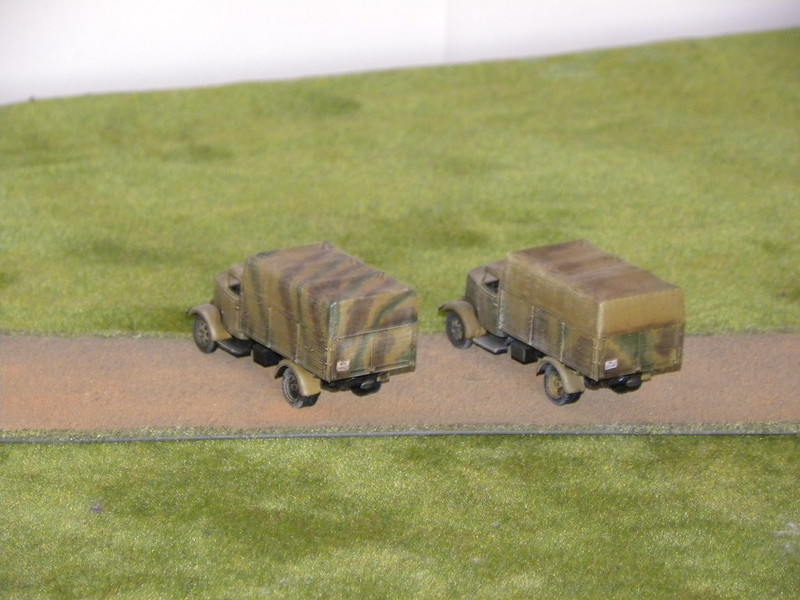
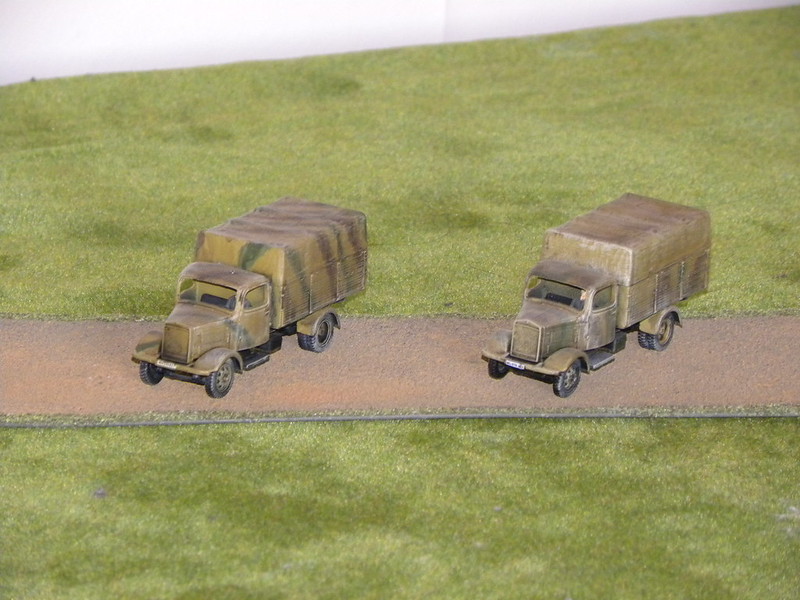
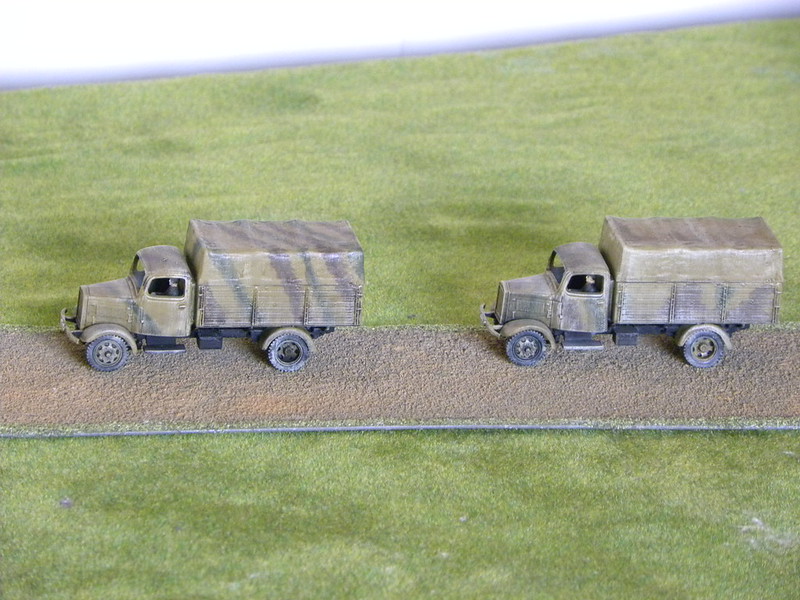
Na zakończenie tego posta dwie kolejne ciężarówki od Pegasus Hobbies:
At the end of this post another two trucks from Pegasus Hobbies:

Na jutro postaram się przygotować listę niemiecką dla Rapid Fire, a po jutrze dla Battlegroup.
For tomorrow I will prepare the German list for Rapid Fire, and for the day after tomorrow for Battlegroup.

11 października 2013

Ruhr 1919 (p2)

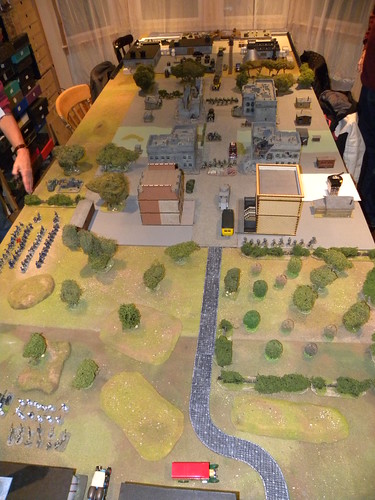
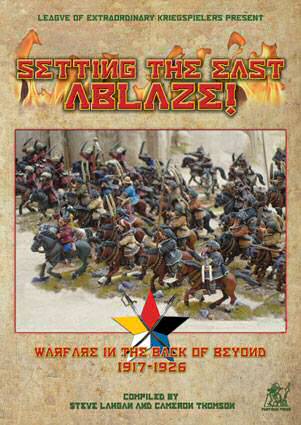
After long time, we come back to Hugh Wilson's gaming room. His room as his hause are still a work in progress, but available for gaming right now. I'm still impressed of the work been done so far and cannot wait until everything will be completed. For our first game after so long break we decided to come back to the Back of Beyond rules and to one of our past games: Ruhr 1919. The relation from the first part of that game you can read at this link:
Po długiej przerwie wróciliśmy do pokoju gier Hugha Wilsona. Prace nad jego pokojem jak i całym domem są ciągle w toku, jednak jest już gotowa przestrzeń do grania. Jestem pod dużym wrażeniem już poczynionych prac i nie mogę się już doczekać końca tych robót. Dla naszej pierwszej gry po tak długiej przerwie postanowiliśmy powrócić do zasad Back of Beyond i do jednej z naszych poprzednich gier: Ruhr 1919. Relację z tamtej gry możecie przeczytać pod poniższym linkiem:

SCENARIO/SCENARIUSZ: Colin Jack
SCENERY/SCENERIA: Hugh Wilson, Bill Gilchrist, Colin Jack
FIGURES/FIGURKI: Colin Jack, Dave O'Brian, Hugh Wilson
1. Introduction/Wprowadzenie.
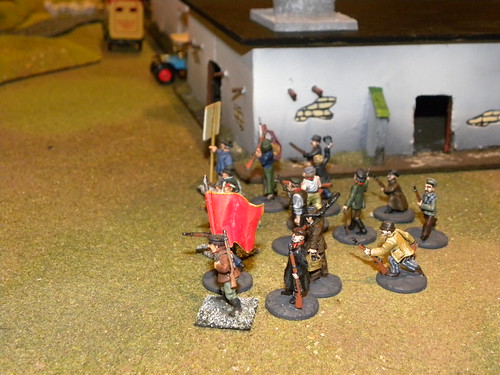
After defeating the Communists in the Factory District, the Freikoprs troops hve moved into the town of Rhineburg and taken control of the centre. Some of the troops have been send to the Docks and rest of them bring the order to the town (the ringleaders have all been imprisoned or executed). It could be end of this story, however the Communists will not stop at this point and is very possible that they will attack again. And indeed, after the news of the Communists defeated spread around, many volunteers join the Red Forces. Now is time to take revange!
Po pokonaniu Komunistów w dzielnicy fabrycznej, siły Freikopsu ruszyły w kierunku miasta Rhineburg i zajęło jego centrum. Część sił zostało wysłanych dla zabezpieczenia portu a reszta przywróciła porządek w mieście (wszyscy prowodyrzy zostali albo uwięzieni albo też rozstrzelani). To mogłoby zakończyć całą historię w tym miejscu, jednakże Komuniści na pewno nie poprzestaną na tym i najprawdopodobniej zaatakują ponownie. I rzeczywiście, po tym jak rozniosła się wiadomość o porażce Komunistów wielu ochotników dołączyło do Czerwonych Brygad. Przyszedł czas na rewanż!


2. Ordre de bataille
After the name of the unit follows: Class / Morale, size, additional information.
Po nazwie oddziału następuje: klasa/morale; wielkość; dodatkowe informacje.
Revolutionaries:
Rewolucjoniści:
(Colin Jack, Bill Gilchrist, Dave O'Brian, Campbell Hardie)

The Main forces:
Volksmarine Company 1; 3/3; 12; LMG
Volksmarine Company 2; 3/3; 12; LMG
Volksmarine Company 3; 3/3; 12
Volksmarine Company 4; 3/3; 12
Volksmarine HMG; 3/3
Marinekadettes; 4/3; 12 
Marinekadette HMG; 4/3
Heerkadettes; 4/3; 10; LMG, flamethrower; Ferocious
HMG Company; 3/3
Panzerzerstorer Company; 3/3; 12; AT, flamethrower
Russo-Balt Armoured Car; 3/3; 2xLMG
Flak gun on truck; 3/3; Field Gun

The Factory Forces:
Militia Company "Rott Wilhelm"; 4/4; 16; Irregular; LMG
Militia Company "Weiss Adler"; 4/4; 16; Irregular; LMG

The Docks Forces:
Militia Company "Gasfabrik"; 4/4; 16; Irregular; LMG
Militia Company "Vorsprung durch Technik"; 4/4; 16; Irregular; LMG
Militia Company "Ersatz"; 4/4; 16; Irregular; LMG

Freikorps:
(Ray Neal, Hugh Wilson, Bartek Żynda)

The Main Forces:
Freikorps von Neal; 3/3; 12; LMG
Freikorps von Zynda; 3/3; 12; LMG
Freikorps von Wilson; 3/3; 12; LMG
Freikoprs Bavaria; 3/3; 12; LMG
Sturmkompanie; 2/3; 12; SMG, flamethrower; Ferocious
Artillery; 3/3; Field gun
HMG Freikorps; 3/3
HMG Bavaria; 3/3
Bussing Armoured Car; 3/3; 3xLMG
Erhardt Armoured Car; 3/3; LMG

The Docks Forces:
Freikorps Totenkopf; 3/3; 12; LMG
Freikoprs Rottkampf; 3/3; 12; LMG
Ruhr Polizei Company; 4/3; 12

3. The game/Gra.
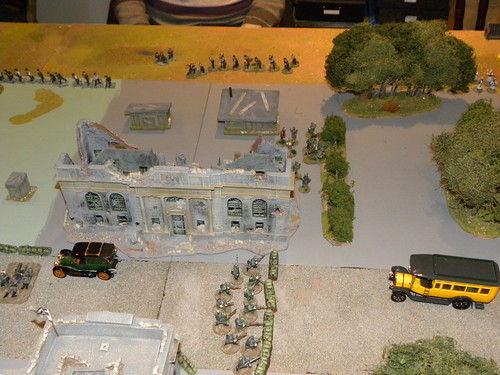
At the begining of the game both sides trying to take the best starting positions before the battle will started. From the beginning the Freikoprs forces were outnumbered, but they were better troops and have better positions instead. Becouse of the not enough troops we decided to not put any forces in the Fabrik District and some of them in the Docks. We have not been sure, how it gonna be solved with the extra locations and probably we would done this in different way, if we could only know how it would going to be played. So far the first Communist wave had been stopped at the outskirts of the town. 
Na początku gry, obie strony starały się zająć jak najlepsze pozycje do rozpoczęcia bitwy. Od samego początku Freikorps dysponował mniejsza ilością oddziałów, jednak ich żołnierze byli lepiej wyszkoleni i zajmowali lepsze pozycje. Ze względu na zbyt małą ilość oddziałów, zdecydowaliśmy się nie obsadzać dzielnicy fabrycznej a jedynie część z nich wysłać do doków. Nie byliśmy dostatecznie pewni, jak sprawa dodatkowych lokacji będzie rozwiązana i prawdopodobnie gdybyśmy wiedzieli jak, zrobilibyśmy to w zupełnie inny sposób. Na razie jednak Komuniści zostali zatrzymani na obrzeżach miasta.

Now comes the time to solve the extra locations. As in the fabrics we did not have any troops, Communists won this location. In the Docks was a draw, Freikorps had 3 units, and Communists had 3 too. So was the time for attacker throw. Becouse  of the quality of the Attacker troops, they need "6" to win and guess what... The Red players gave it to the Dave's hands and if you remember or past games, Dave if he need "6", he usualy get it. The same was this time. And in that way we lost 3 units without the fight. I'm quite sure that we lost the game in that moment. Now was the time for the Reds. They attack was from this moment much more furiously.
Teraz przyszedł czas na rzowiązanie dodatkowych lokacji. O ile w fabrykach nie pozostawiliśmy żadnych oddziałów, to w dokach mieliśmy remis. Freikorps miał 3 oddziały i Czerwoni mieli również 3 oddziały. Potrzebny był dodatkowy rzut. Ze względu na klasę oddziałów atakujących, potrzebna była "6" i zgadnijcie co się stało... Gracze Czerwonych przekazali to do wykonania Davowi i jeżeli dobrze pamiętacie poprzednie gry, Dave, kiedy potrzebuje "6", zazwyczaj je dostaje. Tak samo było i tym razem. I w ten sposób bez walki straciliśmy 3 oddziały.  Jestem pewien, że własnie w tym momencie przegraliśmy całą grę. Teraz przyszedł czas na czerwonych, którzy zaatakowali ze zdwojoną teraz siłą

Fighting on our left was very  fierce. Both sides used their flamethrowers. Initially, the Freikorps were quite good over there, but finally the number of Attackers get the advantage at this side. Soon we did not have any troops in that area. The same was in the centre of our positions. Communists took our positions and we had to withdraw. The different situaton was at our right. As the first fought the Bavarian Company and after the long fight finaly have been whiped by large number of the Red troops. After this Communists attacked the Freikorps von Zynda positions. It was our last defending line, and this line was  saved. Unfortunately the game was lost, and this units had to withdraw as well. The town was lost, but there will be time for revange again!
Walki na naszym lewym skrzydle były bardzo zacięte. Obie strony użyły tam miotaczy płomieni. Początkowo Freikorpsowi wiodło się tam dość dobrze, jednak później dała znać o sobie przewaga liczebna atakujących i to oni zdobyli tam przewagę. Wkrótce też nie dysponowalismy tam juz żadnymi oddziałami. Podobnie było w centrum. Komuniści wyparli nas z naszych pozycji i stamtąd musieliśmy się wycofać. Odwrotnie wyglądało to na naszym prawym skrzydle. Jako pierwsi walczyli tam Bawarczycy, jednak po długiej walce zostali oni zmieceni przez dużą liczbę sił Czerwonych. Po tym Komuniści przystąpili do ataku na pozycje Freikorpsu von Zynda. Była to nasza ostatnia linia obrony, która to została obroniona. Niestety gra była przegrana i ten oddział tez musiał się wycofać. Miasto zostało stracone, ale przyjdzie jeszcze czas na odwet!

4. Summary/Podsumowanie.
We did not used this set of rules for the long period of time. We are going to check how it will be working together with Bolt Action. Will it be quicker game or not. This way we are going to compare both sets of rules. So in two week time will be compare time. Besides of the game I'm quite happy that we finally come back to Hugh and his gaming room - there is again possibility to play with the folks who are not members of our club. 
Nie używaliśmy tych zasad przez dość długi okres czasu. Mamy zamiar sprawdzić jak taka gra będzie pracować z zasadami Bolt Action. Będzie szybsza, czy też nie. W ten sposób dokonamy porównania obu systemów. Tak więc za dwa tygodnie nadejdzie czas porównań. Oprócz tego jestem zadowolony, że w końcu mogliśmy z powrotem zawitać w pokoju gier Hugha - jest więc znowu możliwość grania z osobami, które nie są członkami naszego klubu.

And at the end the gallery on my flickr with the  views of the fantastic table. Hugh, it was not wasted afternoon - that was great table, especially those Berlin buildings!
I na koniec galeria na moim flickr ze zdjęciami  naprawdę niesamowitego stołu. Hugh, to nie było zmarnowane popołudnie - ten stół był znakomity, szczególnie te berlińskie budynki!

08 października 2013

Polska 1944 (29); Poland 1944 (29) - Siły sowieckie - rozpiska dla BG. Soviet forces - BG list.

Jakiś czas temu stworzyłem listę moich Sowietów w 20mm dostosowaną do systemu Rapid Fire. Jako, że nadchodzi listopad i już nie długo ukaże się dodatek Fall of the Reich do Battlegroup, postanowiłem przygotować moją rozpiskę pod ten system. Zamieszczona punktacja i wartość BR są w niektórych przypadkach obliczone na podstawie zbliżonych jednostek (korzystałem w głównej mierze z dodatku Kursk, jak i pierwszego oficjalnego darmowego pdfu), więc te liczby mogą się także zmienić. Spoglądając na już posiadane siły i rozpiskę z Rapid Fire, moje zakupy w przyszłości się pokryją, więc jest to dość dobra wiadomość.
Some time ago I have created the list of my Soviet in 20mm for Rapid Fire. As the November is comming together with new book Fall of the Reich for Battlegroup, I have decided to create the list for this system too. The point value as the same as BR value sometimes is only estimated (to create this I have used the Kursk book, and calculated it on similar units from that book and the first free pdf), so this numbers can be changed in the future. When I compared this list with those created for Rapid Fire I have the good conclusion: my shoping list looks similar, so this is very good news.
Listę możecie obejrzeć pod tym linkiem:
The list can be viewed at this link:
I oczywiście nowe zdjęcie z siłami dostosowanymi do tej rozpiski:
And of course the new picture of my troops with this list:

Numery na zdjęciu odnoszą się do następujących oddziałów:
Numbers on the picture are related to the following units:
1. Forward Infantry Company Headquaters.
2. NKVD Officer.
3. Motorcycle Dispatch Rider.
4. 1st Motorised Rifle Platoon.
5. 2nd Rifle Platoon.
6. 3rd Rifle Platoon.
7. AT Rifle teams.
8. Maxim MG teams.
9. Loader team.
10. Medium Mortar Battery
11. Foot Reconnainssance Team.
12. Towed AA Gum.
13. Heavy AA Gun.
14. Forward Tank Unit Forward Headquaters.
15. 1st T34 Company.
16. 2nd T34 Company.
17. M4 Sherman Platoon.
18. Light Tank Platoon.
19. 1st Heavy Tank Platoon.
20. 2nd Heavy Tank Platoon.
21. SU85 Battery.
22. ISU Battery.
23. SU76.

Na zdjęciu widoczne też są dwa samoloty, nie ujęte w rozpisce są to:
On the picture are two planes, not included on the list, they are:

Yak 9
Il2m3

Lista Rapid Fire pod tym linkiem:
The Rapis Fire list at this link:

07 października 2013

IHMN - Heroes die sometimes too. Bohaterowie też czasem giną.

This week we get the third (second for myself) game with the In Her Majesty's Name rules. For this game we have been much better prepared, so we had quick reference sheets, the teams charts - all of that gave our game much more speed this time. 
W tym tygodniu rozegraliśmy trzecią (dla mnie drugą) grę z użyciem zasad In Her Majesty's Name. Tym razem przygotowaliśmy się znacznie lepiej i mieliśmy wydrukowane skróty zasad, karty drużyn - to wszystko znacznie przyspieszyło naszą rozgrywkę.

SCENARIO/SCENARIUSZ: Colin Jack
FIGURES&MODELS/FIGURKI I MODELE: Colin Jack, Campbell Hardie
SCENERY/SCENERIA: Colin Jack, SESWC


1. Teams/Zespoły

This time we have used four teams:
Tym razem użyliśmy czterech zespołów:

Scotland Yard (Mr Ray)
Geographic Society (Colin Jack)
Princess Maia's Canal Martians (Bartek Żynda)
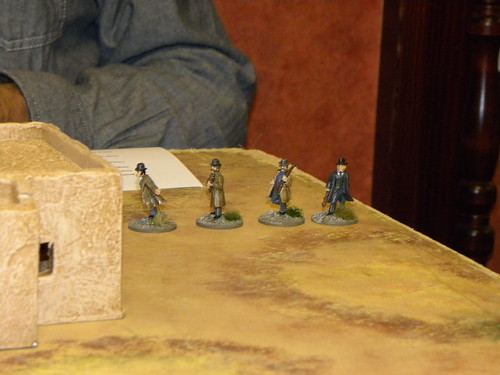
Some of those figures are very very old (I think that some of them as old as myself). Niektóre z tych figurek są bardzo stare (wydaje mi się, że część z nich jest tak stara jak ja sam).
The Armed Wing of the Jura Federation (Campbell Hardie) - team created by Campbell.

2. The game/Gra.

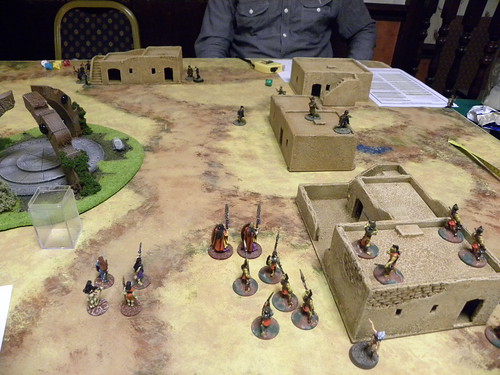
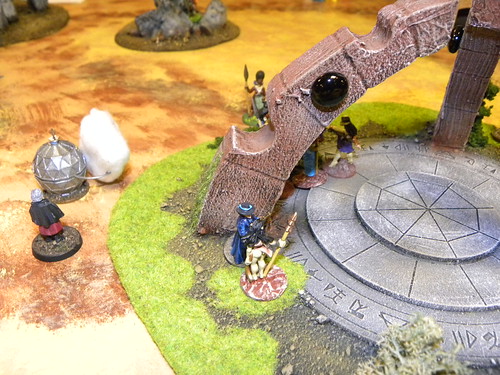
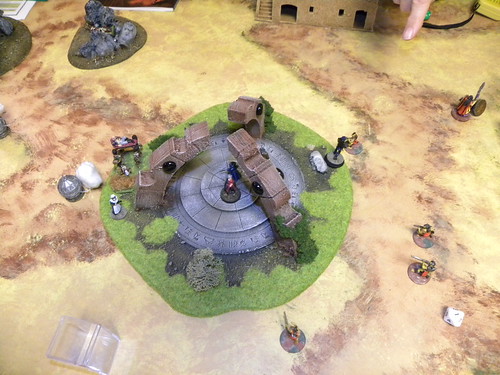
In our game all of the teams have to gain, as I called it the Stargate portal at the centre of the table. At the begining game divided into two separate clashes: Scotland Yard vs Canal Martians and Society vs Yura. As the first clash was mainly the firing, the second turn into big melee.
W naszej grze każdy z zespołów musiał opanować, jak to nazwałem portal Gwiezdnych Wrót, znajdujący się w samym centrum naszego stołu. Na początku naszej gry, podzieliła się ona na dwa oddzielne starcia: Scotland Yard przeciwko Canal Martians i Society przeciwko Yura. O ile pierwszy z nich polegał głównie na strzelaniu, to ten drugi zamienił się w jedną wielką walkę wręcz.

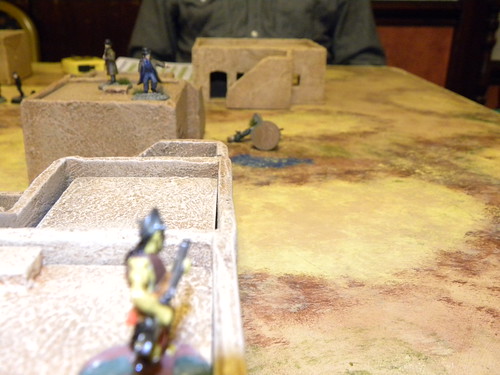
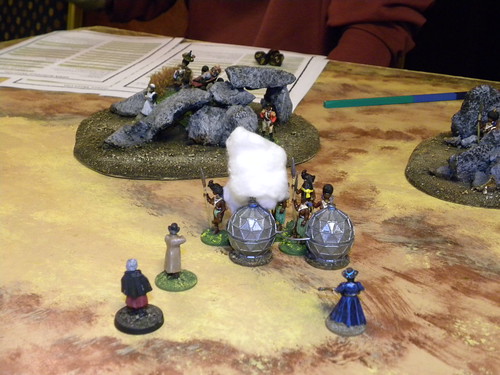
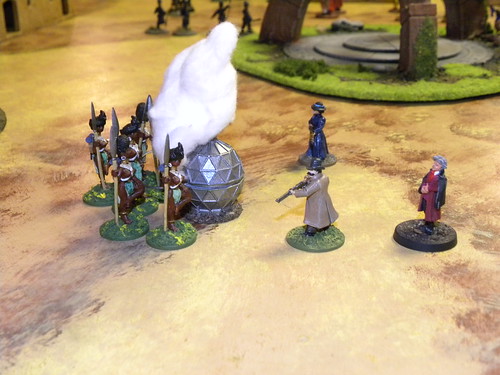
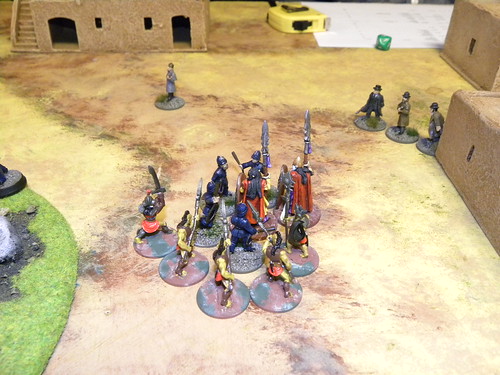
In the Scotland Yard vs Martians clash, both sides took their positions on the top of the buildings and fires at ach other. Martians did it better and Scotland Yard had to withdraw but they get some casualties and Ray was going to use one of his heroes talents (Dr Watson have the Medic talent, so he can bring the fallen figure back to life), but failed this time. As the dark side player one of my shooters killed Dr Watson when he tryed to rescue his comrade. Pure Evil! After this Ray removed all his troops out of the range of my rifles, and Sherlock Holmes was send away of the table. I tried to kill this hero, but for the rest of my game he was out of my range. 
W pojedynku pomiędzy Scotland Yardem a Marsjanami obie strony zajęły pozycje na dachach budynków, skąd prowadziły ogień do swoich przeciwników. Marsjanie byli w tym znacznie lepsi i Scotland Yard musiał się wycofać jednak nie odbyło się to bez ofiar i Ray postanowił zrobić użytek z talentu jednego ze swoich bohaterów (Dr Watson posiada talent Medyka i może on przywrócić ustrzeloną figurkę z powrotem do gry), jednak nie udało mu się to tym razem. Jako przedstawiciel ciemnej strony, jeden z moich strzelców zabił Dr Watsona w momencie gdy ten niósł pomoc swojemu towarzyszowi. Czyste Zło! Po tym Ray wycofał wszystkie swoje figurki z zasięgu moich strzelb a Sherlocka Holmesa wysłał daleko poza stół. Próbowałem zabić tego bohatera, jednak pozostał poza moim zasięgiem.
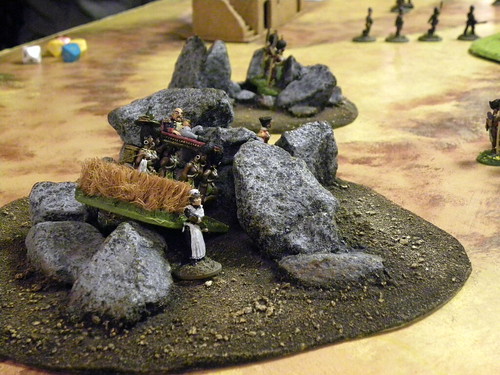
The moment of Dr Watson death. Moment śmierci Dr Watsona.
In the second clash Yura fought against the Society. As the Society was poorly equipped with the firing weapons, they get their opponent into hand to hand combat. Fighting was quite long but finally Society destroyed both Tickers and everything moved into the portal direction.
W drugim pojedynku Yura zmierzyła się z Towarzystwem. Jako, że Towarzystwo nie było zbyt dobrze wyposażone w broń palną szybko uwikłało przeciwnika w walce wręcz. Sama walka trwała dość długo, jednak w końcu Towarzystwu udało się zniszczyć oba Tickery i wszystko skierowało się w kierunku portalu.
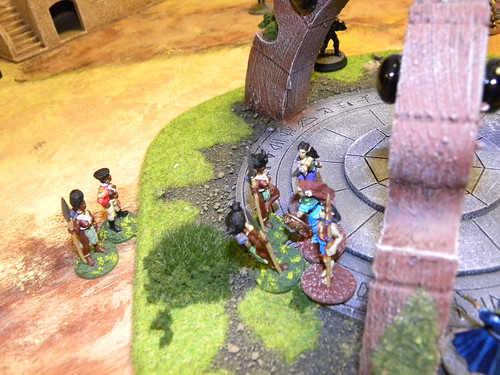
Now everybody fought against everybody. Whole game turned into separate hand to hand clashes, of which most of them was fought around the portal. The bigest of them was beetwen Martians and the Scotland Yard. As far the ordinary Martians soldiers were very easy target to kill, the Palace Gurads were almost immortal (their armour had value of 12), therefore I used them as the heavy tanks - to crash the opponent. Quickly all Policemen get killed, so I charged the rest of the Scotland Yard team. This fight was finished without the result as the whole game have  finished.
Teraz każdy walczył przeciwko każdemu. Cała gra przekształciła się w szereg walk wręcz wokół portalu. Największa z nich stoczona została przez Scotlan Yard i Marsjan. O ile zwyczajni żołnierze marsjańscy mogli być łatwo zabijani, tak Straż Pałacowa była prawie nieśmiertelna (wartość ich pancerza wynosiła 12), dlatego też używałem ich jak ciężkich czołgów - by zgnieść przeciwnika. Szybko też wszyscy policjanci zostali zabici, więc zaatakowałem resztkę Scotland Yardu. Ta walka nie przyniosła rezultatu, ponieważ gra się zakończyła.
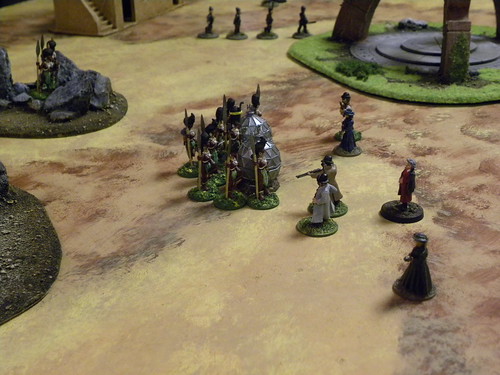
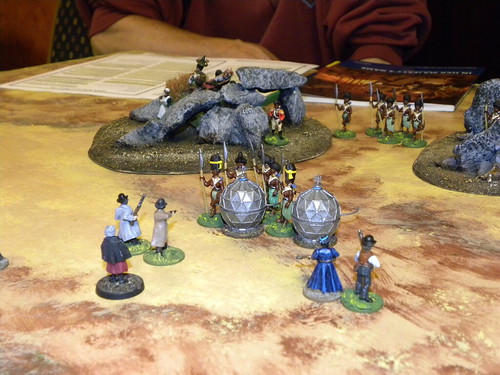
The decisive battle was for the portal. First my Amazon Militia attacket the Society. They killed the ordinary soldiers but were to weak for better heroes and all get killed. My Princess Maia fought against the main Yura characters and failed as well. Scotland Yard Chief Inspector fought against other Yura haracters, and failed as well. This gave the Yura team two figures free of combat, and both of them took the centre of the portal - and the victory.
Decydująca bitwa rozegrała się o portal. Wpierw moje Amazonki zaatakowały Towarzystwo. Udało im się zabić zwykłe żołnierki, jednak były zbyt słabe na lepszych bohaterów i wszystkie zostały zabite. Moja  Księżniczka Maia walczyła przeciwko głównym bohaterom Yury, jednak nie dała im rady i tez poległa. Główny Imspektor Scotland Yardu walczył przeciwko pozostałym postaciom Yury  i też nie dał im rady. Te pojedynki dały Yurze dwie postaci wolne od jakiejkolwiek walki, więc obie zajęły środek portalu, a dzięki temu odniosły zwycięstwo.

3. Summary/Podsumowanie.
As I did not grow up with the British sci-fi or steampunk literature, most of those characters are not know for myself, so sometimes is very hard to fit myself to the game story (thats the reason why I prefer the historical gaming). But from the other hand, it cannot be only serious gaming all the time, and one has to sometimes play something not serious like the IHMN. I like the rules, with all simplicity and sometimes nonsense, but this is not the history but this is the fiction, so not everything have to be serious and in accordance with physical laws. So anyway, this rules are great fun and I can recomend them to all.
Jako, że nie jestem zbytnio zaznajomiony z brytyjską literaturą sci-fi lub steampunkową i większość z tych bohaterów jest mi obca, czasem jest mi bardzo trudno odnaleźć się w historii gry (jest to jeden z powodów, dlaczego wolę gry historyczne). Ale z drugiej strony, nie można tylko grać w poważne gry cały  czas i od czasu do czasu trzeba pozwolić sobie na coś tak nie dokońca poważnego jak IHMN. Zasady mi się podobają, z całym ich uproszczeniem i czasem nonsensem, ale trzeba pamiętać, że jest to fikcja nie prawdziwa historia, więc nie wszystko musi być serio i zgodne z prawami fizyki. Te zasady dostarczają dużo rozrywki i mogę je polecić każdemu.


And as usual, the gallery on flickr:
I jak zawsze galeria na flickr: