13 lutego 2022

Water Loo 1814.

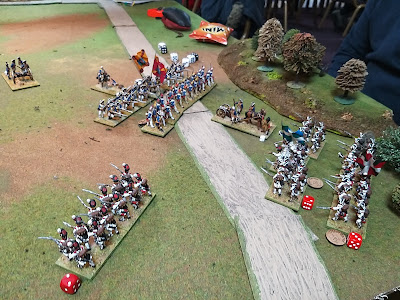
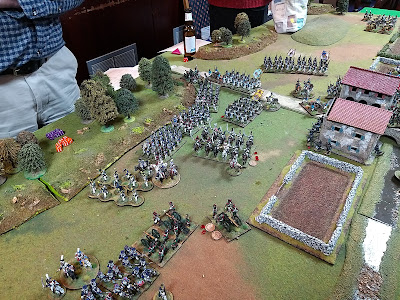
We are back to our alternative reality in Napoleonic Wars. It was a game involving our whole collections, so the table at some point got very crowded. For the game, we used Black Powder rules.

Jesteśmy z powrotem w naszej alternatywnej rzeczywistości wojen napoleońskich. Tym razem w grze użyliśmy całych naszych kolekcji, więc w pewnym momencie zrobiło się bardzo tłoczno na stole. Użyte zasady to Black Powder.


SCENARIO / SCENARIUSZ: Bartek Żynda
UMPIRING / PROWADZENIE GRY: artek Żynda
SCENERY / SCENERIA: Michael Schneider, SESWC
FIGURES & MODELS / FIGURKI I MODELE: Campbell Hardie, Peter Mearns, Bartek Żynda

1. Forces. Siły.


GREAT BRITAIN / WIELKA BRYTANIA
(Alisdair, Michael, Peter)

Senior CinC (lvl 9)

1st Infantry Brigade (lvl 8)
2 x Highlanders (Veteran)
2 x Guard (Guard)

2nd Infantry Brigade (lvl 8)
1 x Rifles
3 x Line (British Line)

3rd Infantry Brigade (lvl 8)
2 x Nassau (Allied Line)
2 x Hannoverian (Allied Line)

1 st Cavalry Brigade (lvl 8)
1 x Heavy Dragoons
1 x Hussars

2nd Cavalry Brigade (lvl 8)
2 x Light Dragoons

1st Gun Battery
2 x Light Gun

2nd Gun Battery
2 x Light Gun


POLAND & WURTTEMBERG / POLSKA i WIRTEMBERGIA
(Campbell, Bartek, Mike)

Marshal Poniatowski (lvl 9)

The Water Loo Detachment (lvl 8)
1 x Half Ułan Regiment
1 x Polish Voltigeurs
1 x Wurttemberg Jagers
1 x Horse Gun (Polish)

POLISH DIVISION
General Dąbrowski CinC (lvl 9)

1st Polish Infantry Brigade (lvl 8)
1 x Polish Voltigeurs
3 x Line Battalion
1st Light Gun Battery (2 guns)

2nd Polish Infantry Brigade (lvl 8)
1 x Polish Voltigeurs
3 x Line Battalion
2nd Light Gun Battery (2 guns)

Polish Cavalry Brigade (lvl 8)
2nd Ułan Regiment
1st Chasseur Regiment
1 x Horse Gun (2 guns)

WURTTEMBERG DIVISION
General (lvl 9)

1st Wurttemberg Infantry Brigade (lvl 8)
4 x Line Battalion
1 x Medium Gun

2nd Wurttemberg Infantry Brigade (lvl 8)
4 x Line Battalion
1 x Medium Gun

1st Wurttemberg Cavalry Brigade (lvl 8)
1 x Dragoons
2 x Chevalier Leger
1 x Horse Gun (1 gun)

2nd Wurttemberg Cavalry Brigade (lvl 8)
2 x Chasseur Cheval
1 x Horse Gun (1 gun)

Wurttemberg Gun Battery (lvl 8)
2 x Heavy Gun
2 x Medium Gun

2. The game scenario.

Polish and Wurtenbergian Light troops detachment took the village and bridge in the small town of Water Loo. Their task is to keep it till the main forces of the Corps under Marshal Poniatowski arrive and cross the bridge over the river to chase escaping British forces. They don’t know that British generals have a similar plan, but they send a whole division to take the town and defend it against incoming enemy forces.

Buildings can be occupied only by 1 unit (exclude guns or cavalry, those can’t occupy the buildings).

The river is crossable on the whole length, but when the unit move to the other bank need to test for disorganisation (anything but 6 unit is disorganised, that exclude skirmishers and light cavalry Chasseurs, Ułans, Chevaliers, light Dragoons and Hussars). British starting every turn.

Any obstacles, like walls, can cause disorganisation when the unit crosses them. Roll D6, on 1, the unit is disorganised.

Generals can be killed during the melee if, after the 'follow me' order, the unit will finish in melee. If the unit suffered any casualties roll D6. On 1 – the general is killed, and removed from the game, on 2 is wounded (-1, to command). If the General is wounded 2 times is automatically killed. General attached to combat gives 1D6 extra dice to combat.

Buildings give +2 cover save and + 3 to combat resolution.

Walls give +1 cover save.

TURN 0: Poles deploy the Water Loo detachment in the town.

TURN 1: British cavalry arrive.

TURN 2: British Main forces arrive; Polish and Wurtenbergian cavalry arrive.

TURN 3: Polish and Wurtenbergians divisions arrive ((on 5-6) test per brigade)

TURN 4: Polish and Wurtenbergians divisions arrive ((on 3-6) test per brigade)

TURN 5: Polish and Wurtenbergians divisions arrive (all remaining units)

TURN 6: Wurtenbergian gun battery arrives

Game length 12 turns.

Victory conditions:

The players with the biggest number of victory points will win the game.

1. Killed Skirmish, small Ułan unit or destroyed light gun – 1 point.

2. Killed lvl 8 general or destroyed heavy/medium gun – 2 points.

3. Killed lvl 9 general, or destroyed regular unit – 5 points.

4. Occupy building in town – 5 points.

5. Occupy bridge over the river – 10 points.


3. The game. Gra.

It started very well for the British. Their forces arrived on the table and began the siege of the village with their best troops. Their cavalry screened the flanks. British Heavy Dragoons destroyed the small Uhlan unit and soon one of the British Guard infantry units took the first building in the village destroying the Wurttemberian Jaegers. However, that was the end of their successes...

Zaczęło się bardzo dobrze dla Brytyjczyków. Ich oddziały przybyły na stół i rozpoczęły oblężenie wioski swoimi najlepszymi oddziałami. Ich kawaleria osłaniała flanki. Brytyjscy ciężcy dragoni zniszczyli mały oddział ułanów a wkrótce gwardyjska brytyjska piechota zdobyła budynek obsadzany przez wirtemberskich jegrów. Jednakże był to koniec ich sukcesów.


Polish and Wurttembergian cavalry arrived. They quickly started to deal with their British counterparts. Soon there was no British cavalry... In the meantime, the hard fight for the village continued. The last Polish unit stood still and repulsed incoming British attacks. Then Polish and Wurttembergian infantry arrived...

Przybyła polska i wirtemberska kawaleria. Bardzo szybko zajęli się swoimi kawaleryjskimi przeciwnikami i wkrótce nie było już brytyjskiej kawalerii... W międzyczasie ostatni polski oddział zaciekle bronił się w wiosce przed kolejnymi brytyjskimi atakami. Wtedy przybyła polska i wirtemberska piechota...


The masses of infantry began to pour into the valley. Brits tried to stop them but were unable to do so. Finally, the Wurttembergians started to cross the river. They succeed and after the heavy bombardment, they retook the lost building in the village. At that moment British Rifles sneaked through the river and in the action taken just from Sharpe's movies took the last unoccupied building in the town. Wurttembergians tried to take it but failed. Finally, the time for the game was over. British got 7 victory points versus 45 for troops loyal to Emperor, so they lost the game.

Masy piechoty poczęły się wlewać do doliny. Brytyjczycy próbowali to powstrzymać, ale bezskutecznie. W końcu Wirtemberczycy zaczęli przeprawiać się przez rzekę. Udało im się i po ciężkim bombardowaniu, odzyskali utracony budynek we wiosce. W tym właśnie momencie brytyjscy Rifles, w stylu z filmów o Shapie, przeniknęli niepostrzeżenie do ostatniego, nieobsadzonego budynku. Witremberczycy próbowali go odzyskać, ale bezskutecznie. Ostatecznie, czas na grę skończył się. Brytyjczycy zdobyli 7 punktów przeciw 45 zdobytym przez oddziały lojalne Cesarzowi, więc przegrali grę.




4. Links. Linki.

Campbell (SESWC):

https://www.facebook.com/Seswc.co.uk/posts/4825689437468991

Michael:

to be updated soon...

Flickr:

https://www.flickr.com/photos/asienieboje/albums/72177720296657978

10 lutego 2022

Patriots Redoubt 1781. Reduta patriotów 1781.

Our last Thursday game was a 28mm Black Powder AWI game. We used the whole Michael and some support of John collections. I helped umpire the game and took the surprise part during the late part of the game. It is getting a fine custom during our games...

Nasza ostatnia gra w czwartkowy wieczór, to amerykańska rewolucja w skali 28mm z zasadami Black Powder. Do gry użyliśmy całej kolekcji Michaela z małym wsparciem figurek Johna. Pomagałem prowadzić grę i wziąłem zaskakujący udział w dalszej części gry. Staje się to powoli naszym zwyczajem w grach...


SCENARIO / SCENARIUSZ: Michael Schneider
UMPIRING / PROWADZENIE GRY: Michael Schneider, Bartek Żynda
SCENERY / SCENERIA: Michael Schneider, SESWC
FIGURES & MODELS / FIGURKI I MODELE: Michael Schneider, John

1. Forces. Siły.


GREAT BRITAIN / WIELKA BRYTANIA
(Alisdair, Campbell, Peter)

1st Infantry Brigade

3 x British Line
1 x Light Gun
1 x British Dragoons

2nd Infantry Brigade

1 x Skirmishers
1 x British Grenadiers
2 x Line Infantry
1 x Siege Gun

3rd Infantry Brigade

1 x Skirmishers
3 x British Line
1 x Light Gun

4th Infantry Brigade

1 x Jaegers
1 x Hessian Grenadiers
2 x Hessian Line
1 x Light Gun

5th Infantry Brigade

1 x Hessian Grenadiers
1 x Hessian Line
1 x British Dragoons


UNITED STATES / STANY ZJEDNOCZONE
(John, Mike)

1st Infantry Brigade

1 x Native Americans
3 x Continentals
1 x Light Gun

2nd Infantry Brigade

2 x Continentals
1 x Militia
1 x Siege Gun

3rd Infantry Brigade

1 x Skirmishers
2 x Continentals
1 s Militia
1 x Light Gun

Reinforcements:

4th Infantry Brigade

3 x Militia

French (5th) Brigade 

1 x French Grenadiers
2 x French Line
1 x Light Gun
1 x American Dragoons


2. The Game. Gra.

It will be more of a description of what happened on the left flank of the British because I was not paying much attention to what was going on on the other flank. There Peter and Campbell attacked Mike's positions. They managed to clear fortifications off the American guns, even climb on the walls but were repulsed. For more details check Campbell's and Michael's relations (links are on the bottom of the relation).

Będzie to bardziej opis tego co stało się na lewej flance Brtytyjczyków, ponieważ nie za bardzo zwracałem uwagę, co działo się na ich drugiej flance. Tam Peter i Campbell atakowali pozycje Mike'a. Udało im się oczyścić fortyfikacje z amerykańskich dział, wspiąć się na obwarowania, ale zostali odparci. Po więcej szczegółów sprawdźcie relacje Campbella i Michaela (linki na dole relacji).


Here is what happened on the side supervised by myself ;) Alisdair commanded both Hessian brigades, quickly marched with one of them towards American fortifications and charged them. It started a very long melee, where both sides slowly get shattered. It seemed that the Hessians finally broke the defenders but then something happened on their left flank.

Teraz opis tego co zdarzyło się na tej stronie stołu nadzorowanego przeze mnie ;) Alisdair, który dowodził obiema heskimi brygadami, szybko ruszył w kierunku amerykańskich umocnień i natarł na nie. To zaczęło cały ciąg długiego starcia wręcz, gdzie obie strony powoli się wykrwawiały. Wyglądało na to, że heskie oddziały w końcu złamią obrońców, ale wtedy coś się wydarzyło na ich lewej flance.


The French brigade appeared on their flank, ready to charge them on the back. I ordered them to do so, but failed! Alisdair feeling that something like this will happen, kept one Hessian brigade a little back. He managed to face the French and moved against them. However, he failed to order his dragoons. That was a great opportunity for my dragoons, who charged them on their back! After a quick fight, British dragoons get destroyed. It wasn't over yet. My dragoons have another great moment in the game and again they charged another unit in their rear! This time it was Hessian infantry. They also managed to destroy them. That helped Americans to finally win the combat on the walls. The whole Hessian brigade was destroyed. In the meantime, my French battered the second Hessian brigade. Finally surrounded them and only end of time save the Germans from total annihilation. The game finished with an American victory!

Francuska brygada pojawiła się na ich flance, gotowa zaatakować ich od tyłu. Wydałem taki rozkaz, ale nie został on wykonany! Alisdair przeczuwając, że coś takiego może się wydarzyć, jedną z heskich brygad pozostawił lekko w tyle. Udało mu się wykonać zwrot i stanąć naprzeciw moich Francuzów. Nie udało mu się jednak obrócić swoich dragonów. To była doskonała okazja dla moich dragonów, którzy zaatakowali ich od tyłu! Po krótkiej walce brytyjscy dragoni zostali zniszczeni. To nie był jednak koniec. Moi dragoni mieli jeszcze jeden wielki moment w grze. Znów zaszarżowali oddział na ich tyły. Tym razem była to heska piechota. Ci również zostali zniszczeni. To pomogło Amerykanom wygrać starcie wręcz na murach. Cała heska brygada została zniszczona. W międzyczasie moi Francuzi masakrowali drugą heską brygadę. W końcu udało im się ich okrążyć i jedynie upływ czasu ocalił ich przez całkowitym zniszczeniem. Gra zakończyła się amerykańskim zwycięstwem!


3. Links. Linki.

Michael:

https://meneken.blogspot.com/2022/02/1781-cornwallis-doubts-clinton-relief.html

Campbell (SESWC):

https://www.facebook.com/Seswc.co.uk/posts/4808098105894791

Flickr:

https://www.flickr.com/photos/asienieboje/albums/72177720296586570

03 lutego 2022

Res ad triarios venit!

Our last game in January was the club's Sunday clash with 6 players participating. The rules were To the Strongest. Every player fielded their ancient army, 130 pts. strong. It was Rome versus Gallo-Greek alliance.

Nasza ostatnia gra styczniowa, była niedzielnym spotkaniem klubowym z udziałem 6 graczy. Użyliśmy zasad To the Strongest. Każdy gracz wystawił swoją armię na 130 pkt. Był to pojedynek Rzymu z galogreckim sojuszem.


SCENARIO / SCENARIUSZ: Peter Mearns
UMPIRING / PROWADZENIE GRY: Peter Mearns
SCENERY / SCENERIA: SESWC, Peter Mearns
FIGURES & MODELS / FIGURKI I MODELE: Michael Schneider, John, Campbell Hardie, Jack Glanville, Peter Mearns, Bartek Żynda


1. Forces. Siły.


GALLO-GREEK ALLIANCE

SOJUSZ GALLOGRECKI

Seleucids - Peter

Spartans - Michael

Gauls - Campbell

ROME

RZYM

Polybian Romans - Bartek

Marian Romans - John

Marian Romans - Jack


2. The game. Gra.

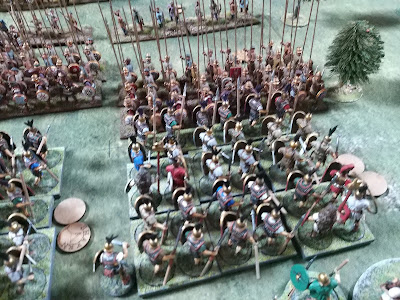
The Alliance forces clashed with Romans on the whole front. The first scratch in Roman lines was made against my cavalry. To be honest I have no idea for these men on horses and how to lead them to the battle. They always died first and are the reason for my future problems... Peter destroyed them and opened my flank. That forced me to perform an even much aggressive attack against Peter's phalangs. I managed to disorganize them, but Peter withdrew them and in that way saved his troops.

Siły Sojuszu starły się z Rzymianami na całym froncie. Pierwsza rysa w rzymskich liniach została wykonana przez moją kawalerię. Tak prawdę powiedziawszy nie mam na nich pomysłu, jak ich prowadzić w bitwie. Zawsze giną w walce jako pierwsi i są później powodem moich dalszych problemów... Peter zniszczył ich i w ten sposób otworzył moją flankę. To zmusiło mnie do jeszcze bardziej agresywnego ataku na falangi Petera. Udało mi się je zdezorganizować, ale Peterowi udało się je wycofać i w ten sposób ocalił swoje oddziały.


Jack and John also had a bad time. Campbell beat Jacks legion and Michael managed to outflank John and also beat him. We started losing money very quickly. Finally, we all lost them all. Then we got extra 5 coins, but those were lost very quickly. Roman forces were broken and lost their game. The fight was so fierce that it took my lines to exchange to the Triarii. I don't remember if that ever happened to me before...

Jack i John również przeżywali swoje złe czasy. Campbell pobił legiony Jacka a Michaelowi udało się oskrzydlić Johna i również go pobić. Zaczęliśmy tracić nasze monety bardzo szybko. Ostatecznie straciliśmy je wszystkie. Wtedy dostaliśmy dodatkowe 5 monet, ale je też straciliśmy. Rzymskie siły były złamane i przegrały grę. Walka była tak zacięta, że moje linie wymieniły się aż do triarii. Nie pamiętam by coś takiego wcześniej mi się przydarzyło...


Here are some pictures made by Peter. I decided that it would be a shame if I did not share them with you.

Oto kilka zdjęć wykonanych przez Petera. Uznałem, że szkoda by było, gdybym się nimi z Wami nie podzielił.


3. Links. Linki.

Michael (here also our previous game):

https://meneken.blogspot.com/2022/02/2-for-1-ww2-54mm-skirmish-and-big.html

Campbell (SESWC):

https://www.facebook.com/Seswc.co.uk/posts/4790718574299411

Flickr:

https://www.flickr.com/photos/asienieboje/albums/72177720296429941