20 lipca 2025

Nimitz: 1905 Russo-Japanese War.

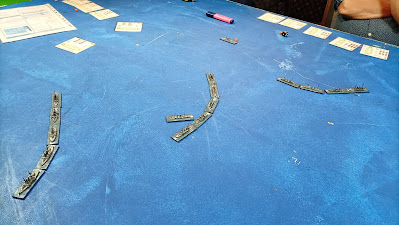
The Russo-Japanese War of 1905 at sea was the focus of our recent game. Tim brought his collection of ships from that war, and this time we decided to use the Nimitz rules. These rules are much simpler than the Tsushima we used before, and they are also more enjoyable to play. We had six players, with three on each side, representing a Russian fleet attempting to break through the Japanese blockade. It truly is a classic of the genre.


SCENARIO: Tim Chant
UMPIRING
Tim Chant
SCENERYSESWC
FIGURES & MODELSTim Chant


1. Forces.


IMPERIAL RUSSIAN NAVY

1st Squadron (Bartek)

Oslyabya
Sissoi Veliky
Navarin
Admiral Nakhimov
Izumrud

2nd Squadron (Peter)

Oleg
Aurora
Dmitrii Donskoi
Vladimir Monomakh

3rd Squadron (Alasdair)

Admiral Seniavin
General Admiral Graf Apraksin
Imperator Nikolai I 
Admiral Ushakov


IMPERIAL JAPANESE NAVY

1st Squadron (David)

Shikishima
Fuji
Mikasa
Asahi
Azuma


2nd Squadron (Jimmy)

Kasuga
Chitose
Iwate
Niitaka
Izumi

 3rd Squadron (Ben)

Kasagi
Tokiwa
Nisshin
Otowa
Asawa
Yakumo


2. The Game.

Our scenario resembled the actual Battle of Tsushima. The Russians needed to break through the Japanese blockade. Our plan involved our two strongest squadrons—mine and Alasdair's—sailing at full speed along the long edges of the table. Peter was designated to act as a decoy for the Japanese fleet. We assumed that the Japanese would focus their efforts on one squadron—in our plan, that was Peter's —while the other two squadrons would attempt to breach the Japanese defences.


I had almost predicted the behaviour of the Japanese fleet. Ben and David led their two squadrons against mine, while Jimmy positioned himself in the centre of the battlefield to face Peter. Alasdair remained at a safe distance. The Russians fired first, and my ships caused significant damage to the Kasagi. However, the Japanese soon opened fire, concentrating their efforts on Oslabya, which was the lead ship of my team.


Jimmy had divided his squadron into three teams and primarily engaged in combat against Peter, while occasionally targeting my squadron and Alasdair's. His efforts finally paid off when he successfully launched a torpedo attack, sinking the Dimitri Donskoi. As the game entered its decisive phase, we were unable to complete it due to running out of time. The Russians still had most of their forces afloat, although the Japanese retained the initiative. Despite the Russians having already lost two ships by that point, we concluded that the game ended in a draw.


3. Links.

SESWC:

https://www.facebook.com/groups/631841809210352

FLICKR:

https://www.flickr.com/photos/asienieboje/albums/72177720327654720

13 lipca 2025

Black Powder: Grochów 1809.

Another game from Roger Grafton's supplement to the Polish-Austrian War of 1809. This time, it focuses on the third scenario: the Battle of Grochów, fought on April 26, 1809. On the table are my and Michael's collections, and the rules used are Black Powder.


SCENARIO: Roger Grafton, Bartek Żynda
UMPIRING
Bartek Żynda
SCENERYBartek Żynda, SESWC
FIGURES & MODELS: Michael Schneider, Bartek Żynda


1. Forces.


In his scenarios, Roger includes additional forces to enhance gameplay and make the combat more engaging. The original battle was fought by the Duchy of Warsaw's 12th Infantry Regiment and the 2nd Ułan Regiment, who were supported by two artillery guns. The Austrian side had two infantry battalions and a squadron of Hussars, also backed by some artillery.

DUCHY OF WARSAW

CinC (8) (Bartek)

1st Infantry Brigade

Brigade General (8) (Jimmy)

4 x Infantry Battalion
1 x Field Gun Battery

2nd Infantry Brigade

Brigade General (8, High Independence) (Bartek)

4 x Infantry Battalion
1 x Field Gun Battery

Cavalry Brigade

Brigade General (8, High Effectiveness) (Bartek)

1 x Ułan Regiment
2 x Small Ułan Detachment
1 x Horse Gun Battery


AUSTRIA

CinC (8, Low Decisiveness) (Michael)

1st Infantry Brigade

Brigade General (8, High Agression) (Michael)

1 x Large Infantry Battalion
2 x Infantry Battalion
1 x Jaeger Detachment
1 x Gun Battery

2nd Infantry Brigade

Brigade General (8) (David)

1 x Large Infantry Battalion
2 x Infantry Battalion
1 x Jaeger Detachment
1 x Gun Battery

Cavalry Brigade

Brigade General (8) (Michael)

1 x Small Cuirassier Detachment
1 x Small Hussar Detachment
1 x Horse Gun Battery


2. The Game.

While writing my previous game report, I realised I forgot to mention that the Polish side had a choice before the game: they could either have their voltigeurs form a separate unit or cooperate with their main battalions. In this instance, both Jimmy and I opted for the latter. Our plan was for Jimmy's forces to launch a feint attack on the Austrian flank, which would distract David's forces and prevent them from interfering with my brigade, which was set to directly assault Grochów. This assault would occur after my Uhlans had either defeated or driven off the Austrian cavalry. The only concern that truly worried me was the Austrian cuirassiers; so far, I had only managed to defeat them once.


Due to either my unclear instructions or Jimmy’s carelessness, he deployed one of his battalions too far into the centre, making it vulnerable to concentrated Austrian fire. This led to the destruction of that battalion. However, the rest of the forces advanced as planned. Jimmy launched an attack on David's forces, but in two separate engagements, he lost two battalions completely. His final unit withdrew and prepared for another attack, but it became unnecessary, as developments in the centre and on our left flank ultimately determined the outcome of the battle.


My Uhlans efficiently crossed the river using the bridge and took up positions on our left flank. The Austrian cavalry came out to confront them. My regular Uhlans wasted no time and immediately charged the Cuirassiers. The outcome was predictable: my Uhlans recoiled from the Cuirassiers, but they were so badly damaged that they could not pursue. My smaller Uhlans then engaged the Hussars and Cuirassiers. This time, they were luckier, successfully driving back the Hussars they had pursued, and they ultimately destroyed the Cuirassiers! With the Austrian right flank now open, my infantry could launch an attack!


My infantry captured Gocław on the first turn and then waited for their next move. As my cavalry began to succeed, Jimmy's actions led to the capture of most of David and Michael's infantry. Taking advantage of this, they launched an attack on Grochów. They managed to reach the village buildings, where hand-to-hand combat ensued. In the first turn, the Austrians managed to stop the Poles at the village border, but in the second turn, the Poles broke into the village. The second infantry battalion then joined the fight. Although this battalion came under fire from Austrian artillery, it fortunately suffered no damage. Michael also applied the Traversing Fire rule here, though I believe, based on my interpretation of the rules, that it shouldn't have happened. We will revisit this topic in future games. Returning to the battlefield events, the Poles were able to eliminate the Austrians in Grochów, leading to the collapse of the Austrian lines. Furthermore, the Uhlans defeated the Hussars, resulting in the Austrians' surrender at that moment. It was another victory for the Poles!


Once again, I decided to employ the original tactics used by the Polish forces during this battle, and once again, they proved effective. The deployment of the Austrian forces also contributed positively. Instead of placing a regular infantry battalion in Grochów, I would have opted for a large-sized one. I would arrange the infantry brigades in a line, one behind the other, to provide additional protection for Grochów against an anticipated frontal assault by the Polish forces, possibly involving both infantry brigades. For the first time, we also took into account the individual characteristics of the commanders, which added a unique dimension to the game. We will incorporate this approach in future games.


3. Links.

SESWC:

https://www.facebook.com/groups/631841809210352

FLICKR:

https://www.flickr.com/photos/asienieboje/albums/72177720327501746

06 lipca 2025

Black Powder: Radzymin 1809.

Today, I’m sharing a report on the game we played last Thursday. Michael and I both have collections from the Napoleonic Wars: Michael has the Austrian forces, while I represent the Duchy of Warsaw. A while back, Roger Grafton prepared a set of scenarios for the Polish-Austrian War of 1809, which he shared on the General D'Armee fan page on Facebook. I decided to adapt these scenarios for our favourite set, Black Powder, and we played our first game. The scenarios start with the Battle of Raszyn; however, we had already recreated that battle when Michael's collection made its debut on the table. Therefore, I chose to proceed with the skirmish at Radzymin next. 


SCENARIO: Roger Grafton, Bartek Żynda
UMPIRING
Bartek Żynda
SCENERYBartek Żynda, SESWC
FIGURES & MODELS: Michael Schneider, Bartek Żynda


1. Forces.


Historically speaking, the original skirmish featured one infantry battalion on the Polish side, supported by a squadron of lancers and four cannons. In contrast, the Austrian forces consisted of two infantry battalions, a squadron of hussars, and fourteen cannons. Roger includes additional forces in his scenarios to enhance gameplay and make the combat more engaging.

DUCHY OF WARSAW

CinC General Dąbrowski (9) (Bartek)

1st Infantry Brigade (Jimmy)

Brigade General (8)

4 x Infantry Battalion

2nd Infantry Brigade (Alasdair)

Brigade General (8)

2 x Infantry Battalion
1 x Voltiguer Detachment
1 x Gun Halfbattery

Cavalry Brigade (David)

Brigade General (8)

2 x Ułan Regiment
1 x Horse Gun Halfbattery


AUSTRIA

CinC General Mohr (8) (Tim)

1st Infantry Brigade (Tim)

Brigade General (8)

2 x Infantry Battalion
1 x Jaeger Detachment
1 x Gun Battery

2nd Infantry Regiment (Andy)

Brigade General (8)

1 x Infantry Regiment
1 x Grenadier Regiment
1 x Grenadier Detachment
1 x Jaeger Detachment
1 x Gun Battery

Cavalry Brigade (Michael)

Brigade General (8)

2 x Hussar Detachment
1 x Horse Gun Battery


2. The Game.

The Austrians were the first to deploy, positioning most of their infantry in Radzymin, ready to cross the bridge and evacuate from the battlefield, which would secure their victory. The Austrian cavalry stationed itself at a distance to cover the retreat from the south. Meanwhile, the Poles divided their forces into two columns. Alasdair aimed to approach Radzymin from the south, while Jimmy and David were tasked with cutting off Radzymin from the north.


Alasdair's attack from the south was swiftly thwarted by Tim and Andy's units, especially the artillery, the Jägers, and a small contingent of Grenadiers. Furthermore, Alasdair exposed himself to a flanking attack by the Austrian cavalry. The cavalry charged the Voltigeurs, who retreated, revealing a half-battery of cannons that the Hussars later destroyed. Dąbrowski was called upon to intervene; he rallied the Voltigeurs and, alongside them, supported Alasdair's assault. They faced another charge from the Hussars, but this time they formed a square, successfully repelling the attack. Meanwhile, Alasdair's remaining units were bombarded by the cannons of Michael and Tim, resulting in the destruction of one of his battalions. The second battalion was attacked by the Grenadiers, but that assault was repelled, destroying the Grenadier unit.


The game, however, was ultimately decided on the opposite bank of the Rządza River, where the attack was led by the brigades of Jimmy and David. Michael warned Tim and Andy about the impending attack, which likely instilled fear in them, much like the Allies feared the German Tigers during World War II. In this instance, however, their object of fear was the Uhlans. In the first round, Tim moved the first of his battalions off the table. However, David's strategic move, which positioned the Uhlans very close to the bridge, forced Tim to recall his unit back on the table. He then arranged it in a square formation and did the same with the second unit. This tactic effectively blocked the cavalry's path, theoretically allowing other units to exit the village safely.


Jimmy led a charge with his infantry against both formations of the Austrian soldiers. After an intense battle, he successfully broke through both squares and blocked the enemy's escape route. Following this, Tim attempted to break through the blockade, but his attack also failed. At this point, the Austrian forces surrendered, and the battle concluded with a victory for the Poles!


3. Links.

SESWC:

https://www.facebook.com/groups/631841809210352

FLICKR:

https://www.flickr.com/photos/asienieboje/albums/72177720327375364