niedziela, 29 września 2013

Disaster or Glory but disaster this time... Klęska lub chwała, lecz to pierwsze tym razem...

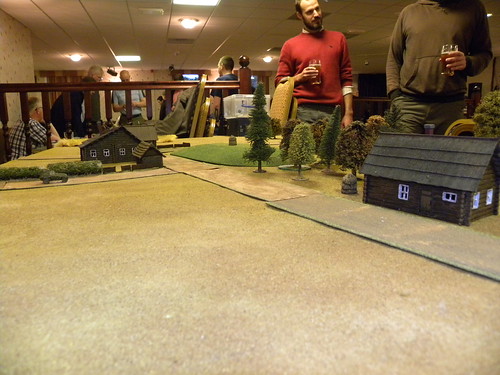
Sometimes during the all games played we have this one we wanna remember, and the one we wanna to forget as quick as possible. Our last game in our club is for the second sort of the games - to forget about it as soon as posible... So from the beggining. Last Thursday, I joined the Michael's AWI Black Powder Campaign game, mostly to support our new club gamer Matt. As Campbell hasn't any game that night he join Michael's forces. More about the troops and all campaign you can read on Michael's blog at this link (click here).
Czasami wśród wszystkich gier jakie rozgrywamy są takie, o których chcielibyśmy pamiętac jak najdłużej i takie jakie chcielibyśmy jak najszybciej zapomnieć. Nasza ostatnia gra w klubie należy do drugiego rodzaju takich gier - zapomnieć jak najszybciej... Najlepiej zacząć więc od początku. W ostatni czwartek dołączyłem do organizowanej przez Michaela kampanii Amerykańskiej Wojny o Niepodległość, rozgrywanej na zasadach Black Powder, głównie by wesprzeć naszego nowego gracza Matta. Jako że Campbell w tym dniu nie miał umówionej żadnej gry dołączył do sił Michaela. Więcej o samej kampanii możecie przeczytać na blogu Michaela klikając na ten link (kliknij tutaj).

SCENARIO/SCENARIUSZ: Michael's Schneider Card System
FIGURES&MODELS/FIGURKI I MODELE: Michael Schneider
SCENERY/SCENERIA: SESWC

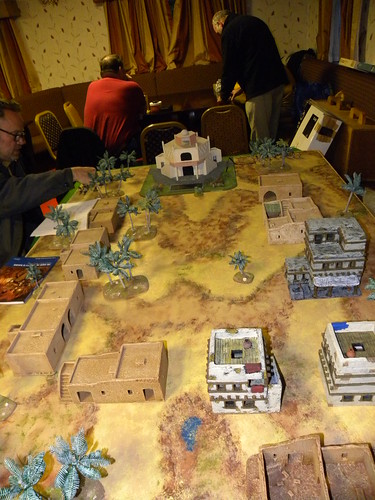
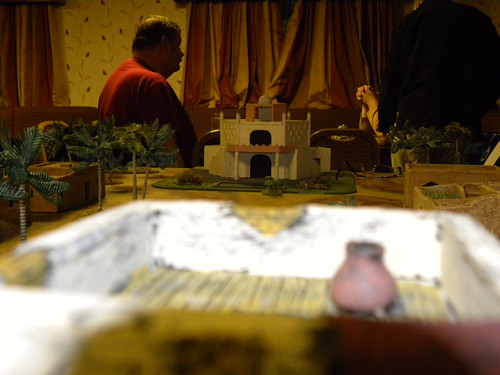
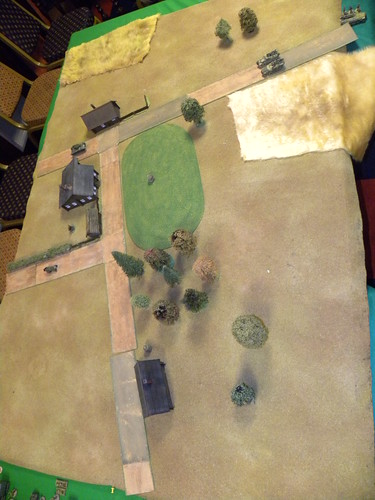
1. Forces and battlefield/Siły i pole bitwy.

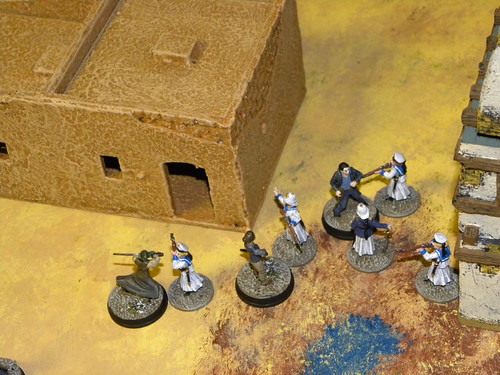
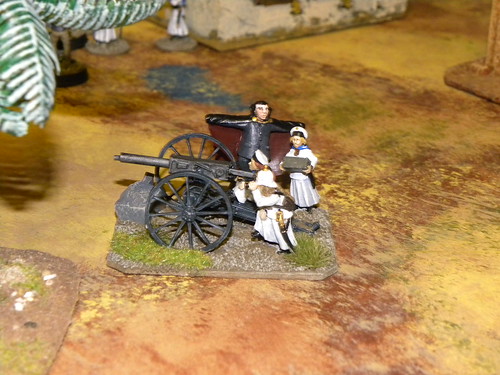
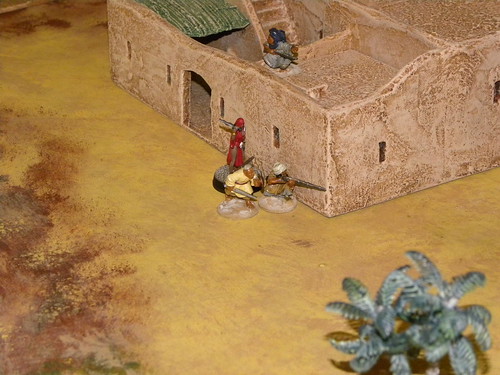
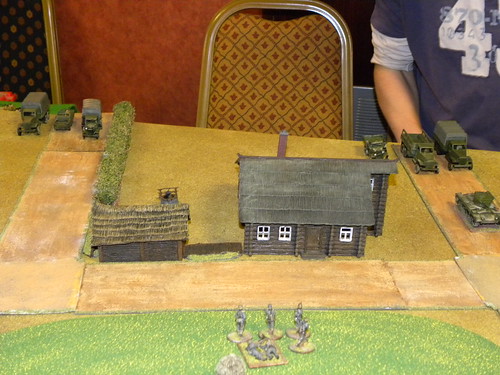
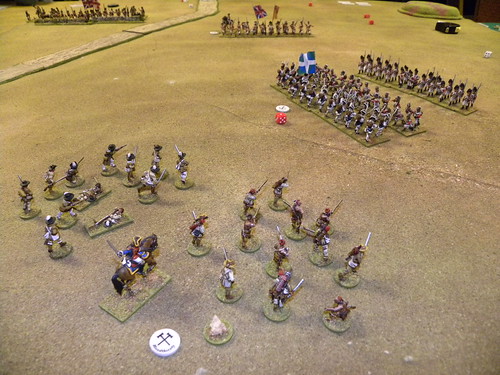
Michael for his games preparing very detailed briefing. This pictures below is some part of this. For more clearance Michael commanded British, Campbell Hesians, Matt Americans and French, Skirmishes, Indians and guns myself.
Michael dla swoich gier przygotowuje zazwyczaj bardzo szczegółowe listy. Obrazek poniżej pokazuje jedną z ich części. Dla lepszej jasności, Michael dowodził Brytyjczykami, Campbell siłami Hezji, Matt Amerykanami, natomiast ja Francuzamie, Harcownikami, Indianami i działami.
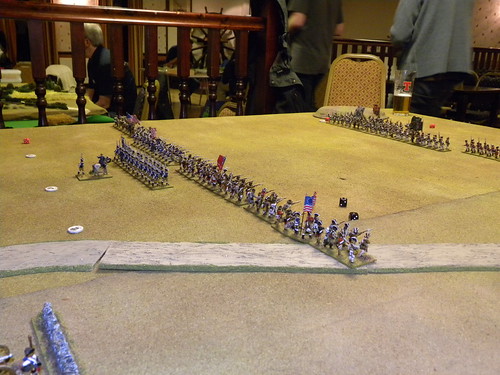
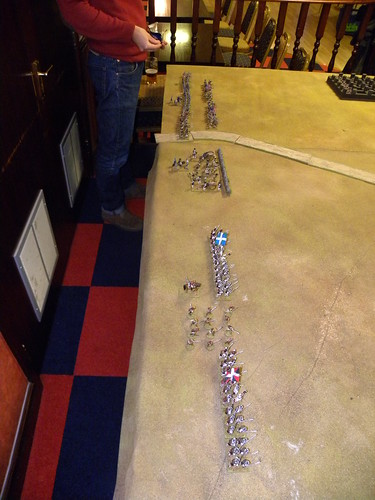
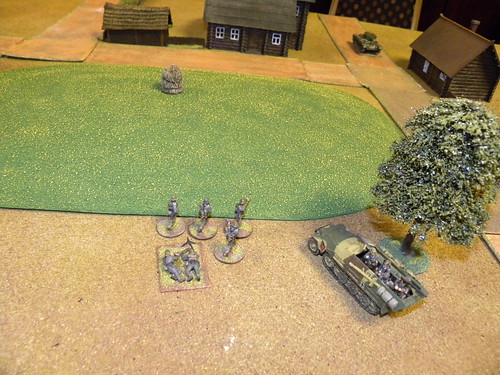
American-French line. Linia amerykańsko-francuska.
 
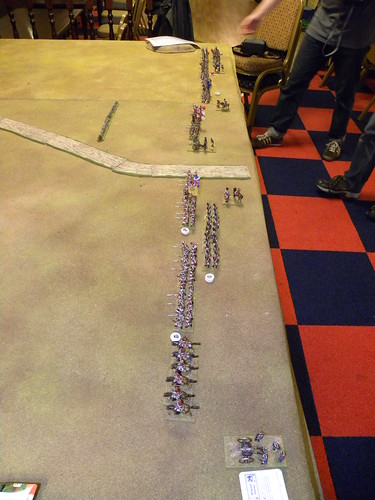
British-Hesian line. Linia brytyjsko-hezyjska.

2. The game/Gra.
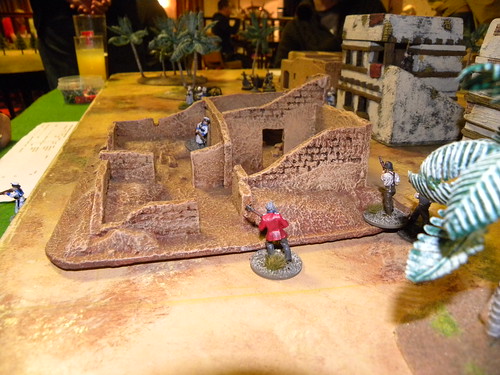
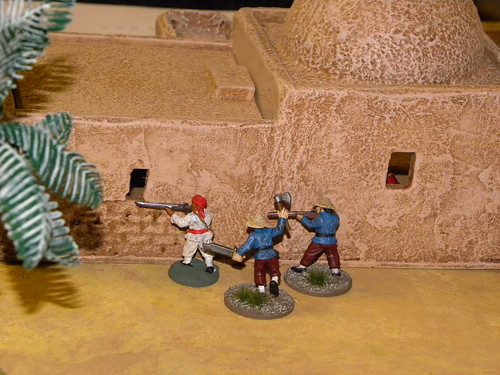
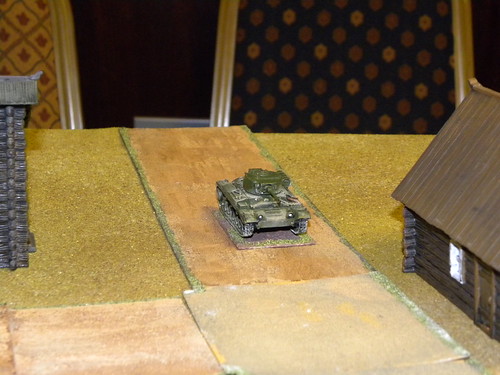
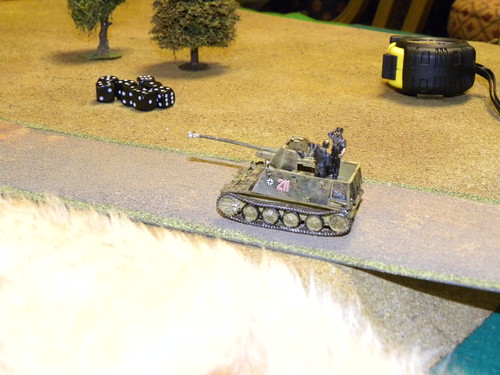
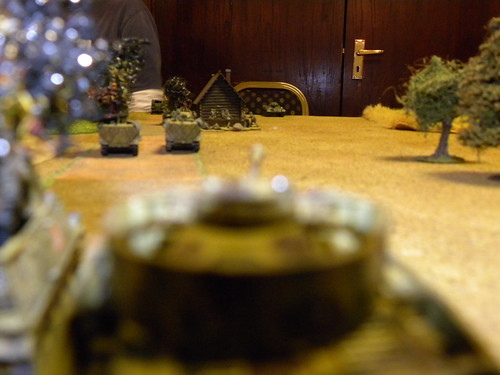
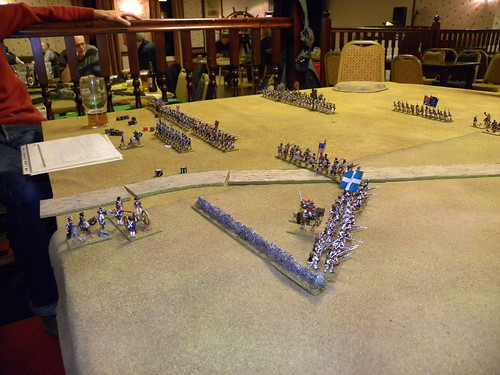
As the battlefield was clear and flat surface without any trees - this seem that the game would could be quite boring, because none of the troops will risk  and come close enought to the enemy, because those part who will do it as the first, would suffer the casualties as the first. (In our club we play House Rule, set by Bill Gilchrist: Initiative Movement, Firing and Ordered Movement). For the first few turns the game exactly looks like this, both lines faced each other, and both side guns tryed to do something, but all targets ware on the very long distance, so there was no results. So everything looks like this game will be a wasted  night... so I decided to change it...
Jako, że pole bitwy to w tym wypadku była pusta i do tego płaska powierzchnia, bez jakichkolwiek drzew - to dawało przypuszczenie, że gra może być dość nudna, ponieważ żadna ze stron nie byłaby chętna ryzykować podejścia do przeciwnika, ponieważ pierwsza strona, która by to zrobiła naraziła by się pierwsza na straty (w naszym klubie gramy sekwencję ruchów wg zasad opracowanych przez Billa Gilchrista, a więc: Ruch w Inicjatywie, Strzał, Ruch poprzez Rozkaz). Przez pierwsze kilka tur, gra tak właśnie wyglądała, obie linie stały naprzeciw siebie i działa obu stron próbowały zadać przeciwnikowi jakieś straty, ale że ogień był prowadzony na dalekich zasięgach, efekty były bardzo mierne. Wszystko wyglądało, że będzie to zmarnowany wieczór... postanowiłem to więc zmienić...

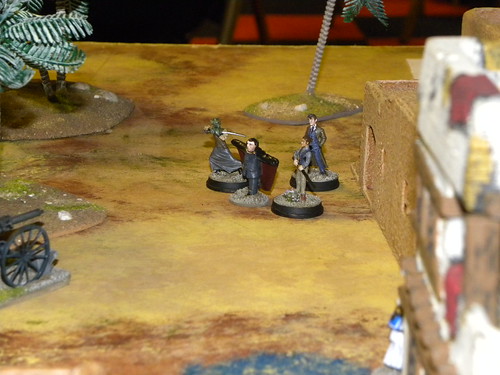
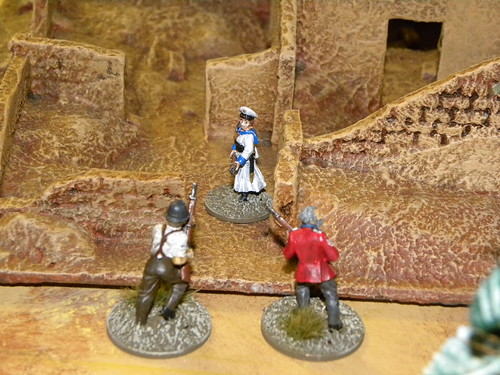
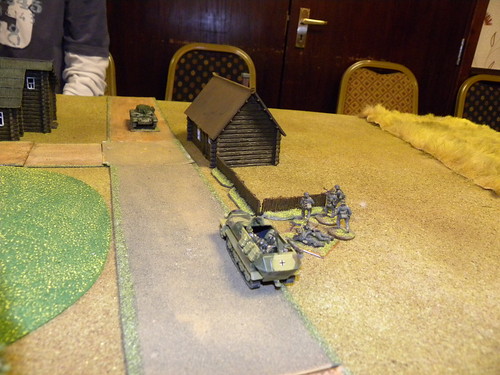
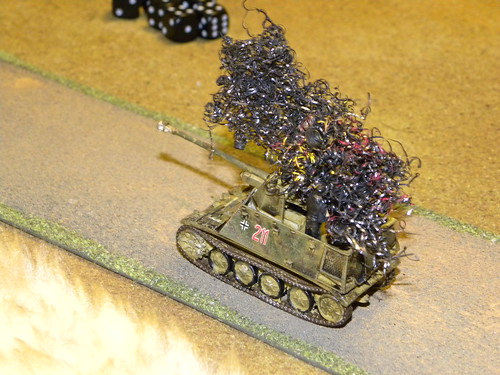
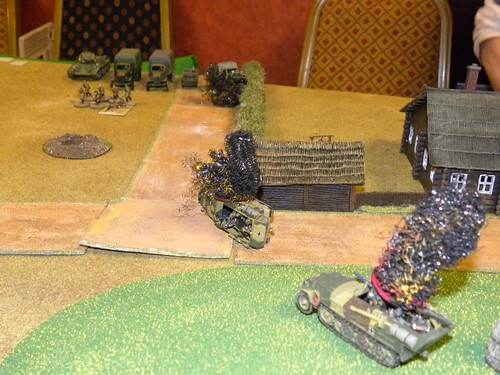
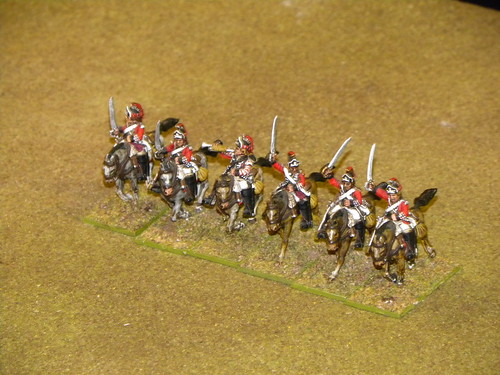
Everyone, who ever played against me, known that I like risking on the battlefield as my gold rules: "Who wants to live forever?" and "Death or Glory", but this time it finished quite bad for myself. First my French troops moved closer to the Brits, and Brits answered with fire. The both battalions had untested stamina, so when it comes for the first casualties I rolled for stamina and I rolled very badly. I rolled 1, so the stamina was 1 for one of the both battalions. Not enought for casualties, so I had to roll for Morale, and I rolled bad again and that how I lost my first unit. Now the situation looks very bad for myself, but soon it looked worst. British cavalry charged on my Indians, and whipped them from the table. American Irregulars tryed to do something, but during the time I ordered them, I blundered (double 6 for order) them as well, and again I rolled very bad, so as the effect they charged the British Dragoons. It was bad, very bad, so I lost next unit. Finally I bring troops to the order, but it was to late as the battle was already lost...
Każdy, kto kiedykolwiek grał przeciwko mnie, wie że lubię bardzo ryzykować na polu bitwy, jako że przyświecają mi zawsze dwie złote reguły: "Kto chciałby żyć wiecznie?" i "Śmierć lub Chwała", jednak tym razem skończyło się to dla mnie bardzo źle. Wpierw moi Francuzi zbliżyli się do Brytyjczyków, na co ci drudzy odpowiedzieli ogniem. Moje oba bataliony miały nieokreśloną wytrzymałość, toteż gdy przyszło do pierwszych strat, musiałem ją przetestować i test ten wypadł bardzo źle. Rzuciłem 1, więc wytrzymałość wyniosła 1 dla jednego z batalionów. Nie było to wystarczająco by pokryć straty i trzeba było przetestować morale. Tym razem też rzuciłem bardzo nisko i w ten sposób straciłem pierwszy oddział. Teraz sytuacja wyglądała bardzo źle, ale wkrótce miała wyglądać jeszcze gorzej. Brytyjska kawaleria zaszarżowała moich Indian i dosłownie zmiotła ich ze stołu. Amerykańskie oddziały nieregularne próbowały coś zrobić, jednak podczas wydawania im rozkazu wyrzuciłem dublet szóstek, i znów rzuciłem bardzo źle na efekt i moi nieregularni wykonali samobójczą szarżę na brytyjskich dragonów. To nie było dobre i w ten sposób straciłem kolejny oddział. W końcu udało mi się opanować jakoś chaos w reszcie moich oddziałów, ale było to już za późno, ponieważ bitwa była już przegrana.

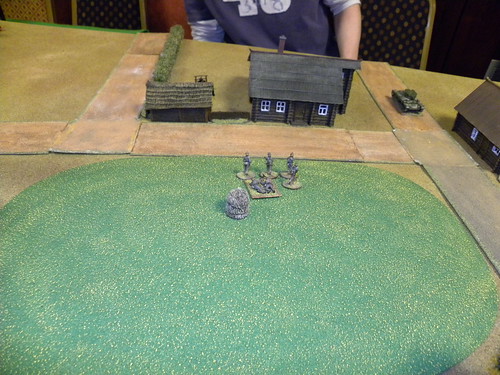
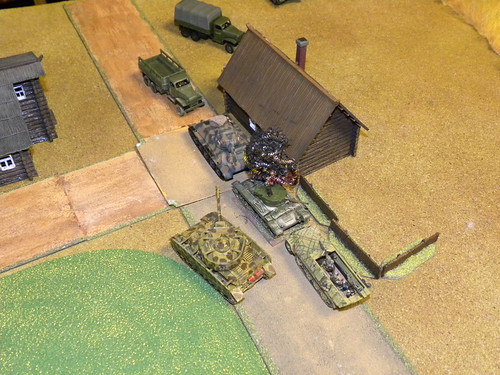
From the relation above, you can ask what about Americans and Hesians? Actually nothing. Matt and Campbell observing my disaster decided not to move their troops, and to the end of the game both of them stand one in front each other and did nothing...
Z powyższej relacji nie wiadomo co stało się z Amerykanami i Hezyjczykami. W sumie to nic. Matt i Campbell będąc świadkiem moich problemów zdecydowali się nie poruszać swoich oddziałów i do końca gry stali naprzeciwko siebie nie robiąc nic...

3. Summary/Podsumowanie.
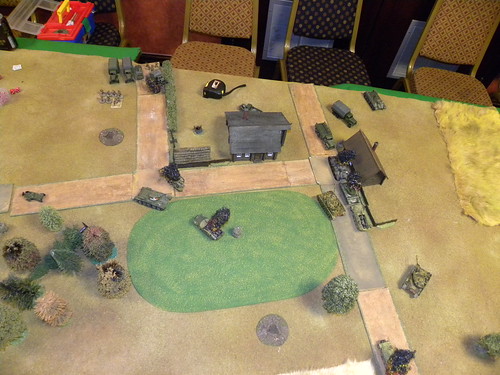
As you can see I lost this game on my demand. If I did not move first, but wait as Matt and Campbell, probably all game would looks completely different, maybe it would have some result. At least we had very good fun with all my morale tests, which all went very bad this time - I think that I did not pass any of them during the game.
Jak widzicie, przegrałem tą grę na własne żądanie. Jeśli nie poruszyłbym się jako pierwszy a czekał tak jak Matt i Campbell, prawdopodobnie gra wyglądała by całkowicie inaczej, może by miała i jakiś rezultat. Jednakże mieliśmy wszyscy dużo dobrej zabawy podczas moich testów morale, które w większości poszły bardzo źle - wydaje mi się, że podczas całej gry nie zdałem ani jednego.
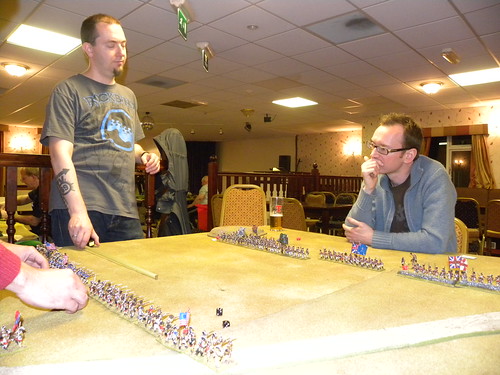
Victorious team: Michael and Campbell. Zwycięski zespół.

And some links at the end:
I kilka linków na zakończenie:
Relation on Michael's blog:
Relacja na blogu Michaela:
And as usual, the gallery on flickr:
I jak zawsze galeria na flickr:

sobota, 21 września 2013

In Her Majesty’s Name

Usually when i raport the games played by myself, they are mostly with historical background. But sometimes, from time to time I like to play something extraordinary. This is the reason I played the In Her Majesty's Name, the steampunk skirmish from Osprey. It was the second game in the club with this system and not everything went smooth, but the game itself was quite enjoyable and very funny as well.
Zazwyczaj gry, które opisuję mają jakieś poparcie historyczne, ale od czasu do czasu lubię zagrać w coś niecodziennego. To był powód aby zagrać w In Her Majesty's Name, steampunkowy skirmisz od Ospreya. To była dopiero druga gra z tymi zasadami i nie wszystko poszło gładko ale i tak gra była bardzo zadowalająca i bardzo zabawna.

SCENARIO/SCENARIUSZ: Colin Jack
FIGURES&MODELS/FIGURKI I MODELE: Colin Jack, Bill Gilchrist
SCENERY/SCENERIA: Colin Jack, SESWC
Somewhere in India... Gdzieś w Indiach...
...there is the temple... ...jest światynia...
...placed in forgoten city. ...położona w zapomnianym miejscu.
 
1. Sides/Strony.
 
In this system you lead an Adventuring Company, a group of extraordinary heroes together with some support team. Remember that, this is alternative world, so the heroes have sometimes special abilities. For more details of those troops, visit the Osprey site, or just google it. In our game we used five teams, which ware:
W tym systemie prowadzisz kompanię Poszukiwaczy Przygód, składająca się z niezwyczajnych bohaterów wraz z wspierającym ich zespołem. Pamiętajcie, że jest to alternatywna rzeczywistość, tak więc i bohaterowie posiadają czasem specjalne zdolności. Na temat szczegułów tych grup, polecam odwiedzić stronę Ospreya, lub zwyczajnie wyguglować temat. W naszej grze użyliśmy następujących zespołów:

  • The Cult Of Kali (Colin Jack)
  • Black Dragoon Tong (Mr Ray)
  • Lord Curr Company (Bartek Żynda)
  • Princess Alexandra's Naval Landing Party (Bill Gilchrist)
  • Torchwood (Campbell Hardie)

2. The game/Gra.
In our game we fought to controll as much buildings as we can. Every building gave at the end of the game right to throw a D10 dice - the number of victory points.
W naszej grze walczyliśmy o to by kontrolować jak najwięcej budynków. Każdy budynek dawał prawo do rzutu kością K10 - dającą ilość punktów zwycięstwa.

2.1. Princes Alexandra's Naval Landing Party vs. Lord Curr Company vs. Torchwood
For all the time, our game divided on the few almost separate fights. In the first the Alexandra's ladies fought against the Torchwod team and Lord Curr Company. As the Curr's guys avoid any melees over here and used only the rifles here, the Torchwood team belived in melee only. The worst situation had the Princess team. Being attacked from both sides, finally had broke and all ladies had been removed... There was no directly fight between Lord Curr and Torchwood, however Lord, himself tryed to hit one of the Torchwood team member, but not very succesfull.
Przez cały czas, nasza gra podzieliła się na kilka osobnych strać. W pierwszym z nich  panienki księżniczki Aleksandry starły się z siłami Lorda Curr i drużyną Torchwood. O ile żołnierze lorda starali się unikać tutaj walki wręcz i użyli tutaj wyłącznie strzelb, tak Torchwood zawierzył jedynie rozstrzygnięciu w walce w zwarciu. Najgorszą sytuację miały tutaj panny od Księżniczki. Będąc atakowane z obydwu stron, w końcu zostały złamane i wszystkie usunięte z gry... Pomiędzy siłami Lorda Curr a Torchwood nie było bezpośrednich walk, jednakże Lord, sam we własnej osobie próbował ustrzelić jednego z członków Torchwood, ale bezskutecznie.

2.2. The Cult of Kali vs. Black Dragon Tong.
The main fight for those two teams had place around the temple. It was diverted into one huge melee, which never been solved. It finished with the draw, as none of the teams get any result.
głowne walki toczyły się wokół świątyni. W końcu wszystko tutaj obróciło się w jedną gigantyczną bijatykę, jednakże żadna ze stron nie osiągnęła tutaj widocznego rezultatu i starcie zakończyło się remisem.

2.3. The Cult of Kali vs. Lord Curr Company.
Both sides for the long time tried to ambush each other. Finally everything ended with few melees. The Curr's team successful defended the building, but had to use all heroes besides of Lord Curr, who was busy with the first fight. The whole fight had never been solved here, but in better position was the Curr's team.
Obie strony przez długi czas próbowały zaskoczyć siebie nawzajem. W końcu wszystko przeobraziło się w kilka walk wręcz. Drużyna Curra szczęśliwie obroniła budynek, chociaż musiała użyć tutaj wszystkich swoich bohaterów, oprócz samego Lorda, który akurat zajęty był pierwszym pojedynkiem. Cała walka nie została ostatecznie rozstrzygnięta, jednak w dużo lepszej sytuacji znajdowała się drużyna Curra.

2.4. The Lord Curr Company vs. Black Dragon Tong.
It was the shortest fight of the game. It had happend at the end of the game. The Curr soldiers with their rifles killed two members of the Black Dragon team and I think that they secured the victory of their team. The Dragon team in that time had three buildings, whilst the Curr team had four buildings. Thanks that action, the Dragon team stopped, and never got the last building.
Była to najkrótsza z walk gry. Rozegrała się już na sam jej koniec. Żołnierze Curra przy użyciu swoich strzelb zabili dwóch członków drużyny Czarnego Smoka i myślę, że w ten sposób zabezpieczyli zwycięstwo swojego zespołu. Drużyna Smoka w tym czasie posiadała trzy budynki, natomiast zespół Curra cztery. Dzięki tej akcji, Smoki zostały zatrzymane i nie były w stanie zająć kolejnego budynku.

3. Results of the game/Rezultat gry.

At the end of the game the order was:
Na zakończenie gry kolejność była następująca:

1. Lord Curr Company - 4 buildings - 27 VP
2. Black Dragon Tong - 3 buildings - 21 VP
3. The Cult of Kali - 3 buildings - less than 20 VP
4. Torchwood - 1 building
5. Princess Alexandra's Naval Landing Party - 0 buildings.

4. Summary/Podsumowanie.
The system is quite well designed. It is fast playing game. Is good, however ther are some buts. I'm dissapointed that there is no extra modificators when you are shoting at Point Blank or minuses when there is shooting on long distance. The same is with the MGs, at the short range, those weapon should be very deadly, but it isn't. The strong side of the game are the abilities of the heroes. Every of them have his strengths and weaknesses, what made the characters very ballanced. Any way very good game for every entusiastic of the steampunk reality, and for everyone who want to play something different.
System jest dość dobrze zaprojektowany. Jest to gra z rodzaju tzw. fast play. Jest dobra, jednak pojawia się kilka ale. Jestem szczególnie rozczarowany tym, że nie ma w grze modyfikatorów przy strzelaniu na bliskie ani dalekie odległości, tak samo jest z km-ami, które na bliskim zasięgu powinny być zabójczą bronią, a taką nie są. Silną stroną gry są zdolności bohaterów. Każdy z nich ma swoje mocne i słabe strony, co czyni je bardzo zbalansowanymi. Podsumowując doskonała gra dla wielbicieli steampunka, dla reszty dobra odskocznia od gier, w jakie zazwyczaj pogrywają.

And as usual, the gallery on flickr:
I jak zawsze galeria na flickr:


poniedziałek, 16 września 2013

The officers die as the first - BGKursk game. Oficerowie umierają jako pierwsi - rozgrywka BGKursk.

The same as last week, this time we decided to play BG Kursk again. This time to finally get our game to the end we needed something smaller. For this purpose I chose the scenario from the main book: Clash of Reconnaissance. As I don't have all vehicles from the original scenario yet (or some of them I have, but I decided to use some other I never used before), I upgraded both forces to the figures and models I already have. The final version of the forces was almost ready, when just before I left home on my way to the club, I decided to upgrade the forces for some extra tanks (finally it was good idea, and we finished our game on time, with the result!).
Tak samo jak w poprzednim tygodniu, zdecydowaliśmy się na grę w BG Kursk. Tym razem jednak, chciałem aby udało nam się zmieścić w czasie, potrzebowałem czegoś mniejszego. Do tego celu wybrałem scenariusz z głównego podręcznika: Clash of Reconnaissance. Jako, że nie dysponuję jeszcze wszystkimi pojazdami (lub dysponuję, ale postanowiłem je wymienić na inne, które nie miały jeszcze okazji grać na stole), uwzględnionymi w tym scenariuszu, dostosowałem rozpiski do figurek i modeli, jakie są obecnie w moim posiadaniu. Kiedy ostateczna wersja sił była już gotowa, wtedy dokładnie przed wyjściem z domu w drodze do klubu dodałem jeszcze kilka czołgów (ostatecznie okazała się to bardzo dobra decyzja i zmieściliśmy się w przewidywanym czasie i jednocześnie osiągając bardzo widoczny rezultat!).

SCENARIO/SCENARIUSZ: Warwick Kinrade, upgraded by Bartek Żynda
FIGURES&MODELS/FIGURKI I MODELE: Bartek Żynda
SCENERY/SCENERIA: Bartek Żynda, SESWC

1. Ordre de Bataille
Germans/Niemcy:
(Bartek Żynda)
morale: 25 BR
PanzerGrenadier Platoon
PzGrenadier Platoon Command Squad: 6 men (Officer, Medic, 2SMG, 2Rifles) - SdKfz 251/10
1st PzGrenadier Squad: 8 men (1 SMG, 5 rifles, MG34 bipod team (2 crew)) with AT grenades - SdKfz 251/1 (scout)
2nd PzGrenadier Squad: 8 men (1 SMG, 5 rifles, MG34 bipod team (2 crew)) with AT grenades - SdKfz 251/1 (scout)
3rd PzGrenadier Squad: 8 men (1 SMG, 5 rifles, MG34 bipod team (2 crew)) with AT grenades - SdKfz 251/1
Marder II
3 x PzKpfw IV - as reserves (platoon without officer)

Soviets/Sowieci:
(Campbell Hardie)
morale: 21 BR
Motorised Rifle Platoon
Rifle Platoon Command Squad: 3 men (Officer, Medic, SMG) - Ford GPA
1st Riffle Squad: 8 men (1 SMG, 6 rifles, DP LMG) with AT grenades - Studebaker US-6
2nd Riffle Squad: 8 men (1 SMG, 6 rifles, DP LMG) with AT grenades - Studebaker US-6
3rd Riffle Squad: 8 men (1 SMG, 6 rifles, DP LMG) with AT grenades - Studebaker US-6
4th Riffle Squad: 8 men (1 SMG, 6 rifles, DP LMG) with AT grenades - Studebaker US-6
Support Squad: AT rifle team (2 crew), 82mm Mortar team (3 crew) - GAZ AA
45mm L46 AT gun team: 3 crew - GAZ AA
Sniper team: sniper and spotter (scout)
BA64 (scout)
Valentine III (scout)

3xT34/76 - as reserves (platoon without officer)
2. Orders/Rozkazy.
I left the oryginal orders and size of the game from the book. Size of the table was 4'x6'. Soviets as the objective chose the western house and Germans the hill in the middle of the battlefield.
Pozostawiłem oryginalne rozkazy i rozmiar gry z podręcznika. Rozmiar stołu 4x6 stóp. Sowieci jako objective wybrali chatę po zachodniej stronie, natomiast Niemcy wzgórze na środku pola bitwy.
 
The sheaf beside the closer house is the Soviet objective. Snopek obok bliższej chaty jest sowieckim objective.
3. The game/Gra.
In the first turn both sides (the units with the scout characteristic) tryed to get the best positions before the main forces will arrive.  Serious threat for me was the Soviet sniper team. I decided to not to risk, and they become the first target for the one of my squads. It was succesfull action and the first blood was spread and Soviets lost their sniper team. The second German squad moved to secure the objective on the hill. In both situations I decided to left one man from each squad in the Sdkfz, so I was able to use an extra MG. Soviets placed their vehicles on both sides of the large farmhouse. Now everybody was awaiting for their main forces.
W pierwszej turze obie strony (oddziały z charakterystyką scout) starały się zająć jak najlepsze pozycje przed przybyciem głównych sił. Poważnym zagrożeniem dla mnie był sowiecki snajper. Postanowiłem nie ryzykować i stali się oni pierwszym celem dla jednego z moich zespołów. Akcja zakończyła się pomyślnie i w ten sposób pierwsza krew została przelana i Sowieci stracili swojego snajpera. Drugi niemiecki zespół ruszył by zabezpieczyć objective na wzgórzu. W obu przypadkach zostawiłem z SdKfz-cie po jednym człowieku, w związku z tym mogłem skorzystać z dodatkowego km-u. Sowieci swoje pojazdy rozstawili po obu stronach dużej chaty. Teraz każdy oczekiwał przybycia głównych sił.

Sniper and spotter team.
No more sniper problem! I po problemie snajperskim!
The second turn strated very badly for myself. First the Soviet AT gun destroyed my SdKfz 251/10 with my officer, and next Valentine destroyed my Marder II - I lost all my available at that moment AT weapons that way! In exchange I killed the AT gun crew, and my second squad killed the Soviet officer. And in that way both sides lost their officers. For Soviet it was bigger lost, because their lost their Mortar spotter, and this weapon become useless. During the third turn the fighing continued. As on the east side of the battlefield my situation looks all right, on the western side was less than bad. My lonely infantry squad had two Soviet squads supported with BA64 against and finally it had been destroyed.
Druga tura zaczęła się bardzo źle dla mnie. Wpierw sowieckie działo ppanc zniszczyło mój SdKfz 251/10 wraz z oficerem i następnie Valentine zniszczyła mojego Mardera II - w ten sposób straciłem  całą swoją dostępną broń ppanc.! W odpowiedzi zabiłem obsługę działka ppanc, a mój drugi zespół zabił sowieckiego oficera. I tak oto obie strony straciły swoich oficerów. Dla Sowietów była to jednak dużo większa strata, ponieważ przy okazji stracili swojego obserwatora dla moździerza i broń ta stała się w ten sposób bezużyteczna. Podczas trzeciej tury walki były kontynuowane. O ile na wschodniej stronie moja sytuacja wyglądała w porządku, to na zachodniej nie było już tak miło. Mój zespół piechoty pozostał samotnie przeciwko dwóm drużynom piechoty sowieckiej, wspartej BA64 i w końcu została zniszczona.
In fourth turn both reserves arrived. Unlucky for me, Campbell used the Ammo Low counter against one of my tank. I throw 6 for test and one of my Pz IV left the battlefield to look for some ammunition! So left my two tanks against 3 T34s and Vallentine, not very good for myself. Thanks for me Campbell spread his forces, so I was able to use the panzer fist, and concentrate all tanks actions in one place. And finally it brought some effects, the Vallentine had been destroyed. On the western side my situation for the moment looked better than the last time. I send there two SdKfz's. With their MGs, they destroyed both Soviet infantry squads, but then they had to face the T34! No chances for halftrucks in that combat. Soon both of them had been destroyed. On the other side, my concentrate fire mission brings first T34 pinned. Two other left...
W czwartej turze przybyły nasze rezerwy. Nieszczęśliwie dla mnie, Campbell użył żetonu Ammo Low przeciwko jednemu z moich czołgów. Rzuciłem 6 w teście i mój Pz IV opuścił pole bitwy w poszukiwaniu amunicji! Tak więc zostały dwa moje czołgi przeciwko trzem T34 i jednej Vallentine, nie za dobrze dla mnie. Jednak dzięki temu, że Campbell rozdzielił swoje siły, mogłem użyć swojej pancernej pięści i skoncentrować wszystkie akcje czołgów w jednym miejscu.. I to zaczęło przynosić w końcu rezultaty i Vallentine została zniszczona. Na zachodniej stronie moja sytuacja wyglądała przez chwilę trochę lepiej niż poprzednio. Wysłałem tam dwa SdKfz-ty. Ogniem ich km-ów zniszczyli oba pozostałe tam drużyny sowieckiej piechoty, ale wtedy musiały stawić czoła T34! W tej walce transportery nie miały żadnych szans i wkrótce oba zostały zniszczone. Po drugiej stronie, mój skoncentrowany atak przyniósł spinowanie T34. Pozostały jeszcze dwa inne...
Now the situation was very interesting, because both sides almost broke. I had lost 24 BR and Campbell lost 20 BR, so every next lost could bring the end of the game. Lucky for myself, I won the initiative. I chose an easy target (pinned T34), from very close range my PzIV destroyed that tank. It was almost like an execution! Campbell had to take a counter and reached 24 BR, 3 more than his battlegroup morale level and that way he lost the game.
Teraz sytuacja wyglądała bardzo ciekawie, ponieważ obie strony prawie osiągnęły poziom rozbicia. Ja straciłem 24BR a Campbell 20, więc z każdą następną stratą jedna ze stron mogła się załamać. Szczęśliwie dla mnie wygrałem inicjatywę. Wybrałem łatwy cel (spinowany T34) i z bardzo bliskiej odległości mój PzIV zniszczył ten czołg. To wyglądało prawie jak egzekucja! Campbell musiał wziąść żeton i jego morale osiągnęło 24 BR, o 3 więcej niż poziom morale jego grupy bojowej i w ten sposób przegrał grę.

4. Summary/Podsumowanie.
This time the game was very smooth. There are still some questions, that needs answers (the book is not very clear abouth them). After the game we had time to look at others games (for example the very big Kiss Me, Hardy game).
During the game German lost:
Podczas gry Niemcy stracili:
  • Pz IV
  • SdKfz 251/10
  • 2 x SdKfz 251/1
  • Marder II
  • 27 figures
Soviet lost:
Sowieci stracili:
  • T34
  • Vallentine III
  • GAZ AA
  • AT gun
  • 26 figures
And as usual, the gallery on flickr: